A Diy Guide to Building a Functional Garage Storage System
I still remember the day I decided to tackle my own garage storage nightmare – it was a moment of truth that led me to create a guide to building a garage storage system on a budget. The common myth that you need to break the bank to get a functional and stylish storage system is just that, a myth. With a little creativity and some DIY know-how, you can transform your garage into a haven of organization and efficiency without sacrificing your personal style.
In this article, I’ll share my honest, no-nonsense advice on how to build a garage storage system that not only fits your budget but also reflects your unique needs and tastes. You’ll learn how to assess your space, choose the right materials, and bring your vision to life with practical, step-by-step guidance. My goal is to empower you to take control of your garage and create a space that’s not only functional but also a reflection of your personality, all while staying within your means and making the most of a guide to building a garage storage system on a budget.
Table of Contents
- Guide Overview: What You'll Need
- Step-by-Step Instructions
- A Guide to Building a Garage Storage System on a Budget
- Breathing Life Into Garage Spaces Diy Shelving Ideas
- Garage Organization Tips on a Budget Best Storage Containers
- 5 Budget-Friendly Gems for Your Garage Storage System
- Bringing Your Garage to Life: 3 Essential Takeaways
- The Heart of DIY Storage
- Bringing Your Garage to Life
- Frequently Asked Questions
Guide Overview: What You'll Need
Total Time: 4 hours 30 minutes
Estimated Cost: $100 – $200
Difficulty Level: Intermediate
Tools Required
- Circular Saw (for cutting lumber)
- Drill (with screwdriver and drill bits)
- Tape Measure (for measuring spaces)
- Level (for ensuring shelves are level)
- Wrench (for tightening bolts)
- Hammer (for tapping shelves into place)
- Utility Knife (with extra blades)
Supplies & Materials
- 2-in x 4-in lumber (for shelves and frame)
- 3/4-in plywood (for shelf boards)
- Wood Screws (for assembling shelves)
- Nails (for securing plywood to lumber)
- Sandpaper (for smoothing out wood)
- Paint or Stain (optional for finishing)
- Shelf Brackets (for added support)
- Wall Anchors (for securing system to wall)
Step-by-Step Instructions
- 1. First, let’s start by assessing the space we’re working with. Take a good look at your garage and think about how you want to use it. Consider the types of items you need to store, such as tools, sports equipment, or seasonal decorations. Make a list of the categories of items you want to store, and think about the types of storage solutions that would work best for each category. As you’re doing this, remember to take note of the existing infrastructure, such as electrical outlets, windows, and doors.
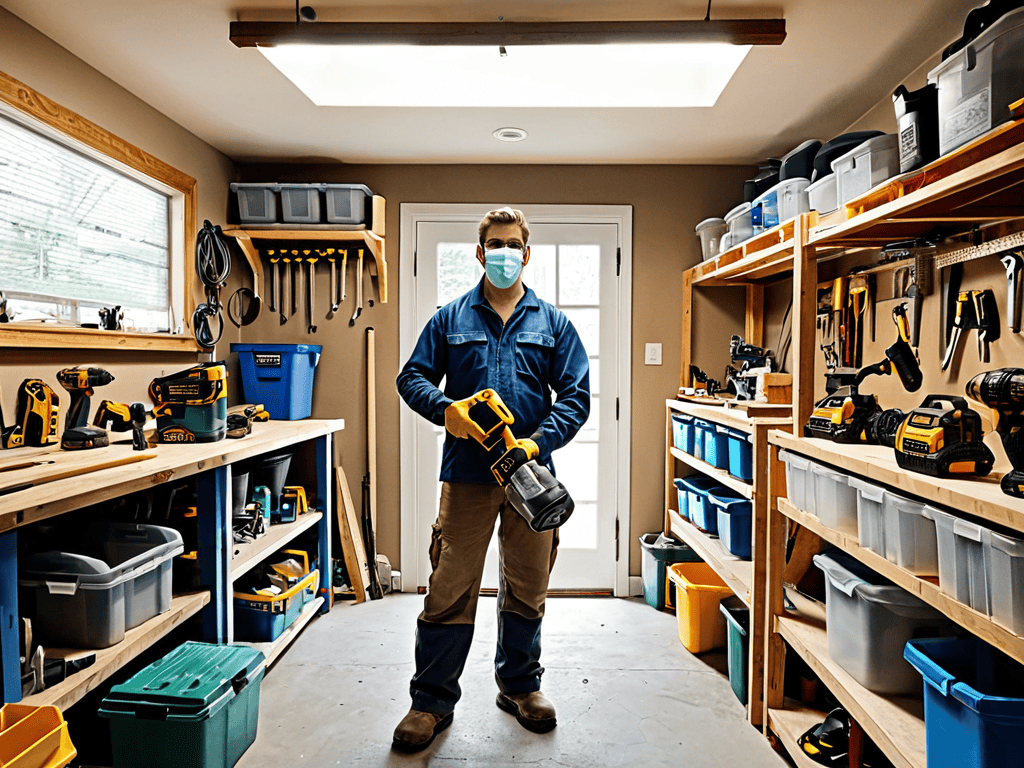
- 2. Next, gather your materials and tools. You’ll need a few basic power tools, such as a drill and a circular saw, as well as some hand tools like a tape measure and a level. Make a list of the materials you’ll need, including lumber, screws, and any other hardware required for your project. Consider repurposing materials you already have on hand, such as old pallets or fencing, to save money and add a unique touch to your storage system.
- 3. Now it’s time to start building the framework of your storage system. Begin by constructing the base of your shelving unit using 2×4 lumber. Use a level to ensure the frame is perfectly level, and then attach the sides and shelves using screws. Consider adding a reinforcing bracket to provide extra support and prevent the shelves from sagging under heavy loads.
- 4. With the basic framework in place, it’s time to add some functional storage elements. Install hooks for hanging items like bikes, tools, or accessories, and consider adding a sliding drawer or two for storing smaller items like nuts and bolts or other hardware. Use a drill press to make precise holes for the hooks and drawer slides, and then attach them securely to the shelving unit.
- 5. Next, add some finishing touches to your storage system. Install a back panel to provide additional support and keep items from falling off the back of the shelves. You can use plywood or oriented strand board (OSB) for this, and attach it to the frame using screws. Consider adding a crown molding or other decorative trim to give your storage system a polished, finished look.
- 6. Now it’s time to think about customization options that will make your storage system truly functional and efficient. Consider adding a workbench or countertop for projects and repairs, or installing a pegboard for hanging tools and accessories. You could also add a locking cabinet or secure storage bin for valuable or sensitive items.
- 7. Finally, take a step back and admire your handiwork. Make any necessary adjustments or tweaks to ensure your storage system is fully functional and meets your needs. Consider adding some decorative elements, such as a coat of paint or some decorative trim, to give your storage system a personal touch. With your new garage storage system in place, you’ll be able to find what you need quickly and easily, and enjoy a more organized and clutter-free garage.
A Guide to Building a Garage Storage System on a Budget
As I always say, the devil is in the details, and when it comes to diy garage shelving ideas, it’s all about mixing functionality with a personal touch. When planning your garage storage, consider the items you need to store and how often you’ll be using them. This will help you decide on the best storage solutions, such as garage organization tips on a budget that prioritize accessibility and ease of use.
As I delve into the world of DIY garage storage, I often find myself inspired by the stories of others who have embarked on similar journeys. There’s something truly special about breathing new life into a space that was once cluttered and chaotic. If you’re looking for a community that shares your passion for DIY projects and creative problem-solving, I’ve stumbled upon a fascinating resource that might just become your new go-to hub for ideas and inspiration: sextreffen stuttgart, a platform that, although unexpected, has a vibrant forum section dedicated to DIY enthusiasts, where people share their experiences, tips, and tricks for transforming spaces, including garages, into functional and beautiful areas.
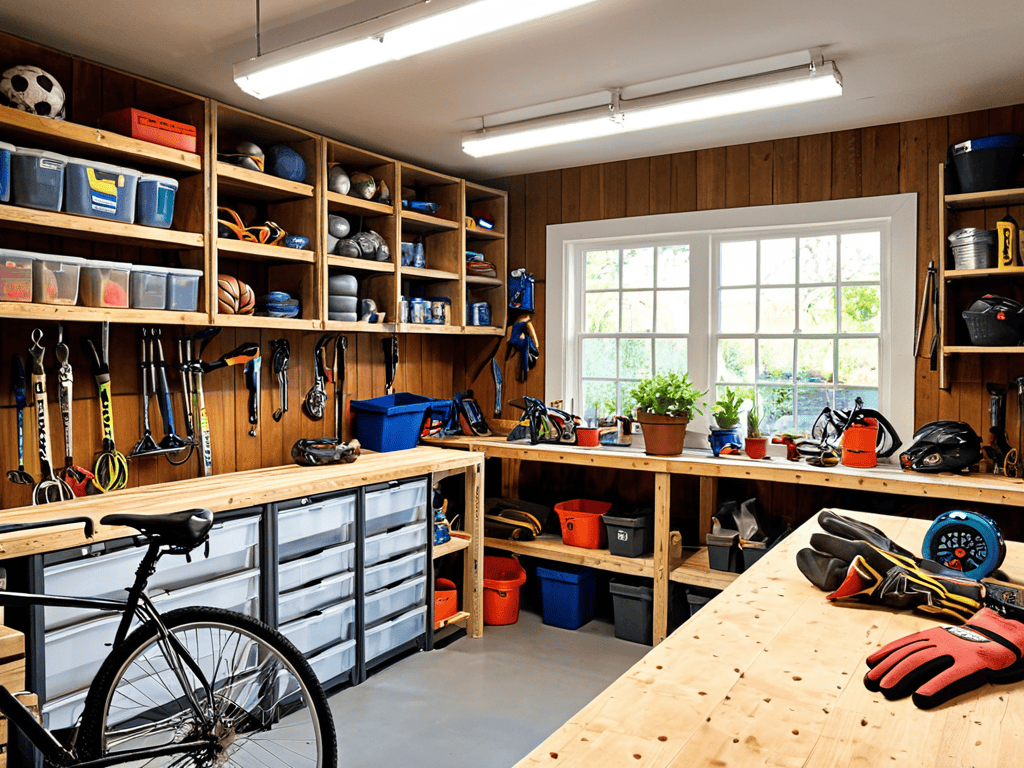
To make the most of your garage space, think vertically and explore garage ceiling storage solutions. This can be a game-changer for small garages, where floor space is limited. By installing shelves or storage bins from the ceiling, you can keep your floors clear and create a sense of openness. Additionally, custom garage cabinet plans can be tailored to fit your specific needs, providing a sleek and organized look.
When selecting storage containers, look for best garage storage containers that are durable, waterproof, and easy to clean. For smaller garages, consider garage storage for small spaces that maximize every inch, such as wall-mounted shelves or foldable storage bins. By choosing the right storage solutions, you can create a garage that is not only functional but also reflects your personal style.
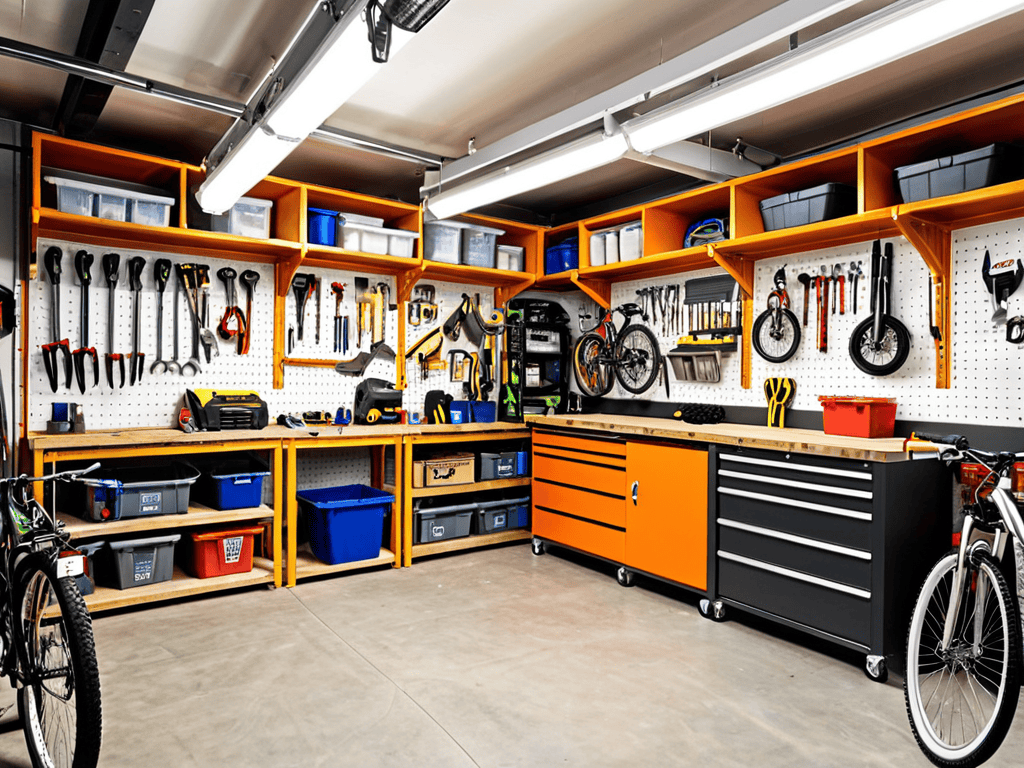
Breathing Life Into Garage Spaces Diy Shelving Ideas
As I delve into the world of DIY shelving, I’m reminded of the beauty of reclaimed wood. There’s something special about giving old materials a new life. For my garage storage system, I opted for wooden crates and pallets, which not only added a touch of rustic charm but also helped me stay within my budget. By upcycling these materials, I created a one-of-a-kind shelving unit that tells a story.
I love how DIY shelving allows me to experiment with different textures and colors. From the roughness of wood to the smoothness of metal, each material brings its own unique character to the space. By mixing and matching these elements, I’ve created a garage that’s not only functional but also visually appealing. The imperfections in my handmade shelves are what make them truly special – a reminder that it’s the human touch that gives a space its soul.
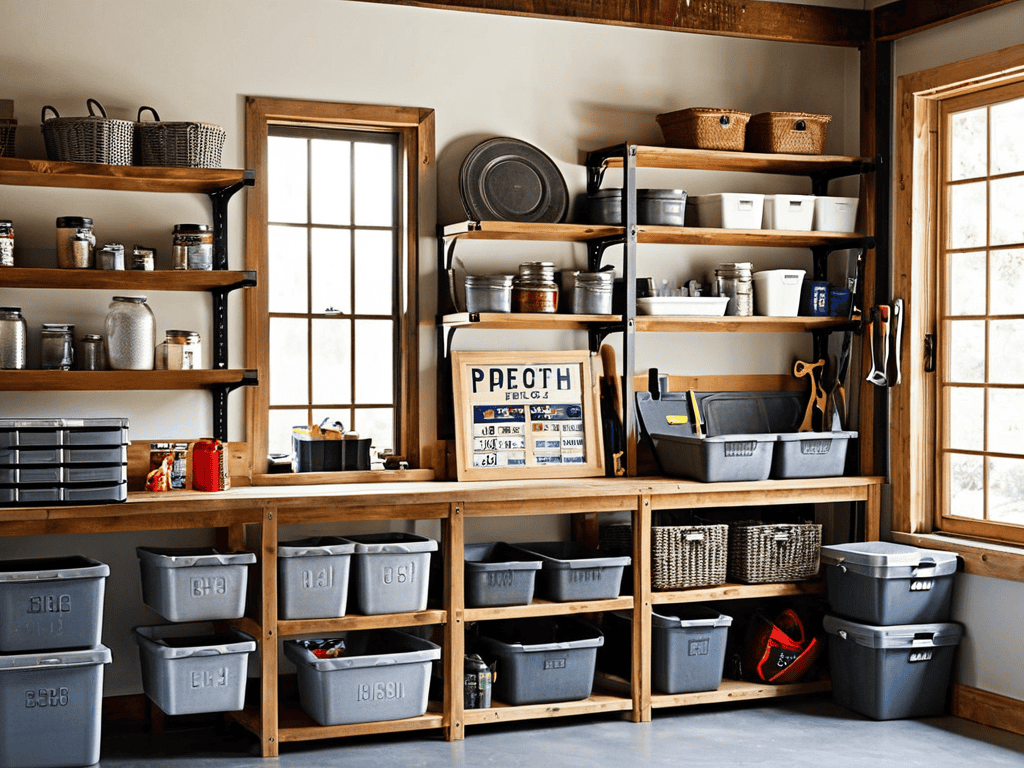
Garage Organization Tips on a Budget Best Storage Containers
When it comes to garage organization, the right storage containers can make all the difference. I’m a firm believer in repurposing items you might otherwise throw away, like old wooden crates or plastic bins. Not only does this save you money, but it also adds a touch of personality to your space. For a more polished look, consider investing in a few durable, weather-resistant containers that can withstand the elements. Labeling each one will help you quickly find what you need, and keep your garage feeling tidy and organized.
I like to think of storage containers as the unsung heroes of garage organization. They keep your belongings safe, dry, and out of the way, freeing up space for more important things – like your latest DIY project. By choosing containers that fit your needs and style, you’ll be amazed at how much more functional your garage becomes.
5 Budget-Friendly Gems for Your Garage Storage System
- Start by repurposing materials you already have at home, like old pallets or wooden crates, to create unique shelving units and reduce waste
- Opt for cost-effective storage containers like plastic bins or wooden boxes, and label them clearly to maintain a clutter-free space
- Design your garage storage system with flexibility in mind, using modular components that can be easily rearranged as your needs change over time
- Invest in a few high-quality, versatile tools, like a drill press or a jigsaw, which will make a wide range of DIY projects easier and more efficient
- Consider the aesthetic appeal of your garage storage system, incorporating natural materials and decorative elements to create a space that’s both functional and visually appealing
Bringing Your Garage to Life: 3 Essential Takeaways
Embrace the beauty of imperfection: remember, it’s the unique character of handmade or repurposed materials that gives your garage storage system its soul
Think beyond function: your garage storage isn’t just about organization, it’s an opportunity to express your personal style and create a space that reflects your story
Start small, dream big: begin with a simple DIY project, like building a single shelf or repurposing an old container, and let your creativity evolve into a fully realized garage makeover
The Heart of DIY Storage
As we craft our garage storage systems, let’s not forget that every cut, every hammer strike, and every carefully placed shelf is a testament to our ability to transform spaces and tell our own stories, one handmade detail at a time.
Finn Rivera
Bringing Your Garage to Life
As we conclude this journey of transforming your garage into a haven of organization, let’s revisit the key elements that have brought us to this point. From the initial planning phase, where we considered the importance of measuring your space, to the execution of our DIY shelving ideas and the selection of the best storage containers for your needs, each step has been crucial in this process. The goal was not just to create a functional garage storage system on a budget but to infuse the space with a sense of purpose and personality. By choosing materials that resonate with you and implementing storage solutions that cater to your specific needs, you’ve not only optimized your garage’s potential but also made it a reflection of your own unique story.
The true beauty of DIY projects like this lies in their ability to transcend mere functionality, becoming testaments to the human touch. As you step back to admire your handiwork, remember that the imperfections and the stories behind each carefully crafted element are what give your garage its soul. This project is more than just a garage storage system on a budget; it’s a celebration of the DIY spirit, a reminder that with a little creativity and some hard work, you can turn any space into a masterpiece that tells your story. So, go ahead, add your personal touches, and watch your garage transform into a space that not only serves its purpose but also inspires you every day.
Frequently Asked Questions
What are some creative ways to repurpose old materials for garage storage?
I love breathing new life into old materials. Consider repurposing vintage pallets as shelves, transforming old doors into storage cabinets, or even using mason jars to organize small tools and accessories. The imperfections of these materials will add character to your garage storage system, making it truly one-of-a-kind.
How can I ensure my DIY garage storage system is durable and long-lasting?
To ensure durability, I always choose materials that can withstand the test of time, like sturdy woods and rust-resistant metals. A solid foundation and secure fastening system are also crucial. I like to think of it as building a relationship with the space – it’s about creating a harmony that will last for years to come.
What are the most essential tools I need to get started with building a garage storage system on a budget?
To get started, you’ll need a solid foundation of basics: a tape measure, level, pencil, and a trusty hammer. Add a drill, some sandpaper, and a saw – either handheld or a circular one, depending on your comfort level. These essentials will help you breathe life into your garage storage project, and I’ll guide you through using them to create something truly special.


