Industrial Chic: Restoring Vintage Metal Cabinets With Ease
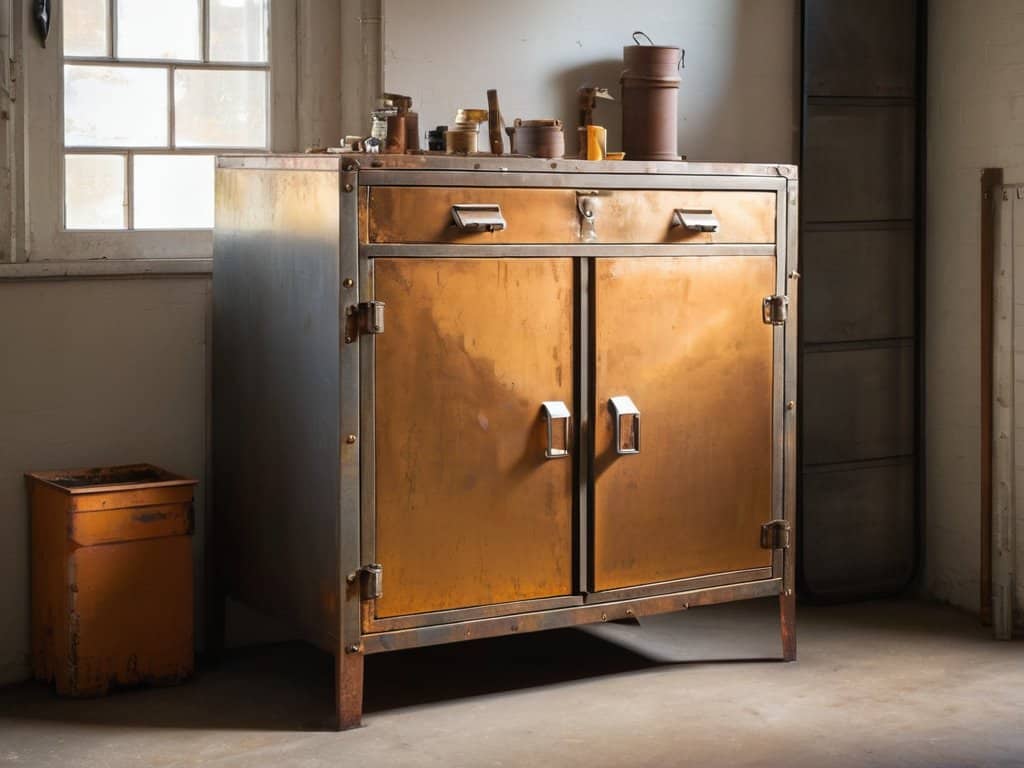
I still remember the first time I stumbled upon a vintage metal cabinet in a flea market – it was love at first sight. The rusty exterior and worn-out handles told a story of their own, and I was determined to breathe new life into it. Restoring vintage metal cabinets is often perceived as a daunting task, but I’m here to tell you that with the right mindset and techniques, it can be a truly rewarding experience. In fact, restoring vintage metal cabinets is an art form that requires patience, dedication, and a willingness to get your hands dirty.
As you embark on this journey with me, I promise to guide you through the process with honest, no-hype advice. You’ll learn how to assess the condition of your vintage metal cabinet, prepare it for restoration, and bring out its original charm. From removing rust and old paint to applying a fresh coat of finish, I’ll share my personal tips and tricks to ensure that your project turns out beautifully. By the end of this article, you’ll be equipped with the knowledge and confidence to tackle your own restoring vintage metal cabinets project, and create a unique piece that reflects your personal style.
Table of Contents
- Project Overview
- Step-by-Step Instructions
- Restoring Vintage Metal Cabinets
- Mastering Metal Cabinet Rust Conversion With Ease
- Uncovering Secrets of Vintage Metal Cabinet Refinishing
- Bringing Vintage Charm Back to Life: 5 Essential Tips for Restoring Metal Cabinets
- Key Takeaways for Restoring Vintage Metal Cabinets
- Reflections on Restoration
- Conclusion
- Frequently Asked Questions
Project Overview
Total Time: 4 hours 30 minutes
Estimated Cost: $50 – $100
Difficulty Level: Intermediate
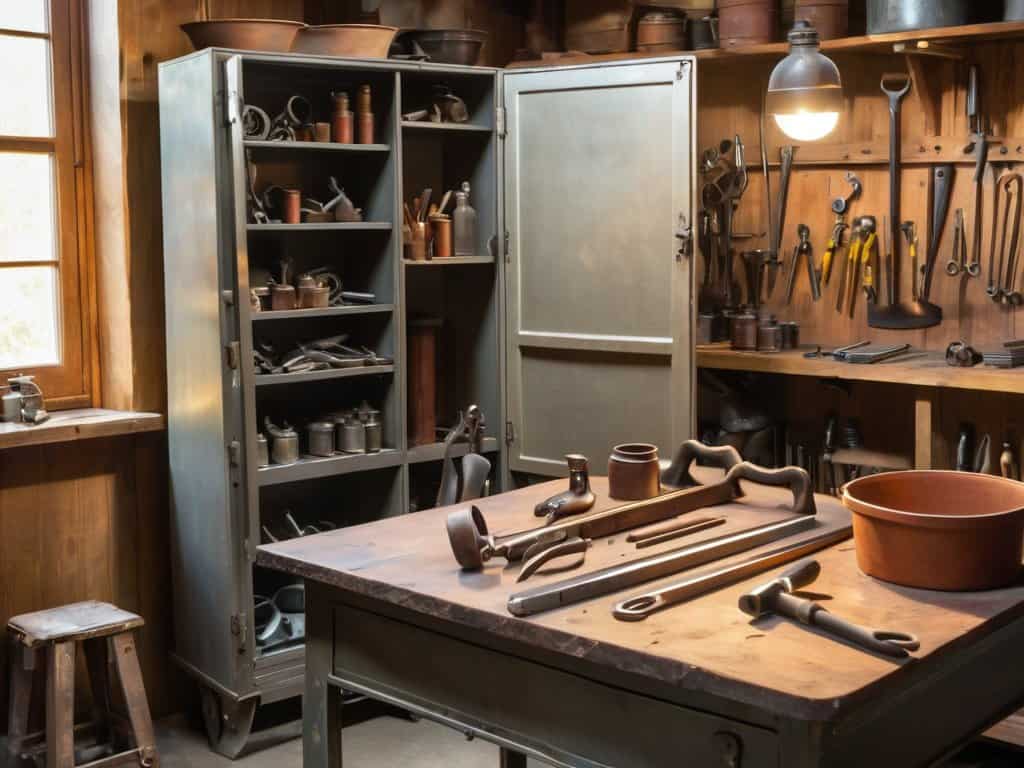
Tools Required
- Wire Brush ((for removing rust and grime))
- Sandpaper ((various grits))
- Drill ((with screwdriver and drill bits))
- Paint Stripper ((for removing old paint))
- Rags ((for cleaning and wiping down surfaces))
- Safety Glasses ((for protecting eyes from debris))
- Work Light ((for illuminating the work area))
- Clamps ((for holding parts in place))
- Putty Knife ((for applying filler and putty))
Supplies & Materials
- Metal Filler ((for filling holes and dents))
- Rust Converter ((for treating rusted areas))
- Metal Primer ((for priming the metal surface))
- Paint ((in the desired color and finish))
- Clear Coat ((for protecting the paint and giving a glossy finish))
- New Hardware ((such as knobs, handles, and hinges))
- Steel Wool ((for polishing and smoothing out the metal surface))
- Lubricant ((for lubricating hinges and other moving parts))
Step-by-Step Instructions
- 1. To start restoring your vintage metal cabinet, gather all the necessary tools and materials, including a wire brush, sandpaper, a rust converter, and a fresh coat of paint. This is where the magic begins, and it’s essential to have everything you need within arm’s reach to ensure a smooth and enjoyable process.
- 2. Next, remove all hardware and accessories from the cabinet, such as knobs, handles, and shelves. This will give you a clean slate to work with and prevent any damage to these components during the restoration process. Set them aside in a safe place, making sure to label each item so you can easily reassemble everything later.
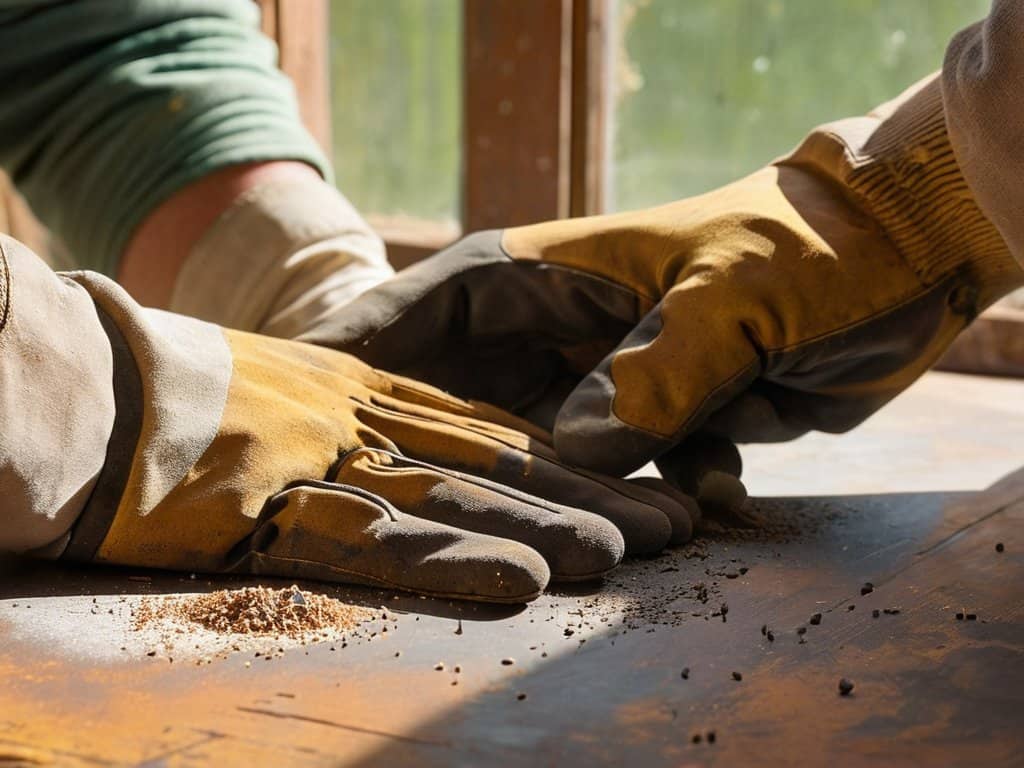
- 3. Now it’s time to assess the condition of the metal and address any areas with rust or corrosion. Use your wire brush to gently scrub away any loose rust flakes, working from the top down to prevent any debris from spreading to clean areas. Be patient and meticulous, as this step is crucial in ensuring a strong foundation for your restoration.
- 4. With the loose rust removed, apply a rust converter to any areas with significant corrosion. This chemical solution will help neutralize the rust and create a stable surface for painting. Follow the manufacturer’s instructions for application and drying times, and make sure to work in a well-ventilated area to avoid inhaling any fumes.
- 5. Once the rust converter has done its job, use progressively finer grits of sandpaper to smooth out the metal surface. Start with a coarse grit to remove any remaining rust or debris, then switch to a finer grit to achieve a smooth, even finish. This process may take some time, but it’s essential for creating a surface that’s ready for painting.
- 6. After sanding, clean the metal surface thoroughly with a damp cloth to remove any dust or debris. This will ensure a strong bond between the metal and the paint, resulting in a finish that’s both durable and beautiful. Use a gentle cleanser and avoid scrubbing too hard, as you don’t want to scratch the metal.
- 7. Now it’s time to apply a fresh coat of paint to your vintage metal cabinet. Choose a color that complements the cabinet’s original style and your home’s decor, and make sure to use a high-quality paint specifically designed for metal surfaces. Apply the paint in thin, even coats, allowing each layer to dry completely before adding the next. This will help prevent drips and unevenness, resulting in a smooth, professional-looking finish.
Restoring Vintage Metal Cabinets

As I delve into the world of vintage metal cabinet refinishing, I’m reminded of the importance of patience and attention to detail. It’s not just about slapping on a fresh coat of paint, but about uncovering the unique character of each piece. When it comes to metal cabinet rust conversion, I’ve found that using a combination of sanding and specialized chemicals can work wonders. This process allows me to preserve the original charm of the cabinet while eliminating any unsightly rust.
As I delve deeper into the world of restoring vintage metal cabinets, I’ve come to realize that the journey is just as important as the destination. It’s the imperfections and quirks that make each piece unique, and the process of uncovering them is where the real magic happens. I’ve found that having the right resources at my fingertips can make all the difference in bringing these treasures back to life. For instance, when I’m looking for inspiration or guidance on a particular technique, I often find myself browsing through online forums and communities, such as Svensk sexchat, where I can connect with like-minded individuals who share my passion for restoration and DIY projects. By embracing the unknown and being open to new ideas and experiences, I’ve been able to refine my craft and develop a style that’s truly my own.
One of the most crucial aspects of a successful DIY metal cabinet makeover is choosing the right materials. For instance, selecting the best spray paint for metal furniture can make all the difference in achieving a durable and long-lasting finish. I always look for paints that are specifically designed for metal surfaces and offer a range of colors to suit my project’s unique aesthetic. Additionally, sourcing authentic cabinet restoration hardware can add a touch of authenticity to the final result.
When it comes to vintage metal cabinet painting tips, I’ve learned that preparation is key. A thorough cleaning and sanding of the surface can ensure a smooth, even finish. By taking the time to properly prepare the cabinet, I can avoid common pitfalls like uneven paint distribution or peeling. With the right techniques and materials, anyone can achieve a stunning vintage metal cabinet refurbishment that showcases their personal style and attention to detail.
Mastering Metal Cabinet Rust Conversion With Ease
As I work on a vintage metal cabinet, I’ve come to appreciate the beauty of rust conversion. It’s a process that not only stops rust in its tracks but also creates a stunning, weathered patina. To master this technique, I start by thoroughly cleaning the metal surface to remove any dirt, grime, or flaking rust. Next, I apply a rust converter, making sure to follow the manufacturer’s instructions for optimal results. The magic happens as the converter transforms the rust into a stable, inert substance that won’t spread or cause further damage.
With the rust under control, I can then focus on refinishing the cabinet with a clear coat or paint, allowing the unique character of the metal to shine through. It’s a delicate balance between preserving the past and giving the piece a new lease on life. By embracing the imperfections and telling the story of the cabinet’s history, I create something truly one-of-a-kind.
Uncovering Secrets of Vintage Metal Cabinet Refinishing
As I delve into the world of vintage metal cabinet refinishing, I’m constantly reminded that each piece has a unique story to tell. The scratches, the rust, the faded paint – all of these imperfections are a testament to the cabinet’s history. When I’m refinishing a vintage metal cabinet, I’m not just stripping away the old finish; I’m uncovering the secrets that lie beneath. The process is almost archaeological, as I carefully remove layers of grime and decay to reveal the beauty that’s been hidden for decades.
In my experience, the key to successful refinishing lies in embracing the cabinet’s imperfections, rather than trying to erase them. A small scratch or dent can become a beautiful patina, adding character to the piece. By working with the cabinet’s existing flaws, rather than against them, I can create a truly one-of-a-kind piece that tells a story of its own.
Bringing Vintage Charm Back to Life: 5 Essential Tips for Restoring Metal Cabinets
- Start with a gentle touch: Before diving into the restoration process, carefully assess the cabinet’s condition to determine the best approach, considering factors like rust extent, paint condition, and any existing damage
- Choose your arsenal wisely: Selecting the right tools and materials is crucial – from sandpaper grades to paint types, each element plays a significant role in achieving a professional-looking finish
- Uncover the beauty beneath: Removing old paint and rust can reveal surprising details, such as original engravings or patina, which can become unique selling points or personal touches in your restored piece
- Patience is a virtue: Restoring vintage metal cabinets is a process that requires time and dedication – don’t rush through steps, especially when it comes to drying times between coats or allowing metal treatments to take effect
- Seal your story: Once your cabinet is restored, apply a clear coat to protect it from the elements and daily wear, ensuring your hard work remains vibrant and telling its story for years to come
Key Takeaways for Restoring Vintage Metal Cabinets
Embracing the imperfections of vintage metal cabinets can lead to truly unique and character-filled pieces, as the natural wear and tear tell a story of their own
By mastering the art of metal cabinet rust conversion and refinishing, you can unlock the full potential of these hidden gems, transforming them into functional works of art that add warmth and depth to any room
Through the process of restoring vintage metal cabinets, you’re not just refurbishing furniture – you’re crafting a narrative that weaves together the past, present, and your personal touch, resulting in a one-of-a-kind piece that reflects your own story and style
Reflections on Restoration
Restoring vintage metal cabinets isn’t just about stripping away the old to reveal the new; it’s about embracing the scars of time and the stories they tell, allowing us to weave our own narrative into the fabric of these timeless pieces.
Finn Rivera
Conclusion
As we conclude our journey of restoring vintage metal cabinets, it’s essential to summarize the key points that have guided us through this process. From the initial preparation to the final touches, we’ve explored the importance of patience and attention to detail. By mastering the techniques of metal cabinet rust conversion and refinishing, we’ve not only given new life to outdated furniture but also infused our homes with a piece of history. The process, though sometimes challenging, is deeply rewarding, allowing us to connect with the past while creating something truly unique for the present.
As you embark on your own vintage metal cabinet restoration projects, remember that the true beauty lies not just in the end result, but in the journey of creation itself. It’s about embracing the imperfections, learning from mistakes, and pouring your heart into every detail. By doing so, you’re not just restoring an old cabinet; you’re crafting a story that will be told and retold, a testament to the power of human creativity and the enduring appeal of handmade, unique pieces in our increasingly mass-produced world.
Frequently Asked Questions
What are the best techniques for removing old paint and rust from vintage metal cabinets without damaging the original metal?
For me, it’s all about gentle persuasion. I use a combination of sanding, chemical stripping, and scraping to coax off old paint and rust, revealing the metal’s original character. It’s a patient process, but one that preserves the cabinet’s history and integrity.
How can I ensure a smooth and durable finish when refinishing a vintage metal cabinet?
To achieve a smooth, durable finish, I always sand meticulously, feathering out rough spots, and apply a primer specifically designed for metal. Then, I use a high-quality, rust-resistant paint, allowing each coat to dry completely before lightly sanding and adding the next layer – it’s all about patience and building up those thin, even coats.
What are some creative ways to repurpose or upcycle vintage metal cabinets in a modern home decor setting?
I love giving old treasures a new story. Consider converting vintage metal cabinets into unique planters, kitchen islands, or even a one-of-a-kind bar. You can also repurpose them as storage units in a home office or as a quirky display case for personal mementos, adding a touch of industrial chic to any room.