A Fun Project: How to Print on a T-shirt With a Linocut
I still remember the first time I tried how to print on a t-shirt with a linocut. I was fascinated by the idea of carving my own design into a piece of linoleum and transferring it onto fabric. But, as I soon discovered, the process wasn’t as straightforward as I thought. There’s a common myth that linocut printing is only for experienced artists, but I’m here to tell you that’s not true. With a little patience and practice, anyone can create unique, handmade designs on a t-shirt.
As you embark on this journey, I promise to guide you through the process with honest and practical advice. You’ll learn how to prepare your design, carve the linoleum, and print your t-shirt with ease. I’ll share my own experiences, including the mistakes I made along the way, to help you avoid common pitfalls. By the end of this article, you’ll be equipped with the knowledge and confidence to bring your designs to life on a t-shirt using a linocut. So, let’s get started and explore the creative world of linocut printing together!
Table of Contents
- Guide Overview: What You'll Need
- Step-by-Step Instructions
- Printing Soul Onto Shirts
- Carving Your Mark: 5 Essential Tips for Printing on a T-Shirt with a Linocut
- Embracing the Art of Linocut Printing: 3 Key Takeaways
- The Art of Imperfection
- Embracing the Art of Linocut Printing
- Frequently Asked Questions
Guide Overview: What You'll Need
Total Time: 2 hours 30 minutes
Estimated Cost: $20 – $40
Difficulty Level: Intermediate
Tools Required
- Linoleum cutter (with various blade sizes)
- Baren or brayer (for applying even pressure)
- Ink roller (for applying ink to linocut)
- Squeegee (for removing excess ink)
- Iron (for heat-setting the design)
- Cutting mat (for protecting work surface)
- Pencil and paper (for designing the image)
Supplies & Materials
- Linoleum block (carving material for design)
- T-shirt (100% cotton recommended)
- Printmaking ink (choose desired color)
- Ink tray (for holding and rolling out ink)
- Newsprint or scrap paper (for testing and wiping excess ink)
- Fixative (optional, for setting design)
Step-by-Step Instructions
- 1. First, let’s start by preparing our linocut design. I like to sketch out my ideas in my notebook before transferring them onto the linoleum block. This helps me get a feel for the composition and makes the carving process much more intuitive. Take your time with this step, as it’s the foundation of your entire project.
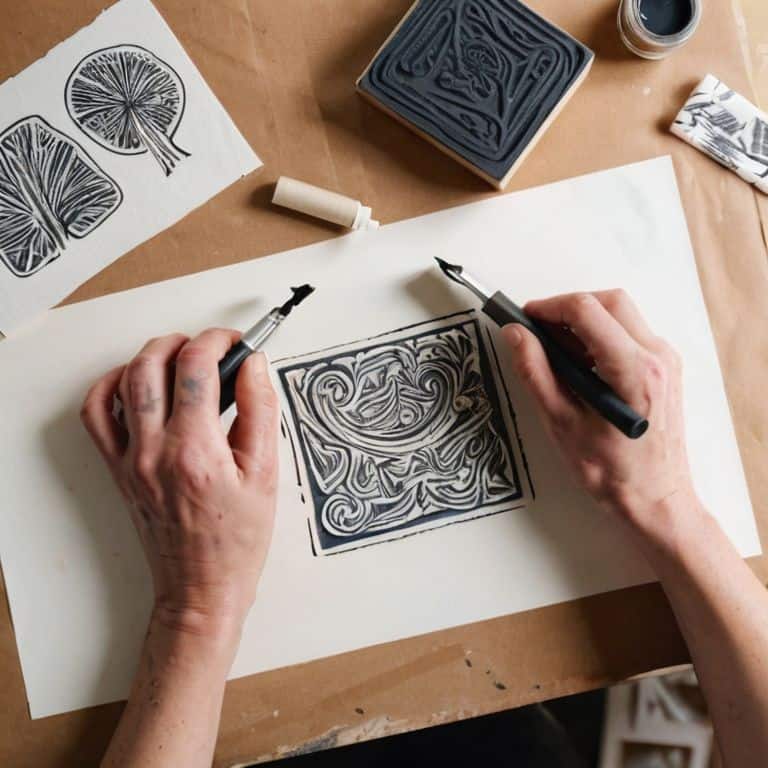
- 2. Next, we need to transfer our design onto the linoleum block. I use a pencil to lightly draw the design onto the block, making sure to mirror the image since it will be reversed when printed. Don’t worry too much about the details at this stage, as we can refine them during the carving process.
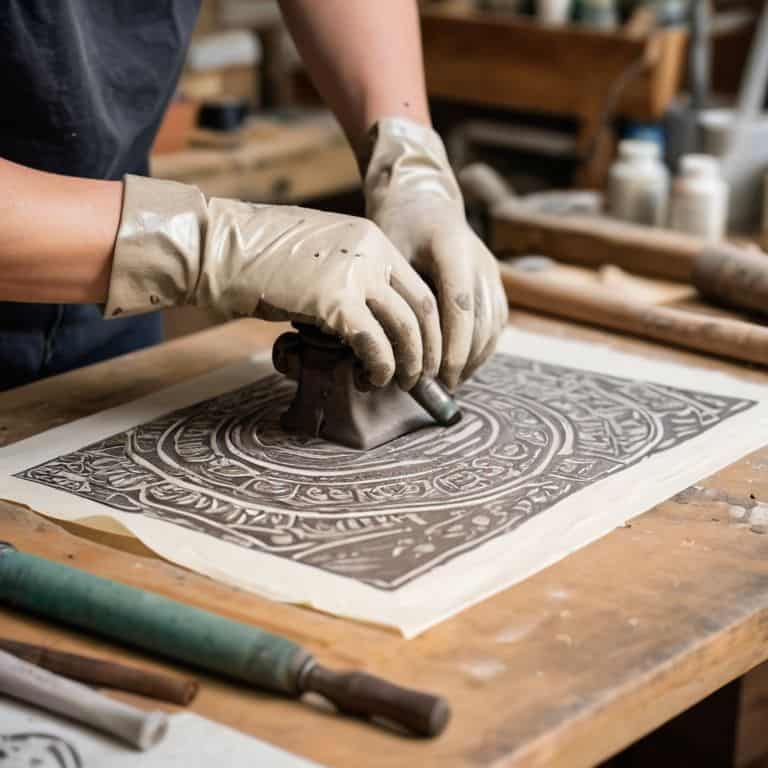
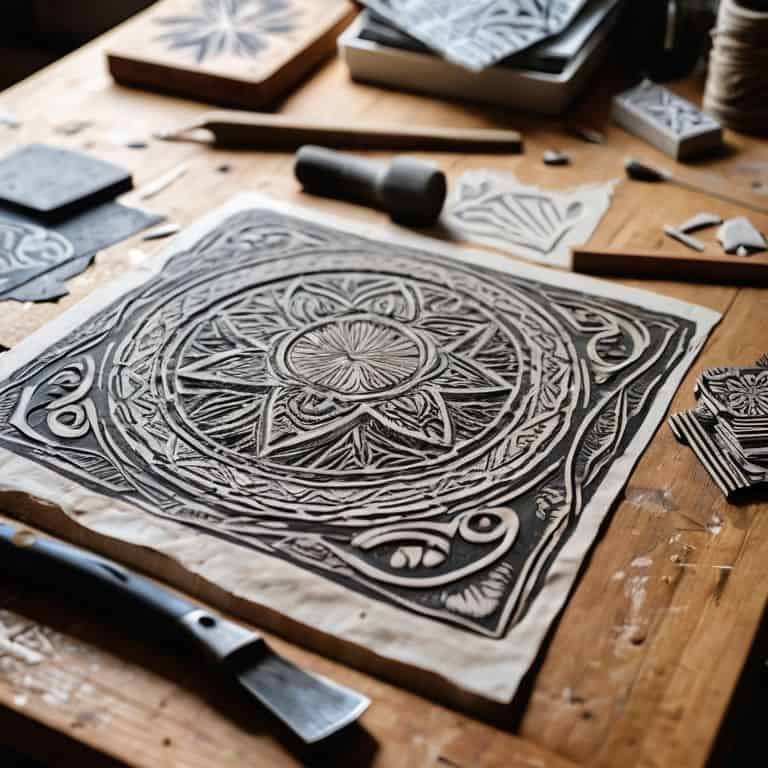
- 3. Now it’s time to carve our design into the linoleum block. This is my favorite part of the process, as it’s where our design really starts to take shape. Use a variety of gouges to remove the linoleum and create the desired textures and patterns. Remember to always carve away from your body and keep your fingers curled under to avoid accidents.
- 4. With our design fully carved, it’s time to prepare our printing materials. I like to use a brayer to apply ink to the linoleum block, making sure to cover the entire surface evenly. You can use a variety of inks, but I prefer oil-based inks for their vibrant colors and durability.
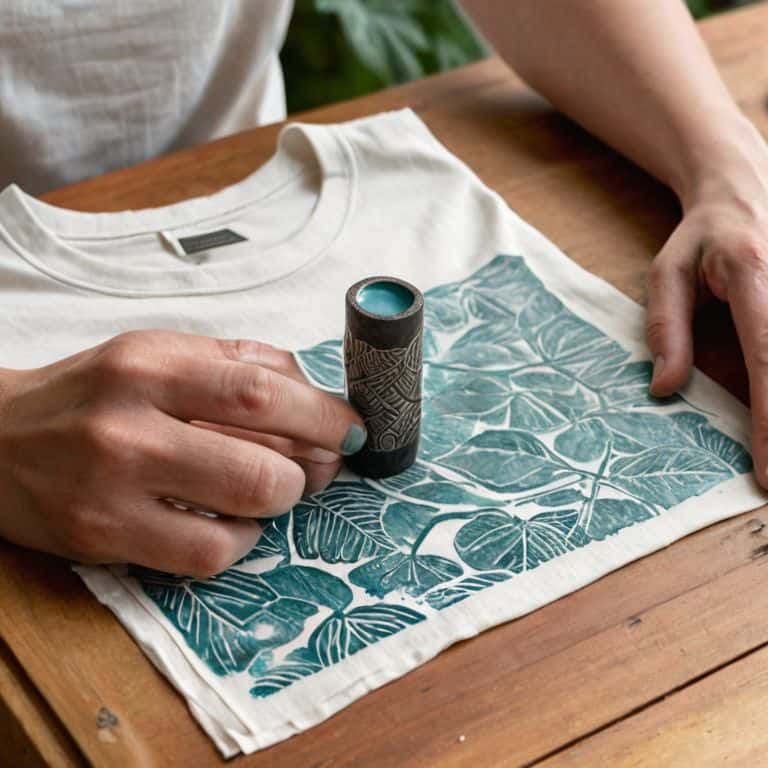
- 5. Now we’re ready to print our design onto the t-shirt. Place the t-shirt on a flat surface and position the linoleum block in the center. Use a spoon or baren to apply pressure, rubbing the ink onto the fabric. Make sure to apply even pressure to avoid any blurring or smudging.
- 6. Once we’ve printed our design, it’s time to let it dry. I like to heat set the ink using a hair dryer or iron to ensure it doesn’t smudge or fade. This step is crucial, as it will determine the longevity of our print. Be patient and take your time, as rushing this step can lead to disappointing results.
- 7. Finally, our printed t-shirt is ready to wear. I love the feeling of wearing something I’ve created with my own hands, and I’m sure you will too. Take a step back and admire your work, knowing that you’ve brought a unique story to life on a simple t-shirt. This is what makes DIY projects so special – the ability to infuse everyday objects with our own personality and creativity.
Printing Soul Onto Shirts
As I delve into the world of linocut printing on fabrics, I’m reminded of the beauty of imperfections in handmade designs. The unique textures and slight inconsistencies that come with carving your own linocut blocks can add a touch of personality to your custom t-shirt designs. When it comes to linocut design tips for fabric, I always advise considering the negative space and the flow of the design on the fabric. This will help you create a visually appealing and balanced piece.
To bring your designs to life, you’ll need to choose the right materials, including the best fabric ink for linocut printing. I’ve found that a combination of high-quality ink and the right heat press settings for t-shirts can make all the difference in achieving vibrant, long-lasting prints. Experimenting with different ink colors and fabric types can also lead to some amazing custom t-shirt design ideas with linocut.
In my workshop, I love exploring the possibilities of diy t-shirt printing at home with linocut. By creating your own linocut blocks and experimenting with various techniques, you can add a personal touch to your clothing and tell a story through your designs. Whether you’re a seasoned maker or just starting out, the process of linocut block making for textile printing can be a fun and rewarding experience that allows you to express your creativity and connect with the materials on a deeper level.
Best Fabric Ink for Your Linocut Story
When it comes to bringing your linocut design to life on fabric, the right ink can make all the difference. I’ve experimented with various brands and types, and I swear by a high-quality, water-based fabric ink. It’s essential to choose an ink that’s not only vibrant but also gentle on the fabric, ensuring your design stays crisp wash after wash. I’ve found that Speedball’s fabric ink is a reliable choice, offering a wide range of colors that blend beautifully with the natural texture of the cotton.
By selecting the perfect ink, you’re not just printing a design – you’re infusing your shirt with a piece of yourself. The ink becomes a part of the fabric, telling a story that unfolds with each wear.
Linocut Design Tips for Timeless Fabric
When designing your linocut, consider the story you want to tell. Simple, bold designs often work best, as they allow the natural texture of the fabric to shine through. I like to think of my designs as whispers, not screams – they should add a subtle layer of depth to the shirt, rather than overwhelming it. In my workshop, I’ve found that classic motifs like leaves, flowers, and geometric patterns never go out of style.
To create a truly timeless design, experiment with negative space and clean lines. Remember, the imperfections in your linocut are what will give your shirt its soul. Don’t be afraid to leave a little room for error – it’s often the unexpected textures and marks that make a handmade piece truly special.
Carving Your Mark: 5 Essential Tips for Printing on a T-Shirt with a Linocut
- Start with a story: Before you begin carving your linocut, think about the message or image you want to convey on your t-shirt – what story do you want to tell?
- Choose the right tools: Invest in a good quality linocut block, cutting tools, and a brayer to ensure crisp, clean lines and even ink distribution
- Select the perfect ink: Experiment with different fabric inks to find the one that works best for you – consider factors like color vibrancy, durability, and ease of use
- Prepare your fabric: Pre-wash and dry your t-shirt to remove any finishes that might affect the ink, and make sure it’s laid out smooth and flat for printing
- Experiment and iterate: Don’t be afraid to try new things and make mistakes – they can often lead to unique and interesting effects, and are all part of the handmade process
Embracing the Art of Linocut Printing: 3 Key Takeaways
Always remember that the beauty of linocut printing lies in its imperfections, making each piece uniquely personal and telling a story of its own creation
Experimenting with different linocut designs and fabric inks can elevate your printed shirts from mere apparel to wearable pieces of art that reflect your personality and style
By embracing the process of linocut printing, you’re not just creating custom shirts, you’re crafting tangible expressions of yourself, each stitch, cut, and print a testament to the joy of handmade craftsmanship
The Art of Imperfection
The beauty of printing on a t-shirt with a linocut lies not in the precision, but in the imperfections – the slight misalignments, the varying ink densities – for it’s in these imperfections that our story, our touch, and our soul are transferred onto the fabric.
Finn Rivera
Embracing the Art of Linocut Printing
As we conclude this journey of printing on a t-shirt with a linocut, let’s reflect on the process and how it allows us to infuse our creations with a piece of ourselves. From designing and carving the linocut, to applying the ink and watching our design come to life, each step is a testament to the beauty of handmade craftsmanship. We’ve discussed linocut design tips for creating timeless fabric, and explored the best fabric ink options to ensure our stories are told vividly. By embracing these techniques, we not only create unique pieces of art but also experience the satisfaction of bringing our ideas to life.
As you embark on your own linocut printing adventures, remember that the true magic lies not in the perfection of the final product, but in the imperfections that make it human. Don’t be afraid to experiment, to try new things, and to tell your story through the medium of linocut printing. With every carve of the linocut and every press of the ink, you’re not just creating a t-shirt – you’re crafting a piece of yourself, a snapshot of your imagination and creativity that will be worn and cherished for years to come.
Frequently Asked Questions
What kind of linocut tools and materials are best for beginners to get started with printing on t-shirts?
For beginners, I recommend starting with a basic linocut toolkit, including a speedball cutter, a linoleum block, and a baren. Choose a soft, easy-to-cut linoleum like Battleship Gray or SoftCut. Don’t forget a brayer and some quality fabric ink – I swear by Permaset for its vibrant colors and durability.
How do I ensure my linocut design transfers evenly onto the fabric without smudging or fading?
To ensure even transfer, I gently press the linocut onto the fabric, making sure it’s centered and smooth. A brayer or baren helps apply consistent pressure, while a thin layer of ink prevents smudging. Let it dry completely before handling, and consider a fixative for extra durability – it’s all about subtle touches to preserve your handmade story.
Can I use different colors or layer multiple linocut designs to create a multi-colored print on a t-shirt?
Absolutely, let’s play with colors and layers. I love experimenting with multiple linocut designs to create unique, multi-colored prints. You can use different colored inks or layer designs to achieve a rich, textured look. Just remember to let each layer dry before adding the next, and don’t be afraid to get creative and try new combinations – it’s all part of the storytelling process.


