A Guide to Understanding Iso and How to Use It
I still remember the day I realized that mastering ISO was the key to unlocking the secrets of photography. I was on a photo walk, capturing the vibrant streets of Tokyo during golden hour, when I stumbled upon a scene that would change my perspective forever. A young girl, laughing and playing with her friends, was bathed in the warm, soft light of the setting sun. It was a moment that embodied the essence of a great photograph – a perfect blend of light, composition, and emotion. As I looked through my lens, I knew that I had to share my knowledge of a guide to understanding iso with others, to help them capture their own fleeting moments of beauty.
In this article, I’ll share my personal approach to demystifying ISO, and provide you with practical advice on how to use it to enhance your photography. You’ll learn how to work with light, rather than against it, and how to compose images that tell a story. My goal is to help you develop a deeper understanding of a guide to understanding iso, and to empower you to take control of your camera settings. By the end of this guide, you’ll be equipped with the knowledge and confidence to capture stunning images that reflect your unique perspective and style. So, let’s dive in and explore the world of ISO together, and discover the secrets to capturing images that truly shine.
Table of Contents
Guide Overview: What You'll Need
Total Time: 1 hour 15 minutes
Estimated Cost: $0 – $10
Difficulty Level: Easy
Tools Required
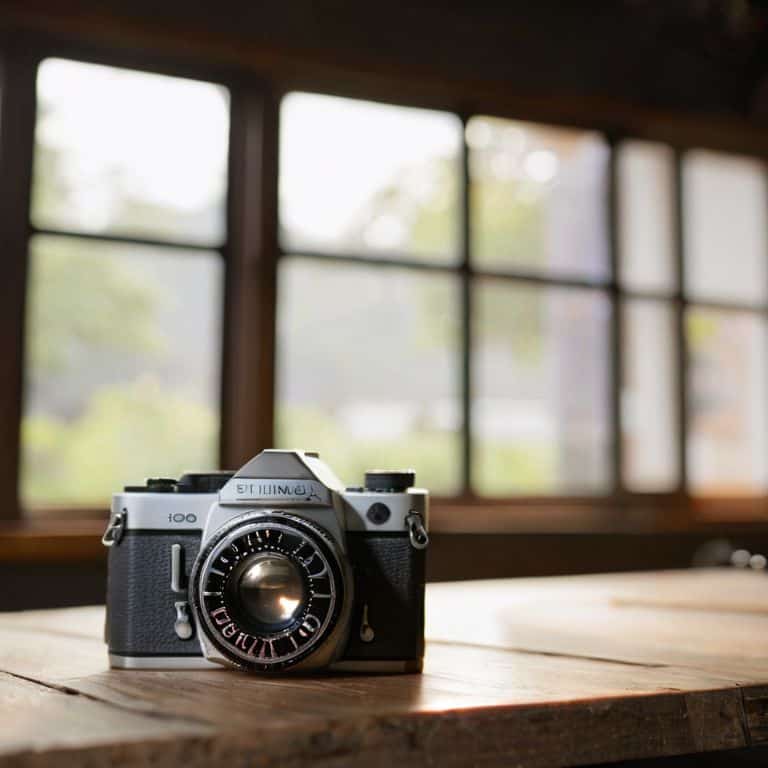
- Camera (with ISO settings)
Supplies & Materials
- Natural Light Source or artificial lighting
- Reference Images for comparison
Step-by-Step Instructions
- 1. First, let’s start by understanding what ISO is and how it affects our photographs. In simple terms, ISO is a measure of how sensitive your camera’s sensor is to light. A lower ISO, such as 100 or 200, means your camera is less sensitive to light, while a higher ISO, like 6400 or 12800, means it’s more sensitive. To get a feel for how ISO works, try shooting in different lighting conditions, from bright sunlight to low-light indoors, and observe how your camera’s ISO settings change to compensate for the available light. As you experiment, pay attention to the interplay between ISO and aperture, and how it impacts the overall look and feel of your images.
- 2. Next, let’s talk about the relationship between ISO, aperture, and shutter speed. These three components are interconnected, and changing one affects the others. When you adjust your ISO, you’ll often need to adjust your aperture or shutter speed to achieve the desired exposure. For example, if you’re shooting in low light and you increase your ISO to 6400, you may need to adjust your aperture to a smaller f-stop number, like f/2.8, to let more light in. This is where the concept of exposure compensation comes in, and understanding how to balance these elements is crucial for capturing well-exposed images.
- 3. Now, let’s dive into the world of low ISOs, typically ranging from 100 to 400. These settings are ideal for shooting in bright lighting conditions, such as outdoors on a sunny day. When using low ISOs, you can expect to capture images with minimal noise or grain, resulting in a smoother, more detailed look. To make the most of low ISOs, try using a tripod or stabilizer to minimize camera shake, and experiment with different aperture settings to achieve a shallow depth of field, which can help separate your subject from the background.
- 4. On the other hand, high ISOs, ranging from 1600 to 12800, are better suited for low-light conditions, such as indoors or at night. When shooting in these conditions, it’s essential to understand that higher ISOs can introduce more noise or grain into your images. However, with the right technique and equipment, you can still capture stunning images in low light. To minimize noise, try using a lens with a wide aperture, like f/1.4, and experiment with different shutter speeds to find the perfect balance between motion and blur. Remember, the key to mastering high ISOs is to embrace the imperfections and use them to add character to your images.
- 5. Another crucial aspect of working with ISO is understanding how it affects the overall aesthetic of your images. Different ISO settings can produce distinct looks, from the smooth, detailed textures of low ISOs to the gritty, high-contrast look of high ISOs. To develop your unique visual style, experiment with different ISO settings and observe how they impact the mood and atmosphere of your images. Ask yourself, what kind of story do I want to tell with this image? Do I want to convey a sense of serenity and calm, or energy and tension? By considering the emotional impact of your ISO settings, you can begin to craft a visual language that’s truly your own.
- 6. As you continue to explore the world of ISO, it’s essential to practice shooting in manual mode. This will allow you to take full control of your camera’s settings and develop a deeper understanding of how ISO, aperture, and shutter speed interact. Start by shooting in familiar environments, like your home or neighborhood, and gradually move on to more challenging locations, like low-light indoor spaces or busy city streets. Remember, the goal is to develop your skills and trust your instincts, so don’t be afraid to experiment and try new things.
- 7. Finally, let’s talk about the importance of reviewing and adjusting your images after capture. This is where you can refine your technique and develop a more nuanced understanding of how ISO affects your photographs. Take the time to review your images, and ask yourself, what worked well, and what didn’t? What would I do differently next time? By reflecting on your process and refining your technique, you’ll be able to capture images that truly reflect your unique perspective and style.
A Guide to Understanding Iso
As I delve deeper into the world of photography, I’ve come to realize that mastering iso is a crucial aspect of capturing stunning images. When working with iso camera settings for beginners, it’s essential to understand how to balance sensitivity with the risk of digital noise. I’ve found that understanding iso in digital photography is all about experimentation and practice. By pushing the boundaries of iso sensitivity, you can uncover new ways to tell stories with your images.
In low light situations, best practices for low light photography dictate that you should adjust your iso settings accordingly. However, this can sometimes result in digital noise, which can be detrimental to the overall quality of your image. To combat this, I recommend reducing digital noise in images by using noise reduction software or techniques such as shooting in RAW format. By doing so, you can maintain the integrity of your image while still capturing the essence of the moment.
As you continue to explore the world of photography, remember that iso sensitivity and its effects on images are just one piece of the puzzle. To truly master iso for professional photography, you need to consider the interplay between iso, aperture, and shutter speed. By developing a deep understanding of these fundamental principles, you’ll be well on your way to creating images that are not only technically sound but also visually stunning.
Mastering Iso Camera Settings for Beginners
As I reflect on my own journey with ISO, I realize that mastering it is all about understanding the dance between light and sensitivity. For beginners, it’s essential to start with the basics: knowing when to adjust ISO to capture the mood and atmosphere of a scene. I always tell my students to think of ISO as the “volume control” for their camera’s light sensitivity.
When shooting in manual mode, I encourage you to experiment with different ISO settings to see how they impact your images. Remember, lower ISOs (like 100 or 200) are perfect for bright, sunny days, while higher ISOs (like 1600 or 6400) are better suited for low-light conditions. By practicing and paying attention to how ISO affects your photos, you’ll develop a keen sense of when to adjust it to capture the perfect shot.
Reducing Digital Noise in Low Light Photography
When shooting in low light, I always look for ways to minimize digital noise. This is where understanding ISO really comes into play. By keeping my ISO as low as possible, I can reduce the grainy texture that can detract from an otherwise great image. Of course, this often means getting creative with my lighting or composition to let more light into the frame.
In my experience, the sweet spot for low-light photography is usually between ISO 800-1600. Any higher, and the noise starts to become distracting. But with a little practice and patience, you can learn to work within these constraints and still capture stunning, noise-free images that tell a powerful story.
Uncovering the Power of ISO: 5 Essential Tips to Elevate Your Photography
- Start by understanding that ISO is not just a technical setting, but a creative tool that can make or break the mood of your image
- Experiment with low ISOs during the golden hour to capture warm, rich tones that add depth to your portraits and landscapes
- When shooting in low light, don’t be afraid to push your ISO to higher settings, but be mindful of the digital noise that can creep in and detract from your subject
- Pay attention to the interplay between ISO, aperture, and shutter speed – finding the right balance is key to unlocking the full potential of your camera
- Practice shooting in manual mode to develop a keen sense of how ISO affects the exposure and mood of your images, and how to harness it to tell the story you want to tell
Key Takeaways for Mastering ISO
Understanding ISO is not just about numbers, but about uncovering the hidden language of light to capture the essence of your story
By mastering ISO camera settings, you can reduce digital noise in low light photography and unveil the beauty of the golden hour
Remember, the key to truly understanding ISO is to experiment and practice, allowing you to develop your unique visual voice and capture life’s fleeting moments with depth and emotion
Beyond the Numbers
ISO is not just a technical setting, but a storyteller’s brushstroke, painting the mood and atmosphere of a scene, and it’s only by mastering its subtleties that we can truly unlock the emotional depth of our photographs.
Julian Kade
Unleashing the Power of ISO: A Photographer's Journey
As we conclude this guide to understanding ISO, it’s essential to summarize the key points we’ve covered. We’ve explored the fundamentals of ISO, including its definition, how it affects image quality, and the importance of mastering ISO camera settings for beginners. We’ve also delved into the world of low-light photography, discussing techniques for reducing digital noise and capturing stunning images in challenging conditions. By grasping these concepts, you’ll be well on your way to unlocking the full potential of your camera and taking your photography to the next level.
As you continue on your photographic journey, remember that the art of photography is a lifelong learning process. Don’t be afraid to experiment, take risks, and push the boundaries of what’s possible with your camera. With practice, patience, and a deep understanding of ISO, you’ll develop a unique visual style that sets your images apart and tells a story that’s truly yours to tell. So, keep shooting, keep learning, and always remember to see the world with a photographer’s eye – filled with light, composition, and emotion.
Frequently Asked Questions
How do I know when to adjust the ISO settings in a given photography situation?
For me, it’s all about reading the light – when I’m in a situation with low or changing light, I know it’s time to adjust my ISO settings. I ask myself, ‘What’s the story I want to tell here?’ and then I adjust my ISO to capture that narrative, whether it’s freezing a moment or conveying a mood.
What are the consequences of setting the ISO too high or too low for my shot?
When you set the ISO too high, you’ll introduce unwanted digital noise, muddying the details. On the other hand, setting it too low can result in underexposed images, losing the subtleties of the scene. It’s all about finding that sweet spot, where the light and shadows dance together in perfect harmony.
Can you provide examples of how different ISO settings affect the overall mood and storytelling in a photograph?
Let’s explore how ISO influences mood and storytelling. For instance, a low ISO like 100 can create a serene, peaceful atmosphere, while a high ISO like 6400 can introduce grit and tension, perfect for documenting city streets at night. I’ve seen this firsthand in my own work, where a low ISO captured the stillness of a morning landscape, and a high ISO conveyed the energy of a bustling market.