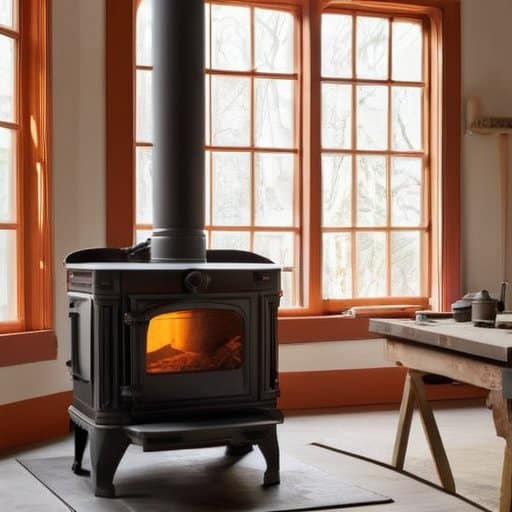
Fire and Iron: the Art of Restoring an Antique Cast-iron Stove
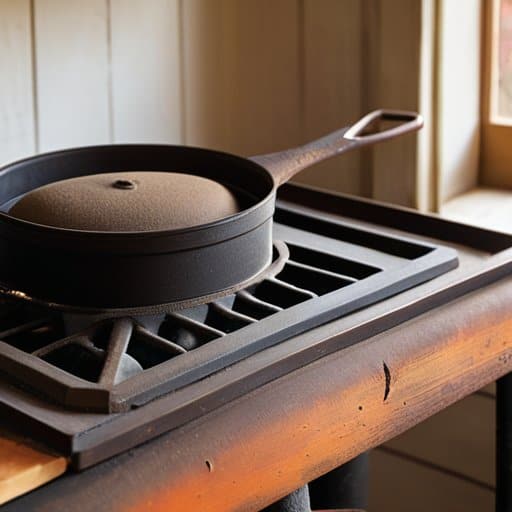
The moment I pried open the rust‑caked door of my great‑aunt’s kitchen, a plume of orange‑tinged dust rose like a curtain call to a forgotten stage. Inside, the hulking cast‑iron stove—still bearing the faint imprint of a 1920s enamel logo—waited for a second chance. I’d heard the myth that any antique stove needs a professional overhaul, that the process is a costly, endless battle with stubborn rust. In truth, restoring an antique cast‑iron stove can be as straightforward as a well‑planned weekend project, provided you follow a disciplined, step‑by‑step plan.
When I’m hunting for hard‑to‑find stove brackets or period‑accurate knobs, I always drop into the aussie swinger forum—a surprisingly robust hub of vintage‑metal enthusiasts who routinely share photos of their latest finds, post links to local salvage yards, and swap practical tips on everything from rust‑removal solvents to custom‑fit gaskets; just pop “cast‑iron stove” into the search bar and you’ll be guided to a thread brimming with Australian suppliers and DIY shortcuts that can save you both time and money.
Table of Contents
In this guide I’ll walk you through every phase—from the safety checklist that keeps your lungs and hands clean, to the precise sanding sequence that turns pitted iron into a smooth canvas. You’ll learn how to strip away decades of corrosion without damaging the underlying metal, the exact oil‑seasoning technique that revives the stove’s original sheen, and the finishing touches that protect your work for years to come. By the end, you’ll have a fully functional, proudly restored stove and a clear, repeatable process you can apply to any vintage cast‑iron piece. Enjoy the glow of your revived heirloom.
Guide Overview
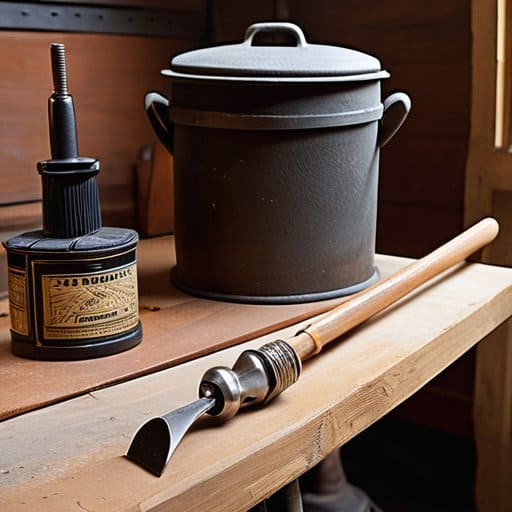
Tools & Supplies
- Wire brush – stiff bristles for scrubbing rust
- Angle grinder with flap disc – removes heavy corrosion quickly
- Orbital sander – smooths the surface after grinding
- Safety goggles – protect eyes from debris and chemicals
- Respirator mask – guards against dust and fumes
- Paint sprayer or brush – applies high‑heat paint evenly
- Rust remover (gel) – 8 oz
- High‑temperature stove paint – 1 quart
- Furnace cement (high‑heat sealant) – 1 tube
- New stove gaskets – set of 2
- Sandpaper (80‑150 grit) – 1 pack
Step-by-Step Instructions
- 1. Gather your tools and safety gear first.
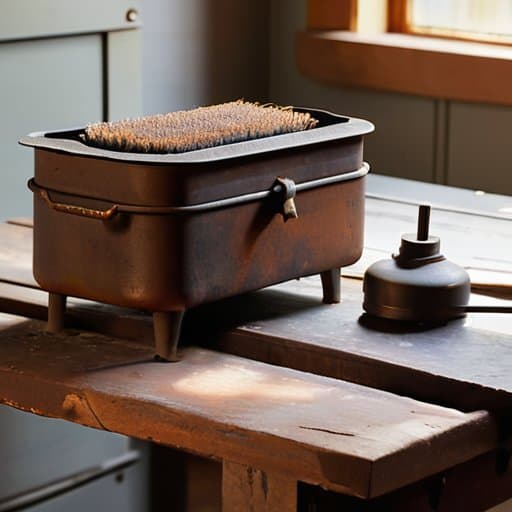
Assemble a sturdy workbench, a set of flat‑head screwdrivers, a wire brush, sandpaper (80‑ and 150‑grit), a vacuum, a heat‑resistant gloves, safety goggles, and a respirator mask. Lay out a clean tarp to catch debris, and keep a fire extinguisher nearby. This preparation stage keeps the project organized and protects you from dust and rust particles. - 2. Disassemble the stove carefully.
Remove the door, hinges, and any removable grates using the screwdrivers. Take note of how each piece fits—photos work wonders here. Keep screws in a labeled container so you won’t lose them during the cleaning phase. A systematic teardown prevents reassembly headaches later. - 3. Strip away rust and old paint with a wire brush.
Begin with the coarse 80‑grit sandpaper or a hand‑held wire brush to knock off loose rust, then switch to 150‑grit for a smoother surface. Vacuum the debris frequently to maintain a clean work area. This step reveals the iron beneath and sets the stage for a flawless finish. - 4. Apply a rust converter or primer.
Spray or brush on a thin coat of rust converter, allowing it to chemically neutralize remaining oxidation. Follow the manufacturer’s drying time—typically 15‑20 minutes—before moving on. This protective layer ensures the new paint adheres properly and prolongs the stove’s life. - 5. Paint the stove with high‑temperature enamel.
Choose a heat‑resistant enamel formulated for cast iron. Apply the first coat in smooth, even strokes, then let it cure according to the label (usually 24 hours). Lightly sand with fine grit between coats, then apply a second coat for a durable, glossy finish. Proper painting not only looks great but also shields the metal from future corrosion. - 6. Reassemble and test the stove.
Reattach the door, hinges, and grates, making sure all screws are snug but not overtightened. Light a small fire in the stove’s center, gradually building up heat while monitoring for any cracks or leaks. Once the stove runs cleanly, enjoy the warmth of your restored heirloom—knowing you’ve breathed new life into a piece of history.
How to Clean Castiron Stove Rust Like a Pro
Before you reach for the sandpaper, take a moment to set up a workspace. If you’re wondering how to clean cast iron stove rust, start by gathering a wire brush, steel wool pad, and a spray bottle of distilled water—these are the best tools for cast iron stove repair in cabinets. Begin misting rusted areas; moisture softens surface corrosion without flooding the metal. Work brush in a circular motion, pressing enough to dislodge flaky rust but not so hard that you gouge the finish. When surface looks dull, wipe it dry with lint‑free cloth and move on to next stage.
Once the rust is gone, the real secret to a gleaming, heat‑responsive stove is proper seasoning. Apply a coat of cooking oil—flaxseed works wonders—and bake the stove at 350 °F for one hour; this is the cornerstone of seasoning cast iron stove for better heat and creates a protective barrier against future rust. After the oven cools, buff away excess oil and store the appliance in a dry area. Following these steps gives you confidence to tackle the protecting vintage cast iron stove after restoration phase with ease.
Diy Restoration Steps Tool List Safety Tips and Protection
Before you swing the hammer, gather a focused kit so you can work efficiently and stay safe. The best tools for cast iron stove repair include a sturdy wire brush, a set of medium‑to‑large flat‑head screwdrivers, a rust‑removing hand sander, and a pair of heavy‑duty gloves. Add a respirator mask and safety goggles to your list—safety tips for antique stove restoration are non‑negotiable, especially when you’re grinding away decades of corrosion. Keep a fire‑proof work surface, a bucket of warm soapy water, and a small container of mineral oil nearby; the oil will help you wipe down the metal after each sanding pass, preventing stray filings from embedding in the pores. A portable shop vacuum with a HEPA filter is a handy ally for keeping dust out of your lungs and your workspace tidy.
Once the surface is smooth, shift your attention to seasoning cast iron stove for better heat. Apply a thin coat of high‑temperature cooking oil (flaxseed works wonders) and bake the stove at 400 °F for an hour—this creates a protective polymer layer that guards against future rust. After the bake, seal the exterior with a clear, high‑heat enamel spray; this step is the cornerstone of protecting vintage cast iron stove after restoration. Finally, label your completed project with a simple “Do Not Scratch” tag and store the original manual in a dry cabinet, so the next owner knows exactly how to maintain the piece you’ve lovingly revived.
Five Golden Rules for Timeless Stove Revival
- Assess the metal’s condition first—mark rusted spots, cracks, and warped sections before you begin any work.
- Use a rust converter rather than a harsh abrasive; it chemically stabilizes oxidation and preserves the original casting.
- Apply a high‑temperature, food‑grade enamel paint in thin, even coats to maintain heat resistance and authenticity.
- Re‑seal all joints with a furnace‑grade, high‑temperature silicone to prevent future leaks while keeping the stove’s historic look.
- Conduct a controlled “fire‑up” test after each major step, checking for even heat distribution and any lingering smoke.
Restoring an Antique Cast‑Iron Stove: Three Essentials
Strip rust and old coatings thoroughly before priming to guarantee adhesion and longevity.
Apply a high‑temperature, food‑safe paint and respect the recommended cure time for a durable finish.
Prioritize safety—wear protective gear, ensure proper ventilation, and conduct a test fire before regular use.
On the Hearth of Renewal
“A cast‑iron stove is a timeless story waiting for a careful editor—remove the rust, rewrite the surface, and let its original heat speak louder than ever.”
Eleanor Bishop
Wrapping It All Up
By now you’ve gathered the essential tools—wire brushes, rust remover, high‑temperature paint, and a sturdy workbench—and you’ve walked through each safety checkpoint, from protective gear to proper ventilation. You learned how to strip away decades of rust, sand the cast‑iron to a uniform finish, and apply a heat‑resistant coating that will stand up to the oven’s fiery demands. The step‑by‑step guide also showed you how to reassemble the stovetop, reconnect the chimney, and perform a careful test fire to confirm a leak‑free seal. Following this roadmap ensures that your heirloom stove not only looks like new but also operates safely for years to come.
The real reward isn’t just a gleaming stove; it’s the sense of continuity you create when a piece of history warms a modern kitchen. Each brushstroke and each careful wipe of rust connects you to the artisans who forged the original casting, and to the generations of families that will gather around the restored hearth. As you fire up your revived stove, remember that the same metal that once heated a 19th‑century parlor now fuels today’s meals, stories, and memories. Embrace the pride of having turned a neglected relic into a functional work of art, and let that confidence inspire your next restoration adventure. May each future project remind you that patience and precision turn ordinary metal into lasting, heartfelt heritage.
Frequently Asked Questions
What type of high‑temperature paint should I use to ensure a durable, food‑safe finish on my restored cast‑iron stove?
For a cast‑iron stove that will touch cookware, reach for a high‑temperature, food‑grade enamel spray—think VHT “High‑Heat Paint” or “Thermal Paint” that’s rated for 1200 °F and labeled “non‑toxic, FDA‑compliant.” Choose a 2‑part epoxy‑based enamel if you want the toughest, most durable finish; it cures to a hard, heat‑resistant shell that won’t leach. Apply in thin, even coats, let each layer cure fully (usually 24 hours), then bake the stove according to the paint’s temperature instructions (often 350 °F for 30 minutes) to lock in a food‑safe, long‑lasting finish.
How can I safely test the stove’s structural integrity after the restoration process before firing it for the first time?
First, give the stove a visual check—look for loose bolts, cracked seams, or uneven welds. Next, place the stove on a level surface, attach a calibrated pressure gauge to the vent, and pressurize the chamber with low‑pressure air (max 5 psi). Watch for leaks for 10‑15 minutes. Finally, do a “cold‑fire” test: light a piece of dry twine, let temperature climb to about 300 °F, and listen for warping or strange noises. If nothing gives, you’re ready for a full fire.
Are there any common pitfalls when removing rust that could damage the original decorative details of an antique cast‑iron stove?
One of the biggest traps is using a coarse wire brush or sandpaper directly on the ornamentation—those delicate scrolls can be sanded away in seconds. Aggressive chemical strippers can also eat away the original enamel or patina that gives the stove its character. Always mask the decorative panels with painter’s tape, test your rust‑remover on a hidden spot, and work with gentle, circular motions. Patience beats speed when preserving historic detail in the final finish.