Thrift Store Flip: How to Restore Vintage Furniture Without Ruining It
I still remember the first time I tried restoring vintage furniture – it was a disaster. I had found this beautiful, old armchair at a thrift store, and I just knew it had potential. But, as I quickly learned, bringing new life to old furniture isn’t just about slapping on some paint and calling it a day. In fact, one of the most frustrating myths about restoring vintage furniture is that it’s a simple, weekend project. The truth is, it takes patience, dedication, and a willingness to get your hands dirty. Whether you’re a seasoned pro or a beginner, restoring vintage furniture requires a thoughtful approach that balances preservation with renovation.
As someone who’s been around the block a few times with restoration projects, I want to share my honest, no-nonsense advice with you. In this article, I’ll walk you through the process of restoring vintage furniture, from assessing the piece’s condition to applying the final coat of finish. You’ll learn how to identify potential pitfalls, choose the right materials, and bring out the unique character of each piece. My goal is to provide you with practical, easy-to-follow guidance that will help you achieve professional-looking results, even if you’re working on a tight budget or with limited experience.
Table of Contents
Project Overview

Total Time: 2 hours 30 minutes to several days
Estimated Cost: $50 – $200
Difficulty Level: Intermediate / Hard
Tools Required
- Sander ((electric or manual))
- Drill ((with various drill bits))
- Hammer
- Tape measure
- Clamp ((bar clamp or C-clamp))
- Paintbrushes ((various sizes))
- Utility Knife ((with extra blades))
- Safety glasses
- Drop cloth
Supplies & Materials
- Wood filler
- Sandpaper ((various grits))
- Paint or stain ((choose a color that matches the original finish))
- Polyurethane ((water-based or oil-based))
- 2-in x 4-in lumber ((for repairs or reinforcements))
- Fabric or upholstery ((if reupholstering chairs or sofas))
- Nails or screws ((for reattaching loose joints or hardware))
- Wood glue
Step-by-Step Instructions
- 1. First, assess the condition of the vintage furniture piece you’re about to restore. This means carefully examining it for any damage, wear, or tear that needs to be addressed during the restoration process. Look for scratches, dents, broken parts, or any other issues that might affect the final result. Take notes and photographs to document the piece’s original state and the repairs it needs.
- 2. Next, gather all the necessary tools and materials. Depending on the type of furniture and the extent of the restoration, you might need sandpaper, paint, varnish, wood glue, new hardware, or fabric. Make sure you have everything you need before you start to avoid interruptions and delays. It’s also a good idea to set up a dedicated workspace where you can work on your project without distractions.
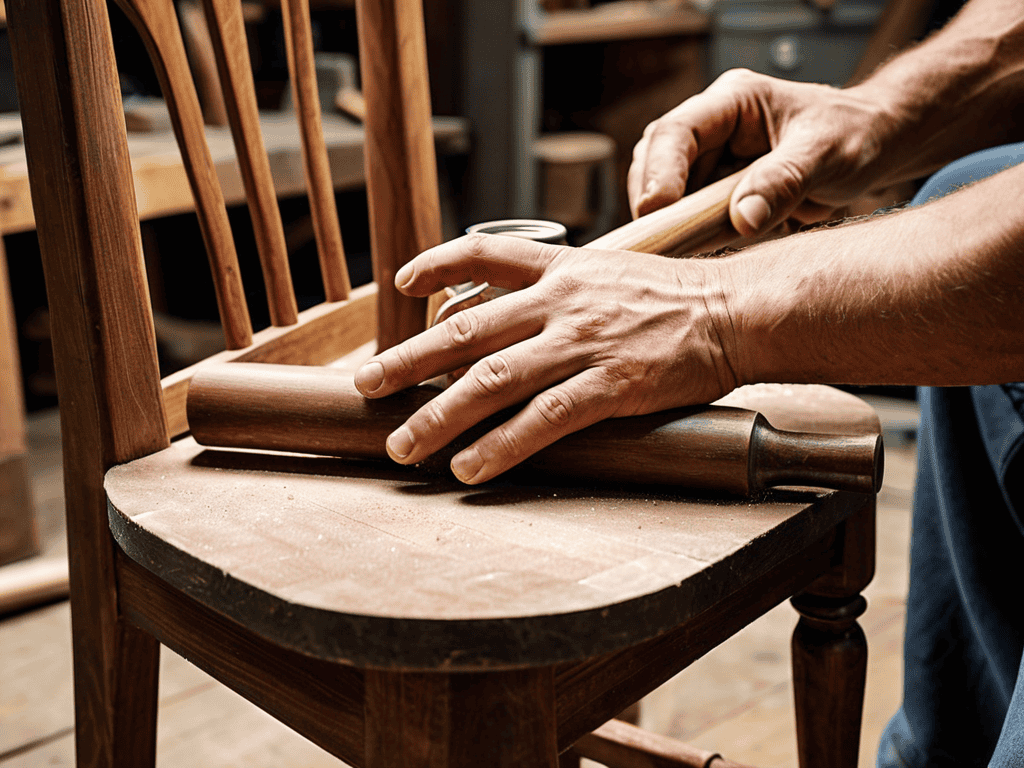
- 3. Now, disassemble the furniture as much as possible. This will give you better access to all parts and make it easier to repair or replace damaged components. Be careful not to damage any of the parts as you disassemble them, and keep all the screws and hardware organized so you can easily find what you need when it’s time to reassemble.
- 4. The next step is to clean and strip the old finish. Use a suitable stripper to remove old paint or varnish, and then clean the surface thoroughly to remove any dirt, grime, or residue. This is a crucial step because it will help the new finish adhere properly. Work in a well-ventilated area and use protective gloves and eyewear to ensure your safety.
- 5. After the old finish is removed, sand the surface to smooth out any rough spots and create a surface that’s ready for the new finish. Start with coarse sandpaper and gradually move to finer grits for a smoother finish. Pay special attention to any areas with intricate carvings or details to ensure you don’t damage them.
- 6. Once the surface is sanded and ready, you can apply the new finish. This could be paint, varnish, or a special finish designed for the type of material your furniture is made of. Follow the manufacturer’s instructions for application and drying times to ensure the best results.
- 7. With the new finish applied, it’s time to reassemble the furniture. Start by replacing any hardware you removed, and then gradually put the pieces back together. Make sure everything is securely attached and functions as it should. Double-check your notes and photographs to ensure that everything is back in its original place.
- 8. Finally, add any final touches. This might include applying a second coat of finish, replacing any upholstery, or adding new hardware. Take your time and be meticulous because these final details can make a big difference in the overall appearance of your restored vintage furniture.
Restoring Vintage Furniture
When working with vintage pieces, it’s essential to consider the history and character of the item. Vintage furniture refinishing techniques can help preserve the original look and feel, while also ensuring the piece remains durable and functional. By using traditional methods and materials, you can maintain the authenticity of the furniture and even increase its value.
To add a personal touch, try upcycling old furniture ideas that incorporate modern elements, such as bold fabrics or sleek hardware. This approach can give new life to a mid century modern furniture design, making it more appealing to contemporary tastes. When selecting materials, be sure to choose high-quality furniture restoration tools and supplies that will withstand the test of time.
As you work on your project, don’t forget to pay attention to the wood finishing tips and tricks that can make a significant difference in the final result. A well-executed finish can enhance the beauty of the wood and protect it from damage. Additionally, consider furniture upholstery restoration techniques to revive the original cushions and seats, ensuring a comfortable and inviting piece that will be treasured for years to come.
Reviving Wood With Finishing Tips
When it comes to reviving the wood on your vintage find, the right finish can make all the difference. I’ve found that a gentle sanding followed by a rich oil-based stain can bring out the natural beauty of the wood. For a more dramatic look, consider adding a wax or polyurethane coat to protect the finish and give it a subtle sheen. The key is to enhance the wood’s character without overpowering it.
As I continue to work on restoring vintage furniture, I’ve found that connecting with others who share my passion is a great way to stay inspired and learn new techniques. I’ve had some wonderful conversations with fellow enthusiasts on various online forums, and I’ve even stumbled upon a few hidden gems through casual online chats. For instance, I recently discovered a great resource for finding unique, one-of-a-kind furniture pieces through a free online community, which can be accessed via kostenloser Chat – it’s amazing how a simple conversation can lead to a new project or restoration idea.
By experimenting with different finishing techniques, you can uncover the unique charm of your vintage piece. Whether you’re aiming for a sleek, modern look or a warm, distressed finish, the right approach can revive the wood and make your furniture truly shine.
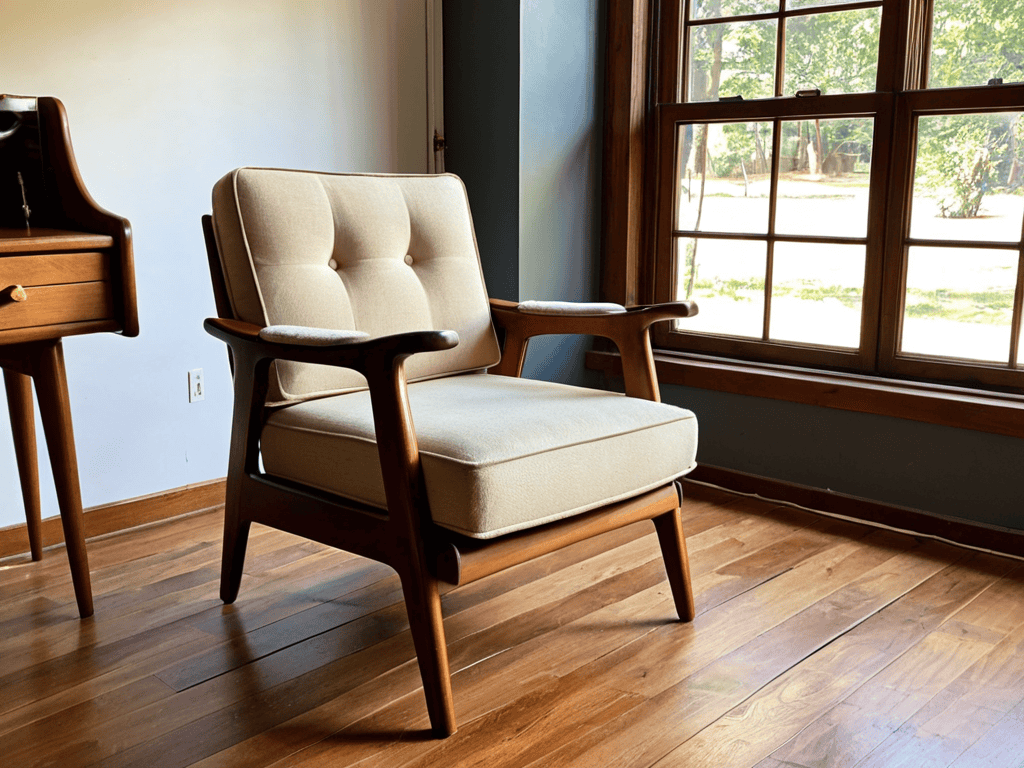
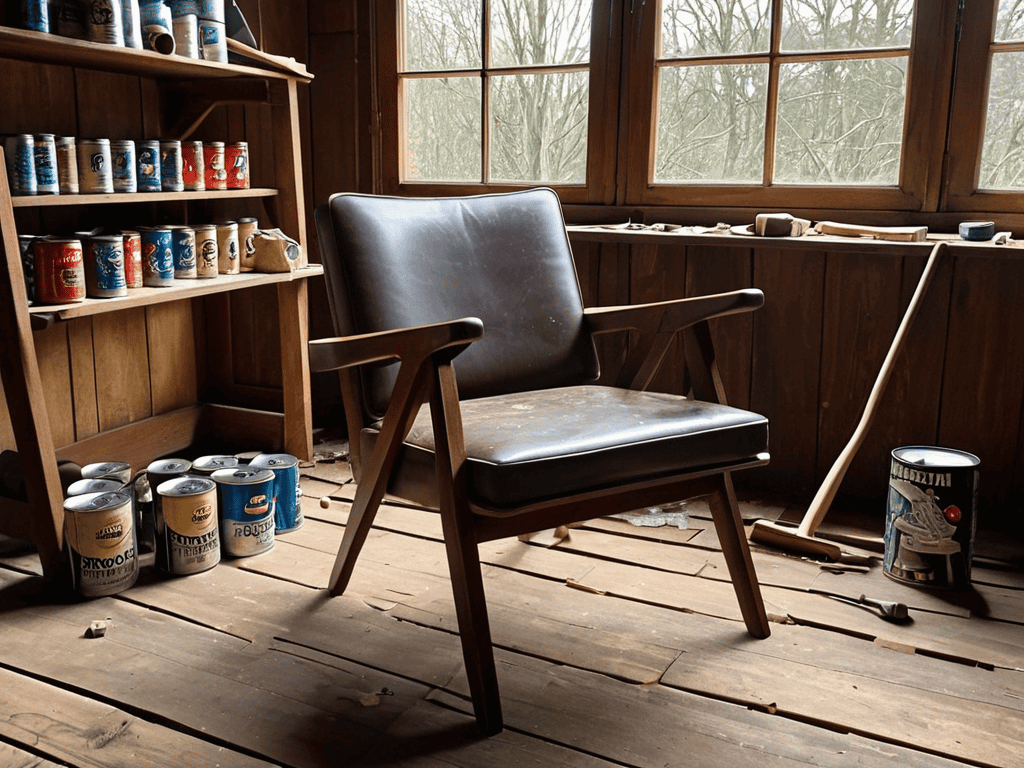
Uncovering Mid Century Modern Gems
Uncovering Mid Century Modern Gems
I’m always on the lookout for hidden gems from the mid century modern era. There’s something about the clean lines, organic curves, and nostalgic charm that draws me in. When restoring vintage furniture from this period, I love uncovering the unique characteristics that make each piece special. From the tapered legs of a vintage coffee table to the tufted upholstery of a retro armchair, every detail tells a story.
These pieces often require gentle handling and thoughtful restoration to preserve their original essence. With a little patience and TLC, a mid century modern treasure can be revived to its former glory, bringing a touch of timeless sophistication to any room.
Bringing Back the Shine: 5 Essential Tips for Restoring Vintage Furniture
- Research the Piece: Before you start restoring, learn about the furniture’s history, era, and original finish to ensure authenticity
- Strip with Care: Use the right chemicals and techniques to remove old finishes without damaging the wood or underlying structure
- Preserve the Patina: Balance restoration with preservation – aim to maintain the character and charm that comes with age
- Reupholster with Flair: Choose fabrics and patterns that complement the piece’s original style, and don’t be afraid to add a pop of color or texture
- Seal and Protect: Apply a suitable finish to safeguard your restored furniture from spills, scratches, and fading, ensuring it remains a treasured family heirloom for generations
Key Takeaways for Restoring Vintage Furniture
I’ve learned that uncovering the hidden gems of mid century modern furniture requires patience, dedication, and a keen eye for detail to revive their original charm
Reviving wood with the right finishing tips can make all the difference in restoring vintage furniture to its former glory, from sanding to applying the perfect stain
Whether you’re a seasoned pro or a beginner, bringing old furniture back to life is an incredibly rewarding experience that combines history, craftsmanship, and personal style
A Labor of Love
Restoring vintage furniture is not just about refinishing wood or reupholstering chairs, it’s about uncovering the stories and secrets hidden within the scratches and scuffs of a bygone era.
Emily J. Miller
Conclusion
As we’ve explored the world of restoring vintage furniture, it’s clear that this journey is not just about refurbishing old pieces, but about uncovering the hidden gems of the past and giving them new life. From uncovering mid century modern gems to reviving wood with finishing tips, each step of the process requires patience, dedication, and a passion for preserving history. By following these steps and tips, you’ll be well on your way to creating unique and functional pieces that not only reflect your personal style but also tell a story of their own.
So, the next time you stumble upon an old, worn-out chair or dresser, remember that it’s not just a piece of furniture, but a piece of history waiting to be restored and loved. As you embark on your own vintage furniture restoration journey, keep in mind that it’s okay to make mistakes and that the process is just as important as the end result. With time and practice, you’ll develop the skills and confidence to tackle even the most challenging projects, and the sense of satisfaction you’ll get from breathe new life into old furniture will be incredibly rewarding.
Frequently Asked Questions
How do I determine the original finish or color of a vintage piece to ensure an authentic restoration?
To uncover the original finish, look for hints on the underside or back of the piece, where the finish may be less worn. You can also use a black light to detect old finishes or consult with a professional restorer for guidance on authentic colors and techniques.
What are some common mistakes to avoid when refinishing or reupholstering vintage furniture?
When refinishing or reupholstering vintage furniture, I’ve found that common mistakes include stripping too aggressively, ignoring the piece’s original patina, and using materials that don’t match the era. It’s also easy to overlook tiny details, like hardware or stitching, that make a big difference in the end result.
Are there any specific safety precautions I should take when working with old finishes or materials that may contain lead or other hazardous substances?
When working with old finishes or materials, safety first is my mantra. Always wear a mask, gloves, and protective eyewear. Lead and other hazardous substances can be hidden dangers, so it’s crucial to test for them before starting your project. Dispose of any hazardous materials responsibly and follow local guidelines to ensure a safe and healthy restoration process.