A Guide to Using a Gimbal for Smooth Shots
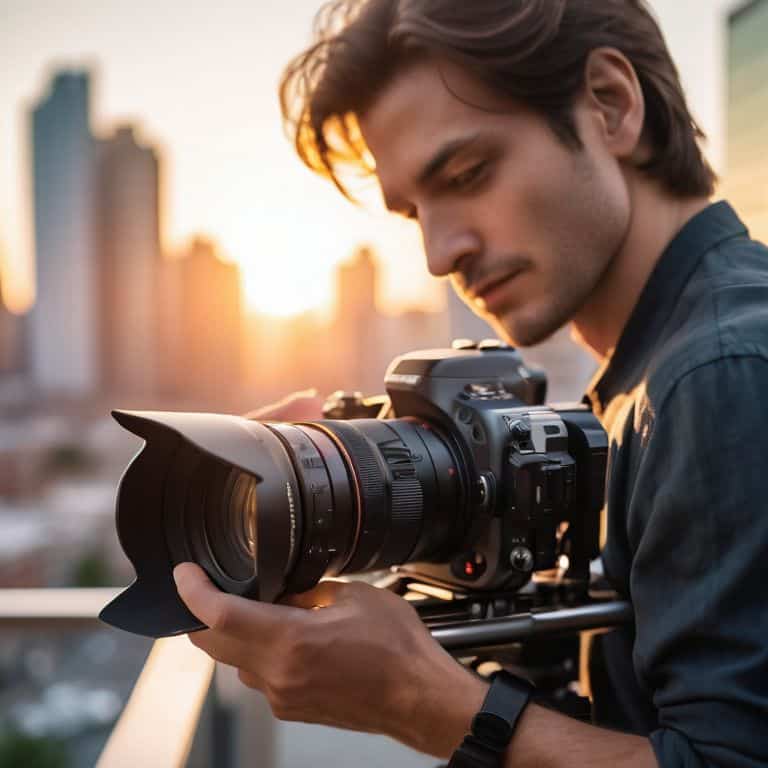
I still remember the first time I used a gimbal on a documentary shoot – it was like a revelation. The smooth shots it provided were a total game-changer for adding polish to my footage. But what I’ve learned over the years is that a gimbal is not just a fancy gadget; it’s a powerful tool that can make or break the visual flow of your story. That’s why I’m excited to share with you a guide to using a gimbal for smooth shots, and how it can elevate your filmmaking to the next level.
In this article, I’ll cut through the hype and share my personal, hands-on experience with gimbals. You’ll learn how to choose the right gimbal for your needs, how to balance and calibrate it for optimal performance, and how to use it to capture breathtaking footage that will leave your audience mesmerized. Whether you’re a seasoned filmmaker or just starting out, this practical guide will give you the confidence to unlock the full potential of your gimbal and take your visual storytelling to new heights.
Table of Contents
Guide Overview: What You'll Need
Total Time: 1 hour 30 minutes
Estimated Cost: $100 – $300
Difficulty Level: Intermediate
Tools Required
- Gimbal Stabilizer (with adjustable arms)
- Camera (with compatible mount)
- Smartphone (for monitoring and adjusting settings)
- Allen Wrench (for adjusting gimbal arms)
- Screwdriver (for securing camera to gimbal)
Supplies & Materials
- Gimbal Battery (with charger)
- Memory Cards (for storing footage)
- Camera Lens Cleaning Kit (for maintaining camera lens)
- Gimbal Counterweight (for balancing camera weight)
Step-by-Step Instructions
- 1. First, let’s talk about prepping your gimbal for a smooth shoot. I always start by making sure my gimbal is fully charged and that I have all the necessary accessories, such as extra batteries and a remote control. This may seem like a no-brainer, but trust me, you don’t want to be stuck in the middle of a shoot with a dead gimbal.
- 2. Next, I recommend getting to know your gimbal’s settings and modes. Take some time to read the manual, watch tutorials, and experiment with different settings to see what works best for your specific camera and shooting style. For example, I like to use the “follow” mode for smooth pans and tilts, but I switch to “lock” mode when I need to capture a steady shot.
- 3. Now it’s time to balance your gimbal, which is crucial for achieving those silky smooth shots. I like to think of balancing as a meditation – it requires patience and attention to detail. Make sure to follow the manufacturer’s instructions for balancing, and don’t be afraid to take your time and make adjustments as needed.
- 4. With your gimbal balanced and settings dialed in, it’s time to start rehearsing your shots. I like to walk through my shots before actually rolling camera, just to get a feel for the movement and pacing. This helps me identify any potential issues, such as obstacles in the way or uneven terrain, and makes the actual shoot much smoother.
- 5. When you’re ready to start rolling, remember to keep it slow and steady. I like to use a slow and deliberate pace when moving the gimbal, as this helps to create a sense of fluid motion. Avoid jerky or abrupt movements, as these can be jarring and take the viewer out of the experience.
- 6. As you’re shooting, don’t forget to monitor your audio. I like to use a separate audio recorder or a high-quality camera mic to capture crisp, clean sound. This is especially important when using a gimbal, as the smooth motion can sometimes make the audio sound a bit detached from the visuals.
- 7. Finally, when it comes time to edit your footage, don’t be afraid to get creative with your gimbal shots. I like to use a combination of fast cuts and slow, sweeping motions to create a sense of tension and release. Experiment with different editing styles and techniques to find what works best for your story and pacing.
Gimbal Magic Unlocked
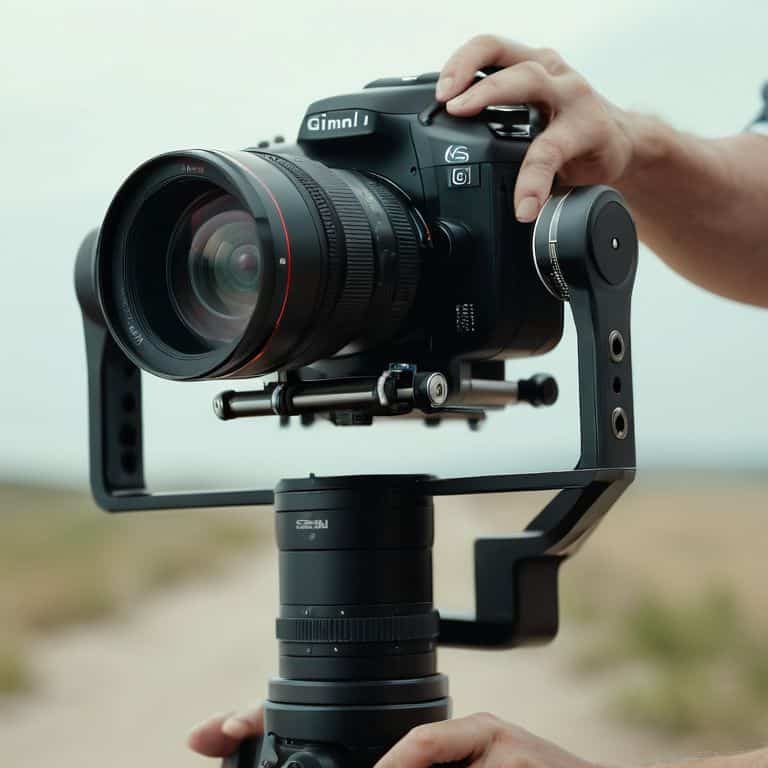
As I delve deeper into the world of gimbal shots, I’m reminded of the importance of gimbal calibration. It’s a crucial step that can make or break the smoothness of your footage. I’ve found that taking the time to properly calibrate my gimbal before each shoot has been a total game-changer. It’s all about finding that sweet spot where your camera is perfectly balanced, allowing for silky smooth shots that bring your story to life.
When it comes to capturing smooth camera movement with a gimbal, I always emphasize the need for patience and practice. It’s not just about pointing and shooting; it’s about feeling the rhythm of your scene and moving your camera in harmony with it. I’ve spent countless hours honing my skills, and I can confidently say that it’s made all the difference in my filmmaking journey. Whether I’m using my gimbal for cinematic footage or experimenting with gimbal stabilization techniques for beginners, I know that I can rely on it to deliver high-quality results.
For those looking to take their gimbal shots to the next level, I highly recommend exploring using a gimbal for time lapse photography. It’s a unique and creative way to capture stunning footage, and with the right gimbal, you can achieve truly breathtaking results. I’ve had the chance to experiment with different best gimbal for cinematic footage options, and I can say that it’s worth doing your research to find the one that suits your needs and style.
Cinematic Footage With Gimbal Calibration
To truly unlock the cinematic potential of your gimbal, calibration is key. I’ve spent hours fine-tuning my gimbal to ensure it’s perfectly balanced for my camera rig. It’s amazing how a slight adjustment can make all the difference in the smoothness of your footage. When your gimbal is calibrated just right, you can achieve those breathtaking, floating-like shots that draw your audience in.
By taking the time to calibrate your gimbal, you’ll be able to capture footage that’s not only smooth but also incredibly stable. This is especially important when shooting in busy or dynamic environments, where a steady hand can make all the difference. With a well-calibrated gimbal, you’ll be able to focus on the creative aspects of your shoot, rather than worrying about shaky footage.
Smooth Movement With Gimbal Stabilization
When I’m editing a scene, I look for moments where the camera movement can elevate the emotional impact. That’s where gimbal stabilization comes in – it’s like a symphony of smooth motion. By allowing the camera to glide effortlessly, I can create a sense of tension or calm, depending on the story I’m telling. It’s amazing how a simple tool can add so much depth to a scene.
I’ve used gimbals to capture everything from sweeping landscapes to intimate portraits, and the result is always stunning. The stabilization allows me to focus on the subject, rather than the camera movement, which creates a more immersive experience for the viewer. Whether I’m filming a documentary or a branded piece, gimbal stabilization helps me craft a narrative that draws the audience in and refuses to let go.
Bringing Life to Your Footage: 5 Essential Gimbal Tips
- I always say that a gimbal is only as good as its operator – take the time to get familiar with your device’s settings and modes to unlock its full potential
- Remember, smooth shots are all about control and finesse – use your gimbal to create deliberate, intentional movements that serve your story, rather than just random sweeping motions
- I’m obsessed with the idea that sound design is 50% of the film – when using a gimbal, don’t forget to capture high-quality audio to match your silky smooth visuals, it’s a total game-changer
- Calibration is key when it comes to getting the most out of your gimbal – take a few minutes to adjust and fine-tune your device before each shoot to ensure you’re getting the best possible results
- When it comes to adding polish to your documentary footage, I swear by the power of subtle gimbal movements – try using slow, gentle motions to add depth and emotion to your scenes, it’s incredibly effective
Bringing Your Story to Life: 3 Key Takeaways
I’ve found that mastering gimbal shots can add a level of polish to your documentary footage, making it feel more immersive and engaging for your audience
By understanding how to properly calibrate and utilize your gimbal, you can unlock a world of cinematic possibilities, from silky smooth pans to dynamic tracking shots
Remember, the key to capturing truly magical footage with a gimbal lies in experimentation and practice – don’t be afraid to try new things and push the limits of what’s possible with this incredible tool
Bringing Life to Your Footage
A gimbal is not just a tool, it’s a dance partner – it helps you find the rhythm and flow of your story, allowing you to capture life in a way that feels almost magical.
Maya Jenson
Bringing Your Vision to Life with Gimbal Shots

As we’ve explored throughout this guide, mastering the use of a gimbal is all about understanding how to balance smooth movement with creative vision. From the initial setup and calibration to the actual shooting process, each step plays a crucial role in capturing high-quality, cinematic footage. By focusing on the details, such as gimbal stabilization and careful planning, you can significantly enhance the visual appeal of your videos. Whether you’re working on a documentary, a short film, or even a personal project, the techniques outlined here are designed to help you achieve professional-looking results.
As you continue to experiment and refine your skills with gimbal shots, remember that the true magic happens in the editing room. It’s where you get to weave your footage into a compelling narrative, using color grading and sound design to evoke emotions and convey your message. Don’t be afraid to push boundaries and try new things – the world of filmmaking is constantly evolving, and the most inspiring stories often come from those who dare to be different. So, keep exploring, learning, and most importantly, creating – your unique voice and vision are what will set your films apart.
Frequently Asked Questions
What are some common mistakes to avoid when using a gimbal for the first time?
When using a gimbal for the first time, I see many beginners overlook calibration, resulting in shaky footage. Others move too quickly, disrupting the smooth motion. And some forget to balance their camera, causing vibrations. Trust me, these mistakes can ruin an otherwise great shot – take your time, follow the manufacturer’s instructions, and practice makes perfect!
How do I balance my camera on a gimbal to achieve perfectly smooth shots?
To balance your camera on a gimbal, start by adjusting the roll axis, then tweak the pitch and yaw. It’s all about finding that sweet spot where your camera is perfectly level and the gimbal’s motors can do their magic. Trust me, it’s worth the extra few minutes to get it just right – the result is silky smooth footage that draws your audience in.
Can I use a gimbal for low-light footage and if so, what settings should I adjust?
For low-light footage, I swear by my gimbal – it’s a total game-changer. Just adjust your camera’s ISO and exposure compensation to optimize for low-light conditions, and use a slower shutter speed to let more light in. Your gimbal will help smooth out any shakiness, and with the right settings, you’ll get silky smooth, cinematic footage even in the darkest environments.