A Guide on How to Make a Simple Miter Joint for a Picture Frame

I still remember the first time I tried to make a picture frame – I was determined to get it just right, but those miter joints had me stumped. I spent hours scouring the internet for tutorials on how to make a simple miter joint for a picture frame, but every guide seemed to assume I already knew the basics. It wasn’t until I stumbled upon an old woodworking book in a thrift store that I finally understood the beauty of a well-crafted joint. The author’s emphasis on patience and attention to detail resonated with me, and I’ve been hooked on handmade craftsmanship ever since.
As I share my own guide on how to make a simple miter joint for a picture frame, I want to promise you that this won’t be just another step-by-step tutorial. Instead, I’ll walk you through the process of creating something truly unique and personal. You’ll learn how to choose the right materials, how to prepare your wood, and how to bring it all together with a simple miter joint. My goal is to empower you with the knowledge and confidence to create your own stunning picture frames, and to inspire you to see the beauty in the imperfections that make each piece truly one-of-a-kind.
Table of Contents
Guide Overview: What You'll Need
Total Time: 1 hour 15 minutes
Estimated Cost: $10 – $20
Difficulty Level: Easy
Tools Required
- Miter Saw for precise angled cuts
- Tape Measure for accurate measurements
- Square for ensuring corners are square
- Clamps for holding pieces in place
- Wood Glue for bonding the joint
- Nail Gun optional, for added security
Supplies & Materials
- Wood e.g., 1-in x 4-in lumber, depending on frame size
- Wood Filler optional, for filling gaps
- Sandpaper for smoothing out the joint
Step-by-Step Instructions
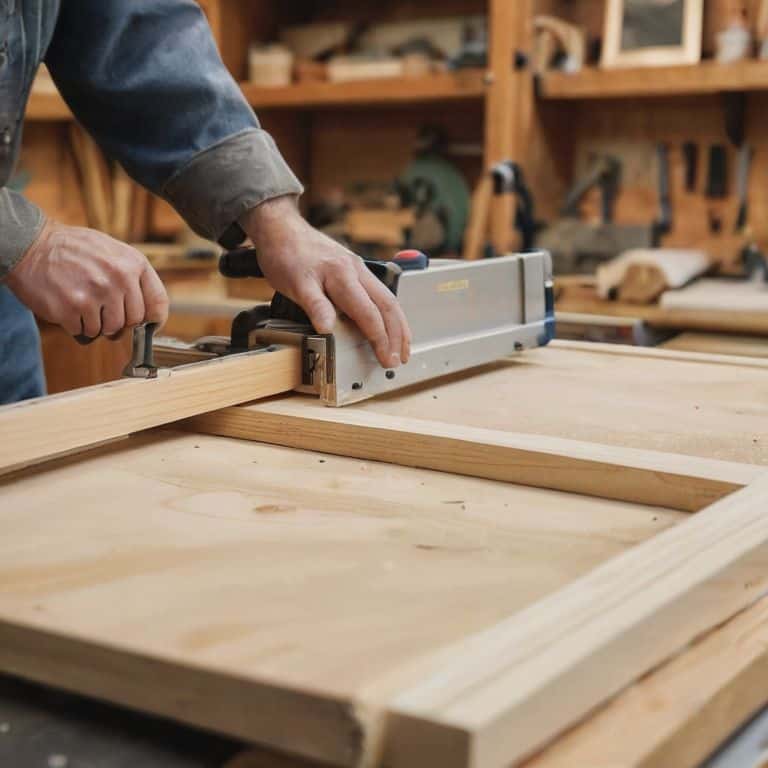
- 1. To start, gather all your tools and materials, including your miter saw, a tape measure, a square, and the wood you’ve chosen for your picture frame. I like to lay everything out on my workbench to get a sense of the project’s landscape, and to make sure I have all the essential components within reach.
- 2. Next, cut two pieces of wood to the same length, using your tape measure to ensure accuracy. This is where the story of your picture frame begins, and it’s a good idea to take your time, making sure each cut is precise and intentional. I find that listening to music or nature sounds helps me focus on the task at hand.
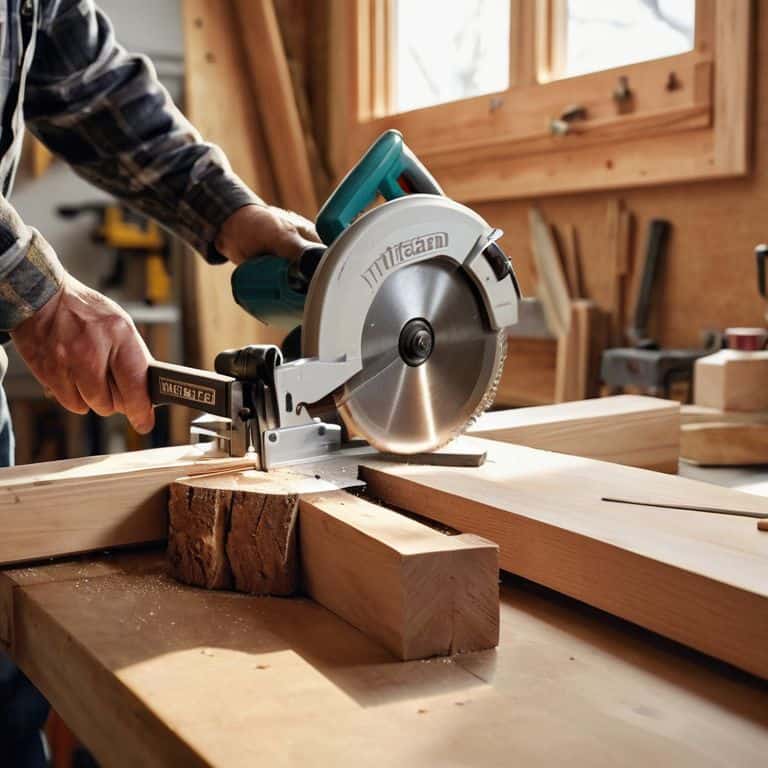
- 3. Now, set up your miter saw to cut a 45-degree angle. This is the part where most people might get a little nervous, but trust me, with a bit of practice, you’ll be making smooth, clean cuts like a pro. Remember to always follow safety guidelines and wear protective gear when operating power tools.
- 4. Place one of the wood pieces into the miter saw, double-checking that it’s aligned with the 45-degree mark. Take a deep breath, and then make the cut. The sound of the saw blade biting into the wood is almost meditative, and it’s a great reminder that you’re creating something with your own hands.
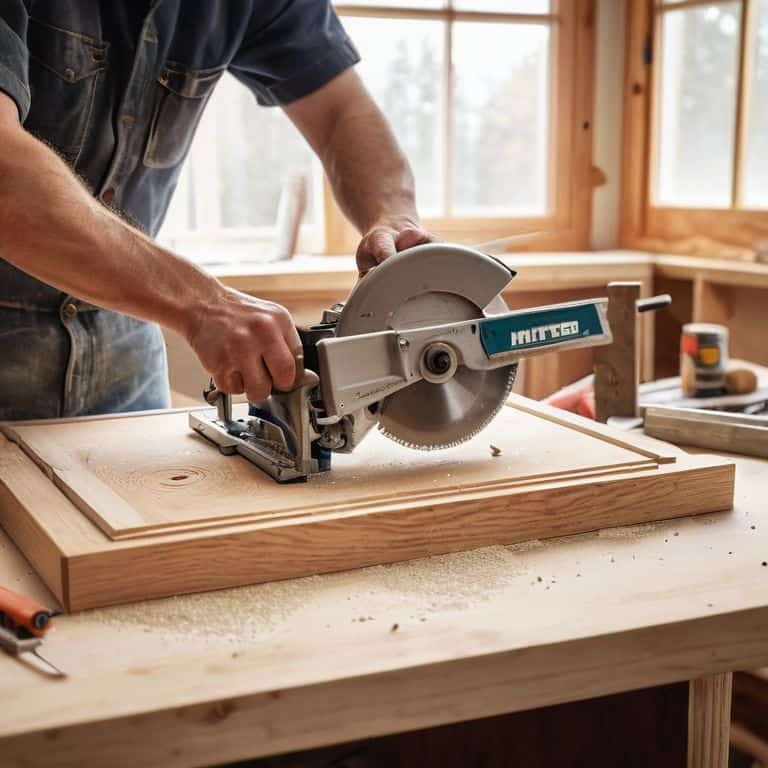
- 5. Repeat the process with the second piece of wood, cutting it at a 45-degree angle in the opposite direction. This will give you the two pieces you need to form a strong and sturdy miter joint. As you work, think about the story you’re telling with this picture frame – what memories will it hold, and what emotions will it evoke?
- 6. To assemble the miter joint, apply a small amount of wood glue to the cut edges of both pieces, and then press them together. Use a clamp to hold the joint in place while the glue dries, making sure it’s secure and even. This is the part where patience comes in – let the glue dry completely before moving on to the next step.
- 7. Once the glue is dry, use a small nail or pin to reinforce the joint, if desired. This will add an extra layer of stability and strength to your picture frame, and give you peace of mind knowing it will last for years to come. As you finish up this step, take a moment to admire your handiwork – you’re one step closer to creating a beautiful, handmade picture frame that tells a story.
Crafting Frames With Soul
As I work on a new frame, I always think about the story it will tell. The miter saw techniques for beginners I’ve learned over the years have been invaluable, but it’s the imperfections that make each piece unique. When cutting at a 45 degree angle, remember that precision is key, but don’t be too hard on yourself if it’s not perfect – it’s all part of the character.
I’ve found that using woodworking jig plans for miter joints can be really helpful, especially for those just starting out. These jigs can help you avoid common miter joint mistakes to avoid, like uneven cuts or loose joints. By taking the time to set up your jig and double-check your measurements, you’ll be able to create a sturdy and beautiful frame that will last for years to come.
When it comes to reinforcing your miter joint, there are a few miter joint reinforcement options to consider. I like to use a combination of wood glue and nails to make sure my joints are secure. By taking the time to carefully craft each joint, you’ll be able to create a frame that’s not only functional, but also a work of art. Remember, the goal is to create something with soul, not just a piece of furniture.
45 Degree Cutting Tips Revealed
As I guide my miter saw through the wood, I feel like I’m unlocking a secret. The 45-degree cut is where the magic happens, where two plain pieces become a harmonious frame. To get this cut just right, I always ensure my saw is calibrated and my wood is securely clamped. A steady hand and a gentle touch are essential – it’s almost meditative.
I’ve found that using a high-quality blade makes all the difference, reducing tear-out and giving me a smooth finish. It’s these small details that elevate a simple frame into a work of art, a testament to the human touch. By paying attention to these subtleties, you’ll be able to craft frames that tell a story, that hold memories and emotions within their wooden borders.
Miter Saw Secrets for Beginners
As I work with my miter saw, I’ve learned a few secrets that make all the difference for beginners. One of my favorites is to always cut a small test piece before diving into your actual project wood. This simple step ensures your blade is set just right and gives you a sense of how the wood will behave. It’s amazing how often this little trick saves me from a mistake that could ruin the whole piece.
I also make sure to keep my saw blade clean and well-maintained. A dull or dirty blade can bind and kick back, which is not only dangerous but also produces a poor cut. By taking the time to properly care for my tools, I can focus on the craft, not the struggle. It’s all about creating a harmonious workflow that lets the beauty of the materials shine through.
Bringing Frames to Life: 5 Essential Tips for a Simple Miter Joint
- Start with a story: Before you begin cutting, think about the memory or moment you’re framing – it helps you connect with the craft
- Choose your wood wisely: Select a type of wood that resonates with the story you’re telling, and don’t be afraid to experiment with different textures and colors
- Measure twice, cut once: Double-check your measurements to ensure a precise fit, and remember, it’s the imperfections that give character to your frame
- Respect the miter saw: Approach your saw with intention and care, and always keep your hands and mind focused on the cut – it’s a dance between you and the tool
- Sand with love: The final touches are just as important as the first cuts – take your time to smooth out the wood, and feel the satisfaction of creating something with your own hands
Bringing Your Frame to Life: 3 Key Takeaways
Embracing the beauty of imperfections in your handmade picture frame is what gives it character and tells a unique story, so don’t be too hard on yourself if your miter joints aren’t perfect
Mastering the miter saw is key to creating stunning picture frames, and with practice, you’ll find that cutting precise 45-degree angles becomes second nature, allowing you to focus on the creative aspects of your project
Remember, the process of making something with your own hands is just as important as the final product – enjoy the journey, take your time, and don’t hesitate to experiment with different materials and designs to make your picture frame truly one-of-a-kind
The Heart of the Joint
A miter joint is more than just a precise cut – it’s where two stories meet, where the grain of one piece of wood whispers to the grain of another, creating a union that’s both strong and beautiful.
Finn Rivera
Bringing Your Vision to Life
As we’ve journeyed through the process of creating a simple miter joint for a picture frame, I hope you’ve come to realize that it’s not just about the technical skills, but about infusing your project with character. We’ve covered the essential steps, from preparing your wood to making those precise 45-degree cuts with a miter saw. The miter saw secrets and 45-degree cutting tips we’ve discussed are designed to help you overcome common obstacles and ensure your frame turns out beautifully. By following these guidelines and practicing your craft, you’ll be well on your way to creating frames that tell a story.
Now, as you put the final touches on your picture frame, remember that the true beauty lies not just in the precision of the miter joint, but in the soul you’ve poured into it. Every imperfection, every slight deviation from perfection, is a testament to the human touch. So, don’t be afraid to experiment, to try new things, and to make mistakes. For it’s in these moments of uncertainty that we often discover our most innovative solutions, and our creations become truly meaningful. Happy crafting, and I look forward to seeing the stories you’ll tell through your handmade frames.
Frequently Asked Questions
What type of wood is best suited for making a picture frame with a miter joint?
For a picture frame with a miter joint, I recommend using woods with a rich character, like oak or walnut. These hardwoods add a sense of warmth and story to your frame. Softwoods like pine or fir can also work, but they might not hold the joint as securely. Experiment with different woods to find the one that tells your story best.
How do I ensure a tight and precise fit between the two pieces of wood in a miter joint?
To get that tight and precise fit, I always say it’s all about the cut’s integrity. Make sure your miter saw blade is sharp, and take your time cutting those 45-degree angles. A little trick I use is to slightly adjust the saw’s fence to account for any wood imperfections – it’s amazing how much of a difference that tiny tweak can make in the final fit.
Can I use a handheld saw or do I need a miter saw to make accurate 45-degree cuts for my picture frame?
While a handheld saw can work, it’s tough to get precise 45-degree cuts. A miter saw is ideal for accuracy, but if you don’t have one, use a miter box or a guide with your handheld saw to help you stay on track – it’s all about giving your cuts a little extra love and care.


