5 Creative Diy Picture Frame Ideas
I still remember the first time I created a handmade picture frame – it was a revelation. I had been restoring vintage furniture for years, but there was something special about giving new life to a cherished memory by framing it with my own hands. That’s why I’m excited to share my favorite creative diy picture frame ideas with you, to help you bring a personal touch into your home. For me, it’s not just about decorating a room, but about telling a story through the objects we create. I believe that the imperfections in handmade objects are what give them their soul, and that’s what makes DIY projects so unique.
In this guide, I’ll walk you through some of my favorite DIY picture frame projects that will help you add a touch of warmth and character to your space. You’ll learn how to create whimsical frames using reclaimed wood, leather, and other natural materials. I’ll share my tips and tricks for working with different materials, and provide you with practical advice on how to bring your vision to life. Whether you’re a seasoned DIY enthusiast or just starting out, I promise that you’ll find inspiration in these creative diy picture frame ideas to frame your story and make it truly unforgettable.
Table of Contents
- Guide Overview: What You'll Need
- Step-by-Step Instructions
- Creative Diy Picture Frame Ideas
- Bringing Your Vision to Life: 5 Essential Tips for Creative DIY Picture Frame Ideas
- Embracing the Art of Handmade Frames: 3 Key Takeaways
- The Heart of DIY
- Embracing the Art of DIY Picture Framing
- Frequently Asked Questions
Guide Overview: What You'll Need
Total Time: 1 hour 30 minutes to 3 hours
Estimated Cost: $20 – $100
Difficulty Level: Intermediate
Tools Required
- Miter Saw (for precise angled cuts)
- Drill Press (for drilling holes for hanging hardware)
- Sandpaper (for smoothing out wood surfaces)
- Hot Glue Gun (for bonding decorative items)
- Paintbrushes (various sizes for painting and staining)
Supplies & Materials
- Wooden Picture Frame Molding (available in various widths and styles)
- Plywood or MDF Board (for creating a unique frame backing)
- Mat Board (for adding a professional-looking border)
- Decorative Items (such as seashells, buttons, or fabric for embellishments)
- Hanging Hardware (e.g., picture frame hooks, screws, and nails)
- Wood Stain or Paint (for finishing and protecting the frame)
- 2-in x 4-in lumber (for creating a frame support or shelf)
- Photo or Picture (the main attraction to be framed)
Step-by-Step Instructions
- 1. First, let’s start by gathering our materials, which will include a few basic tools like a miter saw, a drill press, and some sandpaper. We’ll also need our choice of wood for the frame, the photos we want to frame, and any decorative elements we want to add, like stained glass or carvings. I always like to begin a project by making a quick sketch in my notebook to get a sense of the design and proportions.
- 2. Next, we need to prepare our workspace, ensuring it’s clean and clear of any clutter. This step is crucial because it helps us stay focused and avoid mistakes. I find that having a well-organized workspace is essential for any DIY project, as it allows us to work efficiently and safely. Take a moment to sharpen your tools and set out your materials in an accessible way.
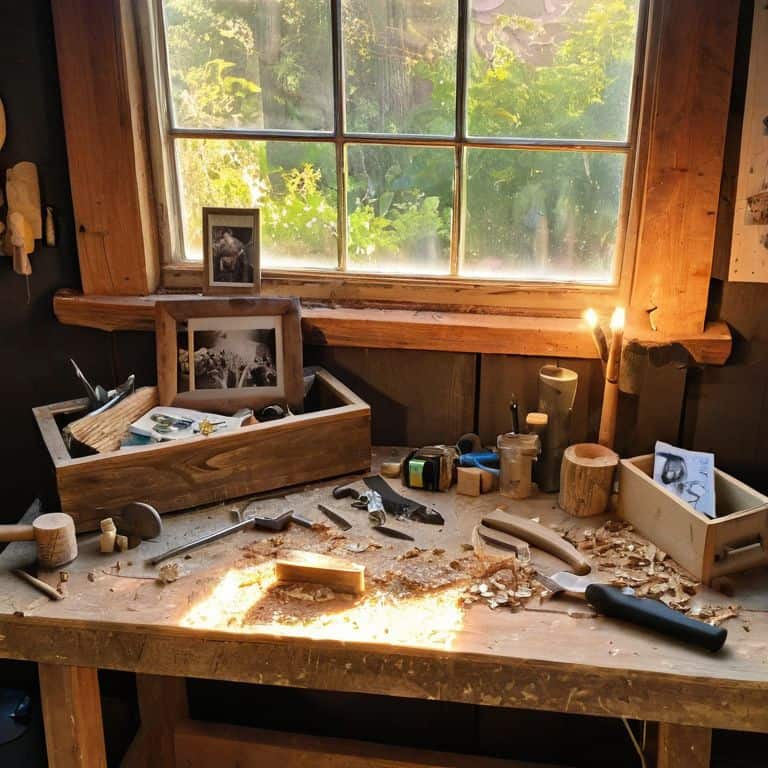
- 3. Now, let’s cut our wood to the appropriate lengths for the frame. This is where our miter saw comes in handy, allowing us to make precise angled cuts. Remember to always measure twice and cut once to avoid any errors. I like to cut a little extra length to allow for any adjustments during the assembly process.
- 4. After cutting our wood, it’s time to assemble the frame. This involves using our drill press to make holes for the screws that will hold the frame together. It’s essential to be careful and precise during this step to ensure the frame is square and sturdy. I often use clamps to hold the pieces in place while I screw them together, which helps prevent any movement or misalignment.
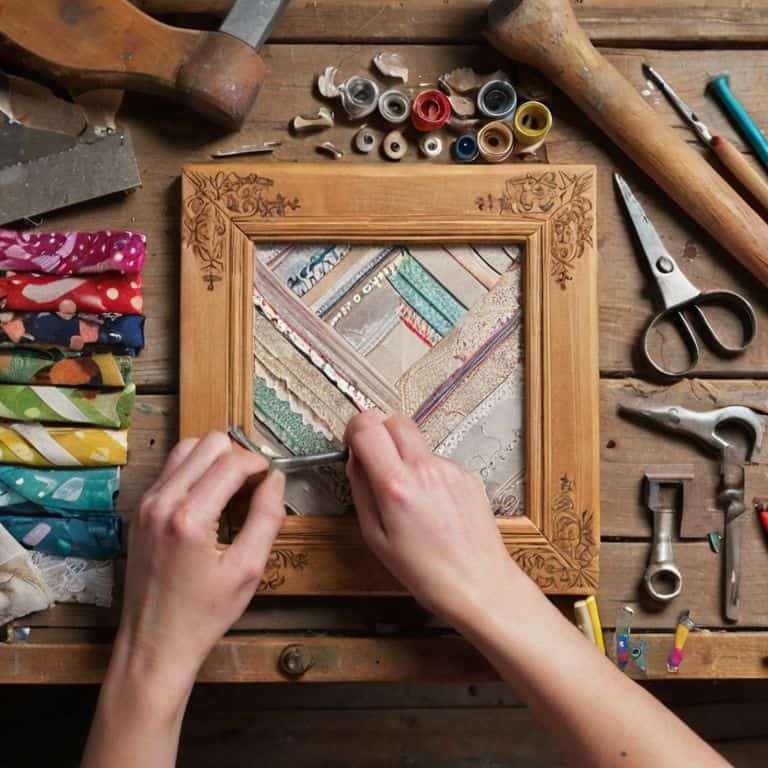
- 5. With the frame assembled, we can move on to adding the decorative elements. This could be anything from staining or painting the wood to adding intricate carvings or patterns. For me, this is the most fun part of the process, as it’s where we can really make the frame unique and personal. Consider what will complement your photo and the style of your home when choosing your decorative elements.
- 6. Next, we’ll attach the photo to the frame. This can be done using a variety of methods, such as gluing the photo directly to a piece of cardboard or foam board that fits inside the frame, or using photo corners for a more traditional look. I prefer the latter because it allows for easy removal and replacement of the photo if needed. Make sure your photo is centered and securely attached.
- 7. Finally, let’s add a finish to our frame to protect the wood and give it a beautiful sheen. This could be a varnish, a wax, or even a natural oil like tung oil. Applying a finish is an art in itself, requiring patience and attention to detail. I always apply a small test patch to an inconspicuous area first to ensure the finish doesn’t affect the color or texture of the wood in an undesirable way.
Creative Diy Picture Frame Ideas
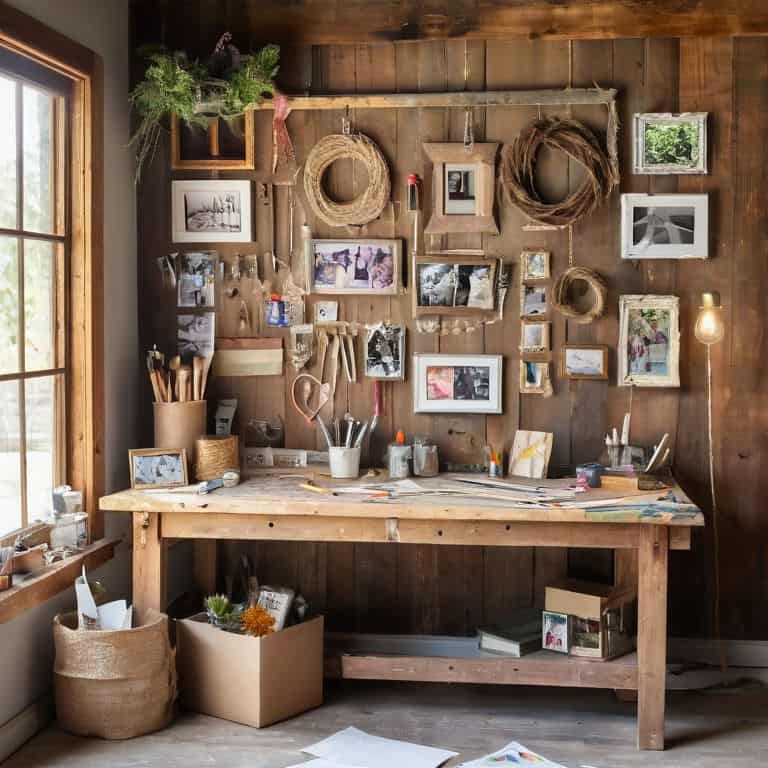
As I delve into the world of reclaimed wood picture frame designs, I’m reminded of the beauty of giving old materials a new life. There’s something special about taking a piece of wood that was once part of a barn or an old fence and turning it into a unique frame that tells a story. When combined with upcycled material picture frame tutorials, the possibilities become endless. You can add metal scraps, old fabric, or even seashells to create a one-of-a-kind piece that reflects your personality.
For those looking to add a touch of elegance to their bedroom, modern picture frame styles can be a great inspiration. Clean lines, minimalist designs, and a focus on easy picture frame making for beginners can help you create a beautiful frame that complements your room’s decor. I’ve found that using a simple design and focusing on the quality of the materials can make a big difference in the overall look and feel of the frame.
When it comes to rustic picture frame decor inspiration, I believe that unique picture frame shapes and sizes can add a lot of character to a room. Instead of using a standard rectangular frame, consider creating a circular or oval frame that adds a touch of whimsy to your space. By experimenting with different shapes and sizes, you can create a truly one-of-a-kind piece that reflects your personal style and adds a touch of soul to your home.
Reclaiming Wood for Unique Frames
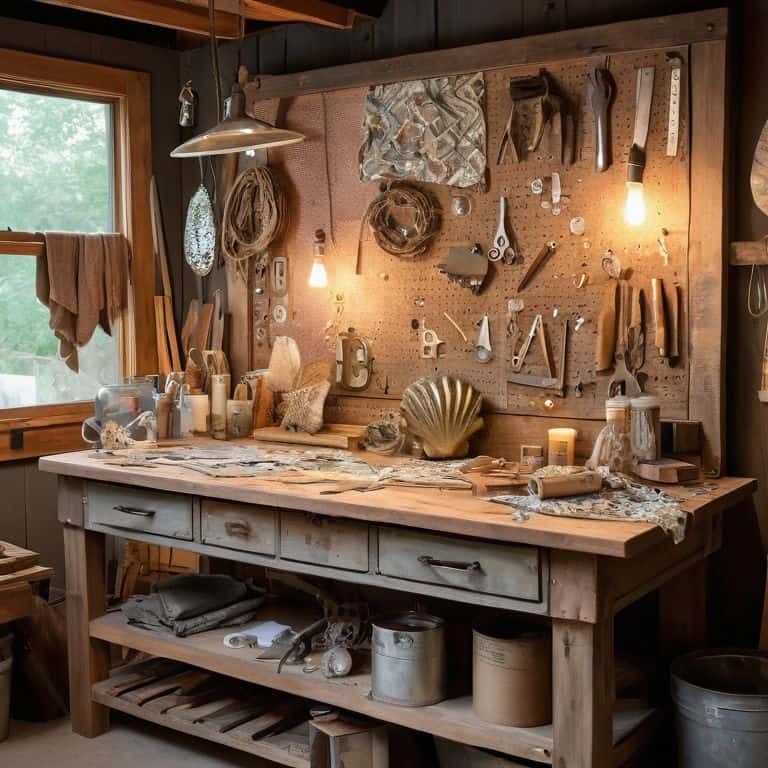
Reclaiming old wood is a great way to add character to your picture frames. I love scouring flea markets and antique shops for vintage wooden pieces, like old doors or windows, that can be repurposed into one-of-a-kind frames. The imperfections in the wood – the scratches, the knots, the worn finish – are what give the frame its soul. By reclaiming this wood, you’re not only reducing waste but also infusing your frame with a rich history. I’ve used reclaimed wood to create beautiful, rustic frames that tell a story of their own, and I encourage you to do the same.
Upcycling Materials for Modern Displays
As I explore the world of creative DIY picture frame ideas, I’m drawn to the art of upcycling materials for modern displays. There’s something special about breathing new life into discarded items, like transforming old windows into stunning frames or repurposing vintage luggage as unique display cases. The possibilities are endless, and I love how upcycling encourages us to think outside the box and see the potential in everyday objects.
By upcycling materials, we not only create one-of-a-kind frames but also reduce waste and give our spaces a touch of personality. I’ve experimented with upcycling old doors, pallets, and even fabric to create distinctive frames that tell a story. The process is just as important as the end result, and I find that the imperfections and character of upcycled materials add a depth and soul to our DIY projects.
Bringing Your Vision to Life: 5 Essential Tips for Creative DIY Picture Frame Ideas
- Start with a story: Before you begin, think about the memory or moment you’re trying to capture – what colors, textures, and materials will bring it to life?
- Experiment with unusual materials: Don’t be afraid to venture beyond traditional frame materials – reclaimed wood, vintage fabrics, or even natural elements like leaves or branches can add an extra layer of depth to your project
- Play with proportions: Mix and match different frame sizes, shapes, and orientations to create a unique gallery wall that reflects your personality
- Add a personal touch: Incorporate meaningful objects or mementos into your frame design, like a piece of jewelry, a coin, or a handwritten note, to make it truly one-of-a-kind
- Embrace the imperfections: Remember, it’s the handmade imperfections that give your DIY picture frame its character – don’t be too hard on yourself if things don’t turn out exactly as planned, and learn to love the unexpected surprises that come with creating something by hand
Embracing the Art of Handmade Frames: 3 Key Takeaways
I’ve found that the most meaningful picture frames are those that tell a story, whether it’s through the type of wood used, the way the light reflects off the glass, or the imperfections that come with being handmade
Reclaiming and upcycling materials not only reduces waste but also infuses the frames with a history and character that mass-produced items often lack, making each piece a unique reflection of the creator’s touch
By embracing the process of creating something with our own hands, we can slow down, appreciate the beauty in natural materials, and craft items that become treasured family heirlooms, each one a testament to the power of DIY as a form of personal storytelling
The Heart of DIY
A handmade picture frame is more than just a decorative piece – it’s a testament to the human touch, a celebration of imperfections, and a reminder that the stories we tell are just as important as the memories we hold.
Finn Rivera
Embracing the Art of DIY Picture Framing
As we’ve explored the world of creative DIY picture frame ideas, it’s clear that the process of making something with your own hands is just as important as the end result. From reclaiming wood for unique frames to upcycling materials for modern displays, each project is an opportunity to tell a story and bring a piece of yourself into your home. By embracing the imperfections and character that come with handmade objects, you’re not only creating a beautiful piece of decor, but also a meaningful connection to the materials and the process.
So, as you embark on your own DIY picture framing journey, remember that it’s okay to take your time and make mistakes – they’re all part of the story. Don’t be afraid to experiment, try new things, and let your creativity shine. With every frame you create, you’re not just hanging a picture, you’re sharing a piece of yourself and the love that went into making it. Happy crafting, and I hope you’ve enjoyed this journey into the world of creative DIY picture frame ideas as much as I have!
Frequently Asked Questions
What are some creative ways to combine different materials, like wood and metal, to create a one-of-a-kind picture frame?
I love experimenting with mixed materials, like combining reclaimed wood with industrial metal accents. For a unique frame, try pairing wooden corners with metal straps or embellishing a wooden frame with metal geometric patterns. The contrast between natural and industrial elements creates a fascinating visual story, making each frame truly one-of-a-kind.
How can I add a personal touch to my DIY picture frame, such as engravings or paintings, without compromising the frame's structural integrity?
To add a personal touch, I love incorporating subtle engravings or paintings that complement the frame’s natural materials. For engravings, use a gentle hand and a fine-tip tool to avoid compromising the wood’s integrity. For paintings, opt for waterproof, non-toxic paints and apply them sparingly to maintain the frame’s structural soundness.
What are some tips for selecting the perfect reclaimed or upcycled wood to match the style and tone of the photo I want to frame?
When selecting reclaimed or upcycled wood, I consider the photo’s tone and style. For a vintage look, I opt for weathered wood with character-filled imperfections. For a modern feel, I choose wood with a cleaner, more minimalist grain pattern. The key is to balance the wood’s story with the photo’s narrative, creating a harmonious union that elevates both.


