A Project Guide: How to Dye With Indigo Using a Shibori Technique
I still remember the first time I tried how to dye with indigo using a shibori technique – it was like uncovering a hidden world of possibilities. The process was mesmerizing, and the results were nothing short of magical. But what really drew me in was the sense of storytelling that came with every fold, every twist, and every dip into the indigo vat. It’s a common misconception that shibori is just about tying and dyeing fabric, but the truth is, it’s an art form that requires patience, intention, and a willingness to let go of perfection.
As you embark on this journey to learn how to dye with indigo using a shibori technique, I want to assure you that it’s not just about following a set of instructions – it’s about embracing the unknown and allowing yourself to be guided by the natural beauty of the materials. In this article, I’ll share my personal approach to shibori, including the essential tools and materials you’ll need to get started, as well as some practical tips for achieving unique, one-of-a-kind patterns. My goal is to inspire you to slow down, get creative, and tap into the meditative quality of this ancient craft, so you can unlock the full potential of indigo dyeing with shibori.
Table of Contents
Guide Overview: What You'll Need
Total Time: 4 hours 30 minutes
Estimated Cost: $50 – $100
Difficulty Level: Intermediate
Tools Required
- Large bucket or container (at least 12 inches deep and 24 inches wide)
- Measuring cups and spoons
- Stirring stick or spoon (long handle recommended)
- Gloves (rubber or latex)
- Twine or string (for shibori technique)
- Pliers or clips (for folding and binding fabric)
Supplies & Materials
- Indigo dye powder (1/2 cup to 1 cup)
- Soda ash (1 cup)
- Salt (1/2 cup)
- Hot water (enough to fill the bucket, approximately 5 gallons)
- Fabric to dye (natural fibers like cotton, linen, or silk work best)
- Synthetic fabric binder or fixative (optional)
Step-by-Step Instructions
- 1. To begin our journey into the world of indigo dyeing with shibori, we first need to prepare our indigo dye bath. This involves mixing the indigo powder with hot water in a large container, making sure to stir it well until the powder is fully dissolved. It’s essential to wear protective gloves and work in a well-ventilated area to avoid any potential health hazards.
- 2. Next, we need to decide on the shibori technique we want to use for our project. Shibori is all about folding, twisting, or pleating the fabric to create resistance areas where the dye cannot penetrate, resulting in unique patterns. There are several techniques to choose from, including kanoko, nui, and kumo, each producing distinct designs.
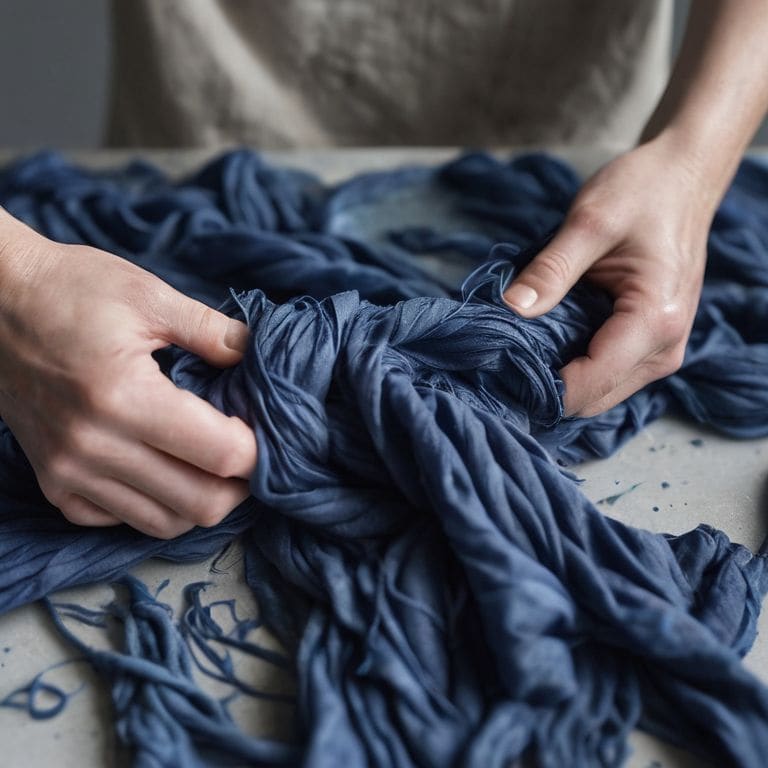
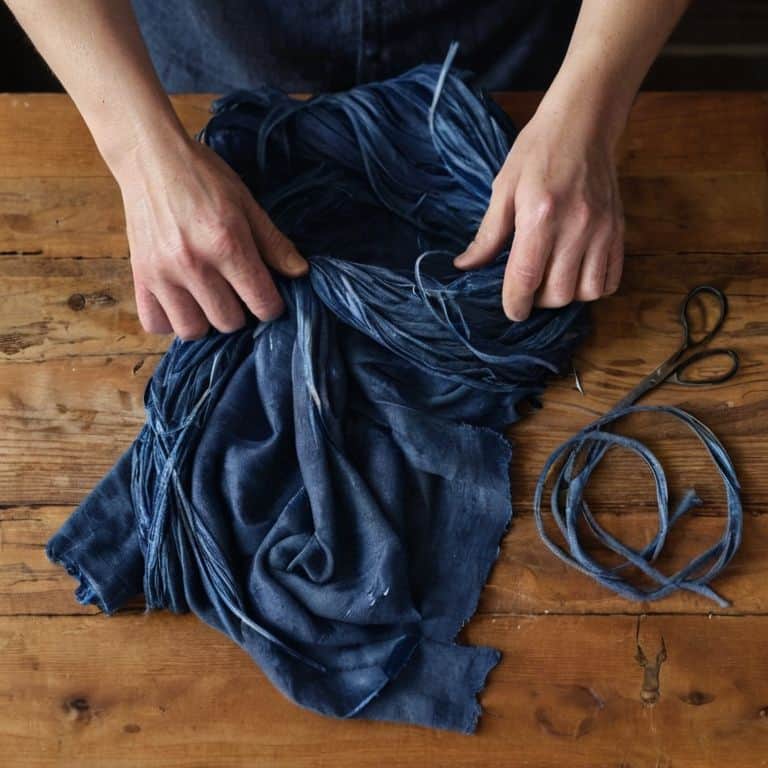
- 3. Once we’ve chosen our shibori method, it’s time to fold and bind our fabric. This is where patience and creativity come into play. For a simple start, we can try the accordion fold, folding the fabric into small, uniform pleats and then binding it with thread or rubber bands. The way we fold and bind the fabric will directly influence the final pattern.
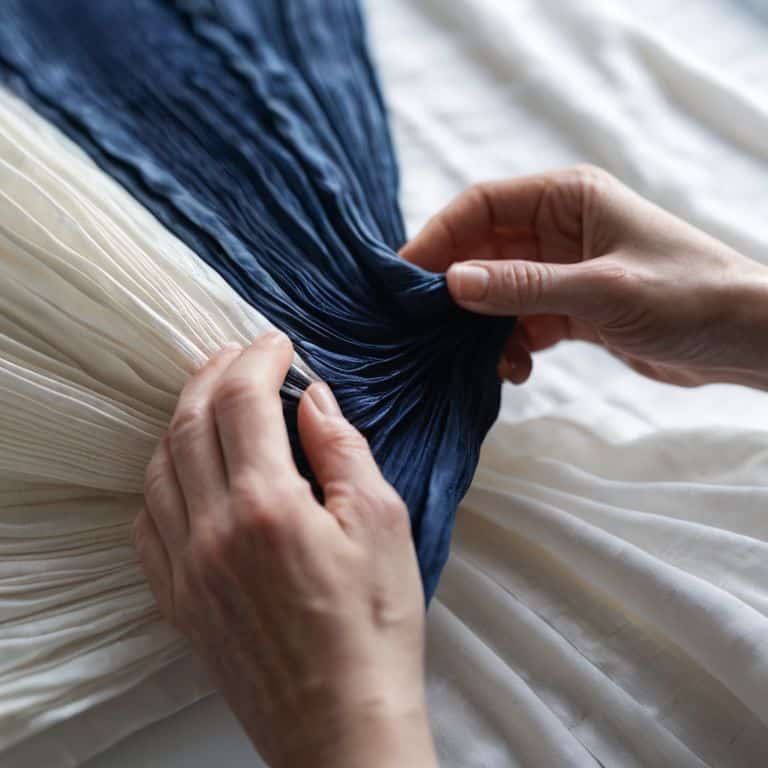
- 4. With our fabric prepared, we can now submerge it into the indigo dye bath. It’s crucial to gently push the fabric beneath the surface to ensure it’s fully covered by the dye. The longer we leave the fabric in the dye, the deeper the color will be. However, for a more nuanced effect, we might opt for shorter submersion times, allowing for a lighter, more pastel shade of indigo.
- 5. After the fabric has been dyed to our desired shade, we need to carefully remove it from the dye bath and rinse it gently with cold water to stop the dyeing process. This step requires delicacy to avoid damaging the fabric or disrupting the folds that create the shibori pattern.
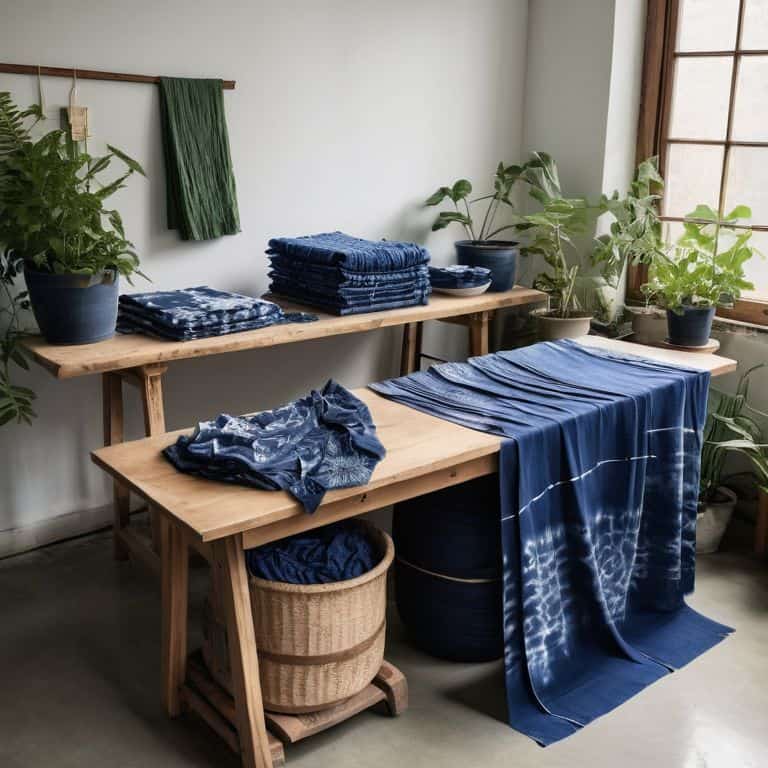
- 6. The moment of truth arrives when we unwrap our fabric to reveal the unique pattern created by the shibori technique. This is always an exciting moment, as the result is never entirely predictable, and the imperfections in the pattern are what make each piece truly one-of-a-kind.
- 7. Finally, to fix the dye and enhance the color, we should wash the fabric in warm water with a mild detergent and then dry it naturally. This step not only ensures the durability of the dye but also brings out the vibrancy of the indigo, giving our handmade piece a professional finish.
Unfolding Indigo Stories
As I delve deeper into the world of indigo, I’m constantly reminded of the beauty of indigo plant based dye. The way it can transform a simple piece of fabric into a unique work of art is truly mesmerizing. One of the key aspects of working with indigo is understanding the importance of resist dyeing methods, which allow us to create intricate patterns and designs. Shibori folding techniques are a perfect example of this, as they enable us to manipulate the fabric in a way that creates resistance areas, resulting in stunning, one-of-a-kind patterns.
When it comes to working with indigo, it’s essential to appreciate the natural indigo dye process. This involves allowing the dye to unfold slowly, often resulting in unexpected, yet beautiful, outcomes. I’ve found that embracing this process, rather than trying to control it, is key to creating truly unique pieces. By surrendering to the natural flow of the dye, we can create textiles that tell a story, with each fold and crease becoming a part of the narrative.
As I continue to explore the world of indigo, I’m drawn to the japanese indigo dyeing traditions, which emphasize the importance of patience, dedication, and respect for the craft. These traditions remind us that the process of creating something beautiful is just as important as the end result. By adopting a mindset that values sustainable textile practices, we can not only create stunning pieces but also contribute to a more environmentally conscious approach to textile production.
Shibori Folding for Natural Beauty
As I fold and bind the fabric, I feel like I’m infusing it with a sense of history. The way the indigo seeps into the folds, creating unique patterns, is like a testament to the human touch. I love how shibori folding can transform a plain piece of cloth into a work of art, with each crease and knot telling a story of its own. The imperfections that arise from this process are what make it truly special – a reminder that beauty lies in the unpredictable.
In my experience, the key to achieving natural beauty with shibori lies in embracing the unknown. Don’t overthink the folds; let your hands guide you, and the indigo will do the rest. As the fabric unfolds, you’ll reveal a one-of-a-kind design that’s as much about the journey as the destination.
Sustainable Indigo Dyeing Traditions
As I delve deeper into the world of indigo dyeing, I’m constantly reminded of the importance of sustainability. Traditional indigo dyeing methods not only produce breathtaking results, but they also promote a slower, more mindful approach to crafting. By using natural indigo plants and minimizing waste, we can create stunning textiles while reducing our environmental footprint. This approach resonates deeply with me, as it echoes the values of urban gardening and handmade craftsmanship that I hold dear.
In embracing sustainable indigo dyeing traditions, we’re not only preserving ancient techniques, but also honoring the connection between nature and our creative expression. By choosing to work with natural materials and adopting eco-friendly practices, we can ensure that our handmade objects are not only beautiful, but also tell a story of responsibility and respect for the planet.
Weaving Wisdom: 5 Essential Tips for Indigo Shibori Dyeing
- Start with the right fabric: Look for natural fibers like cotton, linen, or silk, as they absorb the indigo dye beautifully and allow for a more nuanced expression of the shibori technique
- Experiment with folding techniques: From simple accordion pleats to more intricate knotting and twisting, the way you fold your fabric is what creates the unique patterns and resist areas that make shibori so captivating
- Respect the indigo: This ancient dye is notoriously finicky, so be patient and gentle when working with it – avoid over-agitating the dye bath, and make sure your fabric is fully submerged for an even color
- Consider the water: The quality and temperature of the water you use can significantly impact the final color and texture of your dyed fabric, so opt for soft, lukewarm water for the best results
- Embrace the unexpected: Shibori is all about happy accidents and surprising patterns, so don’t be too hard on yourself if things don’t turn out exactly as planned – it’s all part of the charm and character of this handmade process
Embracing the Art of Indigo: 3 Key Takeaways
By combining indigo dye with shibori techniques, you can create unique, handmade textiles that tell a story of their own, reflecting the beauty of natural imperfections
Embracing sustainable traditions in indigo dyeing not only reduces environmental impact but also connects us to the rich cultural heritage of this ancient craft, where every fold and every dip into the dye vat is a testament to human touch
Through the process of shibori folding and indigo dyeing, you’re not just creating a piece of fabric – you’re crafting a narrative that weaves together tradition, creativity, and the inherent beauty of natural materials, making each piece a reflection of your personal story
Embracing the Art of Imperfection
As I fold and bind the fabric, preparing it for the indigo bath, I’m reminded that the true beauty of shibori lies not in the precision of the folds, but in the unpredictable dance of dye and textile – it’s in these imperfections that our stories are woven.
Finn Rivera
Embracing the Art of Indigo
As we conclude this journey into the world of indigo dyeing with shibori, let’s reflect on the key elements that make this craft so unique. From the initial preparation of the indigo vat to the careful folding of the fabric using shibori techniques, each step is an opportunity to connect with the natural world and express our creativity. The process of unfolding stories in blue is not just about dyeing fabric, but about the patience, dedication, and attention to detail that goes into creating something truly special. Whether you’re drawn to the sustainable traditions of indigo dyeing or the innovative possibilities of shibori, this craft has the power to inspire and transform.
As you embark on your own indigo dyeing journey, remember that the true beauty of this craft lies in its imperfections and unpredictabilities. The art of shibori is a testament to the human touch, a celebration of the unique and the handmade. So, don’t be afraid to experiment, to try new things, and to make mistakes. For it’s in these moments of uncertainty that we often discover our most authentic creations. And as you wrap your hands around a freshly dyed piece of fabric, feeling the softness of the material and the depth of the color, you’ll know that you’ve created something truly special – a piece of yourself, woven into the very fabric of the world.
Frequently Asked Questions
What are some common mistakes to avoid when folding fabric for shibori indigo dyeing?
When folding for shibori, I’ve found that over-folding can lead to a loss of natural texture, while under-folding might not create enough resistance for the dye to penetrate. It’s all about finding that sweet spot where the fabric can still breathe, allowing the indigo to dance across its folds in unexpected ways.
How can I achieve consistent, deep blue colors with indigo dye, and what factors affect the final shade?
To achieve those rich blues, I’ve found that it’s all about the balance of dye, water, and time. The key is to create an environment where the indigo can fully bond with the fabric. I always say, the slower and more gentle the process, the deeper the color. Factors like temperature, fabric type, and the number of dips all play a role in getting that perfect shade.
Are there any safety precautions I should take when working with indigo dye, and how can I properly dispose of leftover dye and materials?
When working with indigo, I always wear gloves and work in a well-ventilated space to avoid skin irritation and inhaling the dye particles. As for disposal, I mix leftover dye with sawdust or soil to neutralize it, then discard it in a sealed bag. It’s all about respecting the process and the planet.


