A Guide on How to Make a Simple Dovetail Joint
I still remember the first time I attempted to make a simple dovetail joint. I was restoring an old dresser, and I wanted to add a touch of handmade charm to the drawers. But, as I soon discovered, the process wasn’t as straightforward as I thought it would be. There’s a common myth that creating a dovetail joint is a daunting task, requiring years of experience and specialized tools. However, I’ve found that with the right guidance and a bit of patience, anyone can learn how to make a simple dovetail joint that’s both functional and beautiful.
As you read through this article, I promise to share my honest, no-hype advice on the process, from preparing your materials to cutting and assembling the joint. You’ll learn the importance of precision and how to achieve it, even if you’re a beginner. My goal is to empower you with the knowledge and confidence to create your own unique pieces, whether it’s a wooden box or a custom furniture item. By the end of this guide, you’ll be equipped with the skills to make a simple dovetail joint that will elevate your DIY projects and bring a sense of pride to your creations.
Table of Contents
- Guide Overview: What You'll Need
- Step-by-Step Instructions
- Soulful Dovetail Journey
- The Artisan's Touch: 5 Essential Tips for Crafting a Simple Dovetail Joint
- Embracing the Art of Dovetailing: 3 Key Takeaways
- The Heart of the Joint
- Embracing the Beauty of Handcrafted Joints
- Frequently Asked Questions
Guide Overview: What You'll Need
Total Time: 2 hours 30 minutes
Estimated Cost: $20 – $40
Difficulty Level: Intermediate
Tools Required
- Table Saw for cutting lumber to size
- Miter Saw for precise angled cuts
- Dovetail Jig for creating dovetail patterns
- Copier or Pencil for marking cut lines
- Clamp for holding pieces in place during gluing
- Sandpaper for smoothing out wood surfaces
Supplies & Materials
- 2-in x 4-in lumber for creating the joint
- Wood Glue for bonding the pieces together
- 1 1/4 inches wood screws for added reinforcement
- Wood filler for filling any gaps or holes
Step-by-Step Instructions
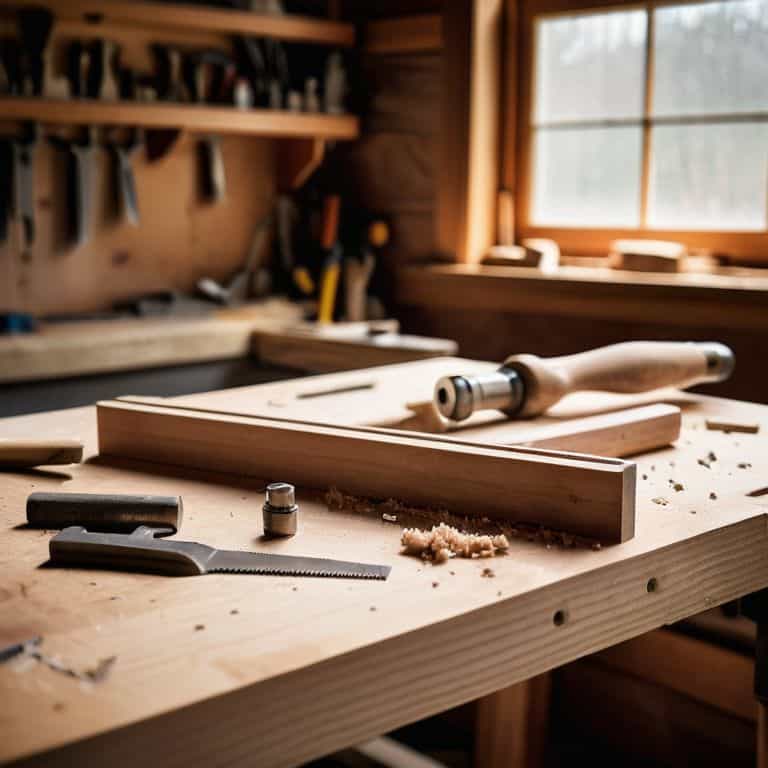
- 1. To begin, let’s start by preparing our workspace. This means clearing off any clutter, laying out our tools, and ensuring that our work surface is clean and dry. I like to take a moment to appreciate the beauty of the wood I’m about to work with, feeling the texture and smelling the scent of the material. It’s a small moment of connection that helps me get into the right mindset for creating something special.
- 2. Next, we need to select our wood. For a simple dovetail joint, you’ll want to choose two pieces of wood that are similar in thickness and texture. I prefer to use woods with unique grain patterns, as they add an extra layer of character to the finished piece. Take your time when selecting the wood, as the right choice can make all the difference in the final product.
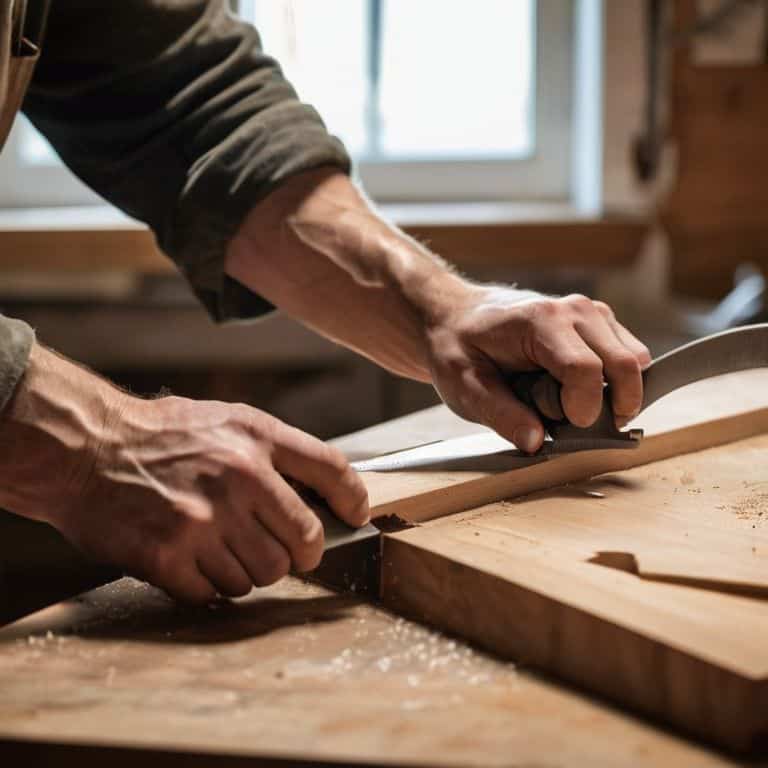
- 3. Now, let’s move on to cutting our tails. This is the part of the process where we create the distinctive interlocking tails that give the dovetail joint its name. To do this, you’ll need to use a dovetail saw or a coping saw, depending on the specific design you’re aiming for. Remember to cut slowly and carefully, as the precision of your cuts will directly impact the strength and beauty of the joint.
- 4. With our tails cut, it’s time to create the pins. This involves cutting a series of small, angled cuts in the corresponding piece of wood. The key here is to make sure that the pins are evenly spaced and precisely angled, as this will ensure a snug and secure fit when the joint is assembled. Don’t be afraid to take your time and double-check your measurements – it’s better to be safe than sorry.
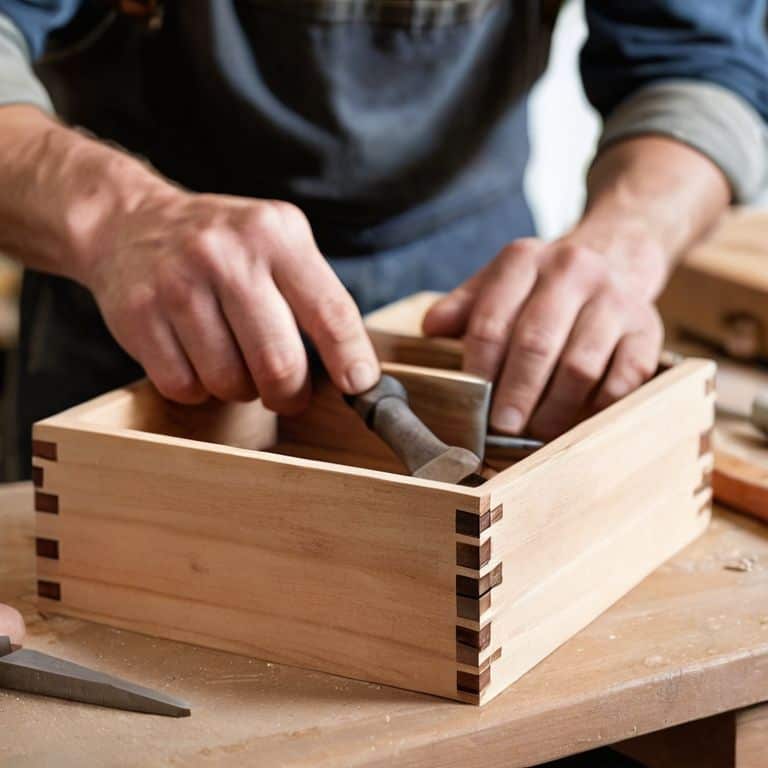
- 5. Once we have our tails and pins cut, we can move on to assembling the joint. This is the moment when all your hard work comes together, and you get to see the joint take shape. Start by applying a small amount of glue to the pins, then carefully slide the tails into place. Use a combination of clamps and cauls to hold everything in position while the glue dries.
- 6. As the glue dries, take a moment to inspect and refine the joint. Check for any gaps or imperfections, and make any necessary adjustments. This is also a good time to add any additional details, such as decorative trim or a finish coat of oil or wax. Remember, the imperfections are what give the piece its character, so don’t be too hard on yourself if things aren’t perfect.
- 7. Finally, let’s add a finish to our piece. This could be a simple coat of oil or wax, or something more elaborate like a stain or paint. The choice is yours, but remember to choose a finish that complements the natural beauty of the wood. As you apply the finish, take a step back and admire your handiwork – you’ve just created something truly special, a testament to the power of human craftsmanship.
Soulful Dovetail Journey
As I reflect on my journey with dovetail joints, I’m reminded that mastering the technique is just the beginning. It’s the attention to detail that sets a truly skilled craftsman apart. For beginners, I recommend starting with dovetail joint techniques for beginners that focus on hand-cut joints. There’s something special about using a dovetail saw to carefully craft each joint, rather than relying on machinery.
One of the most common challenges I see is achieving tight dovetail joints. This is where marking and cutting become crucial. Take your time to ensure accurate measurements, and don’t be afraid to practice with scrap wood. I also find that using a coping saw can be helpful for more intricate cuts, but it’s essential to understand the difference between a dovetail saw vs coping saw to choose the right tool for the job.
As you continue to hone your skills, remember that practice exercises are key to developing muscle memory. Try creating a series of dovetail joints with varying angles and sizes to challenge yourself. With patience and dedication, you’ll find that your joints become stronger and more precise, allowing you to create truly beautiful pieces that showcase your craftsmanship. By focusing on the process, you’ll discover that the soul of the craft lies in the imperfections and nuances that make each piece unique.
Tight Joints Happy Heart Tips for Dovetail Success
As I work on a dovetail joint, I feel a sense of connection to the wood and the craft. It’s about creating something that’s not just functional, but also beautiful. To achieve this, I’ve learned a few tips that make all the difference. For instance, using the right type of wood and ensuring that my tools are sharp can greatly impact the outcome. A gentle touch and patience are also essential – it’s not just about cutting and assembling, but about coaxing the pieces together to form a strong, elegant joint.
By paying attention to these details, I’ve found that my dovetail joints have become tighter and more precise, giving me a sense of satisfaction and joy in the process. It’s this attention to detail that makes handmade objects truly special, and it’s what I hope to pass on to you through my craft.
Whispering Wood to Life Hand Cut Dovetail Basics
As I sit at my workbench, surrounded by the scent of freshly cut wood, I’m reminded that hand-cut dovetail joints are more than just a technique – they’re a meditation. The gentle rhythm of the saw, the soft whisper of the wood as it yields to the blade, it’s a symphony of sound and sensation that never gets old. With each careful cut, I feel a sense of connection to the craft, to the wood, and to the story that’s unfolding.
In this quiet, intentional process, I find a sense of peace and purpose. The imperfections that arise from hand-cutting dovetails aren’t mistakes, but rather a testament to the human touch – a reminder that this piece was crafted with love and care, not churned out by a machine. As you embark on your own dovetail journey, I encourage you to slow down, breathe in the scent of the wood, and let the process become a part of the story you’re telling.
The Artisan's Touch: 5 Essential Tips for Crafting a Simple Dovetail Joint
- Choose Your Wood Wisely: Selecting the right type of wood for your project can make all the difference in the success of your dovetail joint – look for wood with a straight grain and minimal knots
- Mark with Intention: Take your time when marking your wood for the dovetail joint, as accurate measurements are crucial for a tight and even fit
- Cut with Confidence: Use a sharp saw and a gentle touch when cutting your dovetail joints, remembering that it’s better to take small, careful cuts than to risk cutting too much at once
- Chisel with Care: When chiseling out the waste material from your dovetail joint, work slowly and carefully, using a mallet to tap the chisel and avoid splitting the wood
- Fit with Patience: Don’t be afraid to take your time when fitting the pieces of your dovetail joint together – a little patience and persistence can make all the difference in achieving a seamless and sturdy bond
Embracing the Art of Dovetailing: 3 Key Takeaways
As you embark on your dovetail journey, remember that patience and practice are your greatest allies in mastering this timeless technique.
Hand-cut dovetails, though more challenging, offer a level of personalization and character that machine-cut joints simply can’t replicate, making each piece truly unique.
Whether you’re a seasoned woodworker or just starting out, the process of creating a simple dovetail joint is not just about the technical steps, but about the story you tell with every cut, every joint, and every finished piece that comes to life in your workshop.
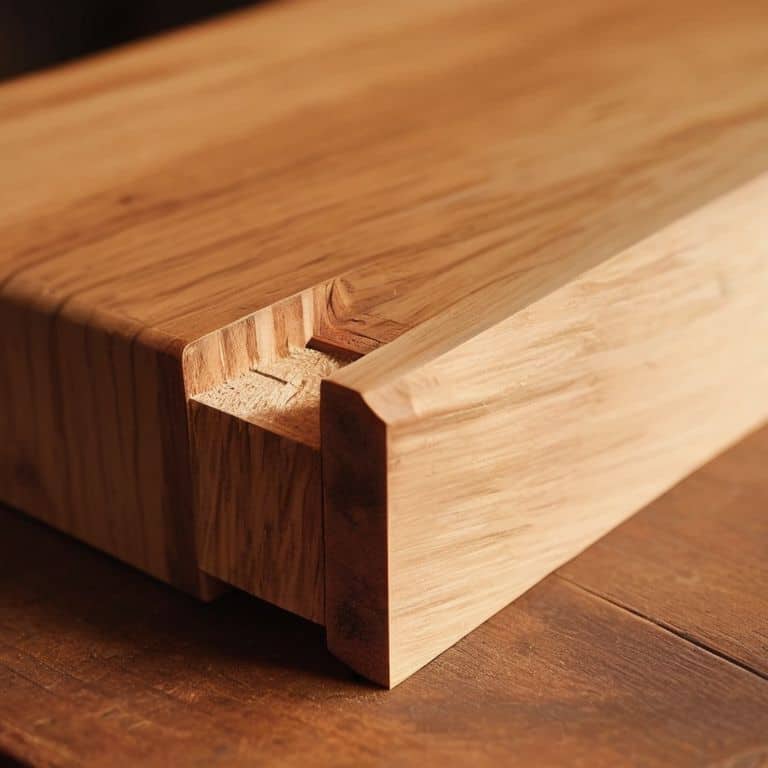
The Heart of the Joint
A simple dovetail joint is not just a union of two pieces of wood, but a testament to the human touch – where precision meets imperfection, and beauty is born from the gentle persuasion of the craftsman’s hand.
Finn Rivera
Embracing the Beauty of Handcrafted Joints
As we conclude our journey through the world of simple dovetail joints, let’s take a moment to reflect on the key elements that make this technique so unique. From the initial cuts to the final assembly, each step requires patience, attention to detail, and a willingness to embrace the imperfections that make each piece truly one-of-a-kind. By following the steps outlined in this guide, you’ve not only learned a valuable skill, but you’ve also taken the first step towards creating something that tells a story – a story of your own creativity and craftsmanship.
As you continue to hone your skills and explore the world of woodworking, remember that the true beauty of a handcrafted joint lies not just in its functionality, but in the soul you pour into it. So, don’t be afraid to experiment, to try new things, and to push the boundaries of what’s possible. With every cut, every shape, and every assembly, you’re not just building a piece of furniture – you’re building a piece of yourself, and that’s what makes it truly special.
Frequently Asked Questions
What type of wood is best suited for creating a simple dovetail joint?
For a simple dovetail joint, I recommend using woods with a tighter grain, like oak or maple. These hardwoods respond beautifully to hand tools and provide a crisp, clean cut. Softwoods can work too, but they might be more prone to tear-out. Experiment with different woods to find your favorite – it’s all part of the journey.
How do I ensure accurate measurements and cuts when hand-cutting a dovetail joint?
For accurate measurements and cuts, I rely on a combination of careful marking, a sharp pencil, and a trusty cutting gauge. I also take my time to double-check each mark, ensuring that my cuts are precise and intentional. It’s a meditative process, really – one that requires patience, attention to detail, and a willingness to slow down and listen to the wood.
What are some common mistakes to avoid when assembling and gluing a dovetail joint to ensure a strong and durable bond?
As I assemble and glue my dovetail joints, I’m always mindful of a few common pitfalls. Uneven clamping pressure and insufficient glue application can lead to weak bonds, while rushing the drying process can cause the joint to shift. To avoid these mistakes, take your time, apply even pressure, and let the glue dry slowly – patience is key to a strong and durable dovetail joint.


