A Guide on How to Create a Simple Portrait Backdrop at Home
I still remember the first time I tried to create a portrait backdrop at home – it was a disaster. I had heard that how to create a simple portrait backdrop at home was all about using expensive equipment and intricate lighting setups. But as I delved deeper into the world of photography, I realized that this was just a myth. The truth is, a great portrait backdrop can be created with minimal equipment and a lot of creativity. I’ve spent years honing my skills, and now I’m excited to share my knowledge with you.
In this article, I’ll show you the simple yet effective techniques I use to create stunning portrait backdrops at home. You’ll learn how to use everyday objects to create unique and interesting backgrounds, and how to harness the power of natural light to elevate your portraits. Whether you’re a seasoned photographer or just starting out, this guide will give you the practical advice you need to take your portrait photography to the next level. So, let’s get started and explore the world of DIY portrait backdrops, and discover how to create beautiful, professional-looking portraits in the comfort of your own home.
Table of Contents
Guide Overview: What You'll Need

Total Time: 1 hour 45 minutes
Estimated Cost: $20 – $40
Difficulty Level: Easy
Tools Required
- Tape Measure
- Level
- Pencil
- Scissors
- Staple Gun (with staples)
- Drill (optional)
Supplies & Materials
- Large Piece of Fabric (at least 6 feet by 9 feet)
- PVC Pipe or 1 inch x 2 inch Lumber (for frame)
- Corner Connectors (for PVC pipe or lumber)
- Backdrop Stand (optional)
- Clamps (for securing fabric)
- Duct Tape (for temporary fixes)
Step-by-Step Instructions
- 1. First, let’s start by assessing the space where we’ll be creating our portrait backdrop. Look for a room with plenty of natural light, as this will help us achieve a more flattering and soft illumination on our subject. Consider the color of the walls and the furniture in the room, as these can either complement or distract from our backdrop.
- 2. Next, we need to decide on the type of backdrop we want to create. For a simple and versatile option, I recommend using a large piece of fabric or a canvas. You can choose a plain colored fabric, or get creative and use a patterned or textured one to add some visual interest to your portraits. I personally love using a vintage-inspired fabric to give my backdrops a unique and nostalgic feel.
- 3. Now, let’s talk about the hardware we’ll need to set up our backdrop. You’ll need a sturdy frame or a backdrop stand to hold your fabric or canvas in place. You can purchase a dedicated backdrop stand or get creative and use a DIY solution, such as a PVC pipe frame or a wooden dowel. Make sure your frame is stable and secure, as you don’t want it to collapse or move around during your photo shoot.
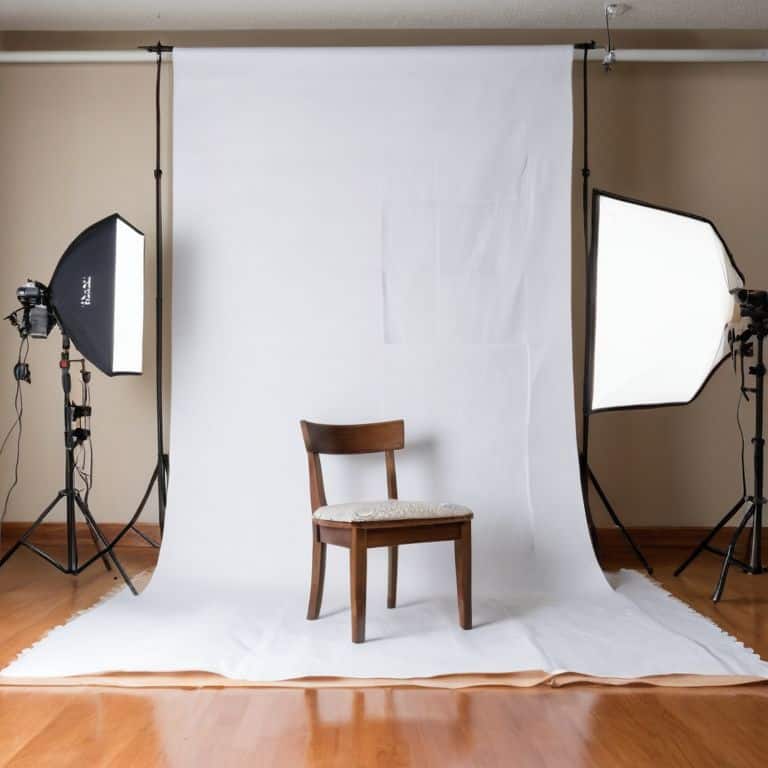
- 4. With our frame and fabric in place, it’s time to think about lighting. Natural light is always the best option, but if you’re shooting indoors, you’ll need to set up some artificial lighting. I recommend using a combination of softbox lights and reflectors to achieve a soft, wrinkle-free light that flatters your subject. Experiment with different lighting setups to find the one that works best for your portrait style.
- 5. Once we have our backdrop and lighting set up, it’s time to think about composition. Consider the rule of thirds, and think about how you can use your backdrop to create a sense of depth and interest in your portraits. You can use props, furniture, or even the background itself to create a sense of context and storytelling. Remember, the goal is to create a simple yet stunning portrait backdrop that complements your subject, rather than overpowering them.
- 6. Now, let’s talk about textures and patterns. If you’re using a plain colored fabric, you can add some visual interest by incorporating textures and patterns into your backdrop. You can use a distressed fabric, or add some props such as vintage suitcases, rugs, or even a old door to create a unique and eclectic backdrop. Experiment with different combinations to find the one that works best for your portrait style.
- 7. Finally, it’s time to test and refine our portrait backdrop. Set up your camera and take a few test shots to see how your backdrop looks in different lighting conditions. Make any necessary adjustments to your lighting, composition, or backdrop to ensure that you’re getting the look you want. Remember, the key to creating a great portrait backdrop is to keep it simple, yet visually interesting. With a little practice and experimentation, you’ll be well on your way to creating stunning portraits that tell a story.
Unveiling the Canvas
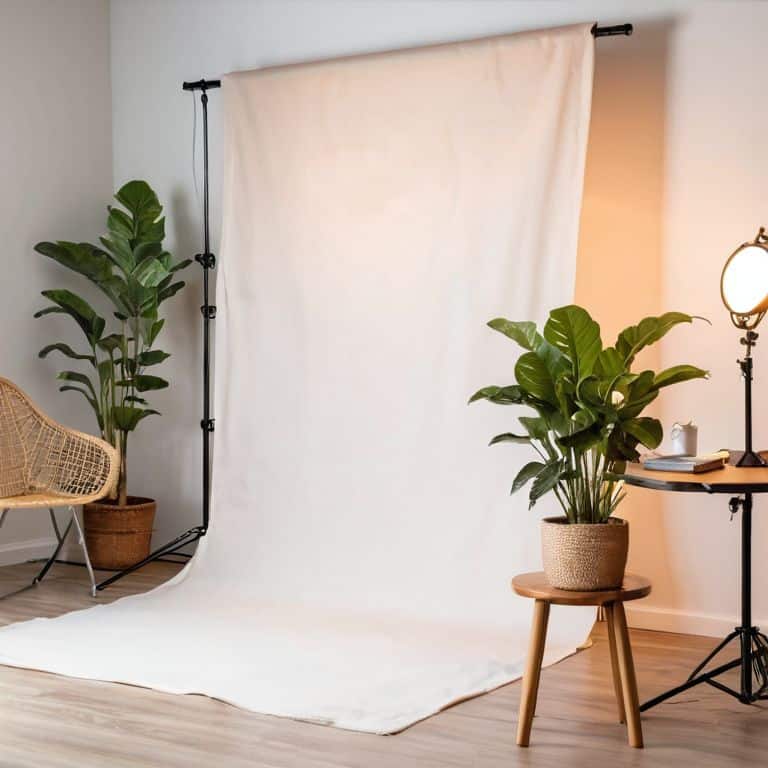
As I reflect on my own journey in photography, I’ve come to realize that creating a home photo studio can be a game-changer for capturing stunning portraits. One of the most critical aspects of this setup is the backdrop. I’ve experimented with various inexpensive backdrop materials, from plain colored sheets to repurposed fabric, and each has its unique character. When choosing a material, consider the texture, color, and overall mood you want to convey in your portraits.
When it comes to setting up your DIY photography studio, portable backdrop stand ideas can be a huge help. I’ve used everything from makeshift stands created from household items to professional-grade equipment. The key is to find a solution that works for you and your space. For instance, if you’re working with a smaller area, a simple lighting for portraits setup can make a big difference. I often use natural light, but when that’s not possible, a well-placed softbox or umbrella can do wonders.
In my experience, the backdrop size for portraits can greatly impact the overall composition of the image. I tend to opt for larger backdrops to allow for more flexibility when framing my shots. By experimenting with different sizes and materials, you can develop a unique visual style that sets your portraits apart. Remember, the goal is to create a canvas that complements your subject, rather than overpowering them.
Crafting Simple Backdrops at Home
As I reflect on my own journey with photography, I’ve found that the simplest backdrops often yield the most compelling results. A crisp white sheet, a textured brick wall, or even a vibrant colored fabric can become a stunning canvas for your portraits. The key is to experiment and find what works best for your subject and the story you’re trying to tell. I’ve had my fair share of trial and error, but that’s all part of the process.
By keeping it simple, you’ll be amazed at how your subject becomes the true focus of the image. I’ve used everything from old doors to vintage windows as backdrops, and each one has added a unique layer of depth to my photographs. Remember, the goal is to create a backdrop that complements your subject, not overpowers them. With a little creativity, you can turn any space into a photography studio, and I’m excited to share more of my favorite tips and tricks with you.
Illuminating Portraits With Basic Lighting
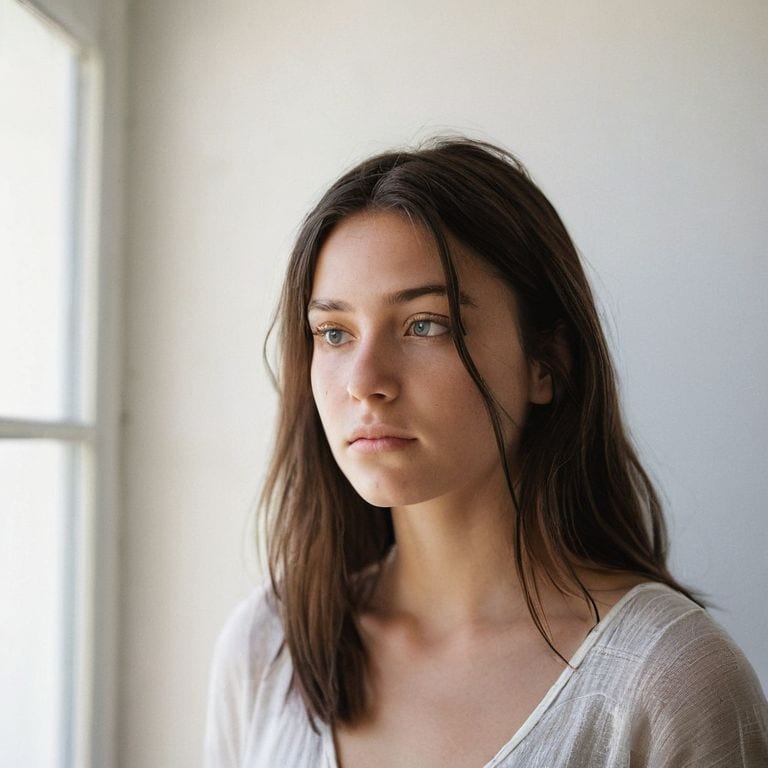
As I always say, the right lighting can elevate a portrait from ordinary to extraordinary. I’m obsessed with the quality of light, especially during ‘golden hour’ when the soft, warm tones seem to dance across my subject’s face. When working with a simple backdrop at home, it’s essential to pay attention to the lighting. Natural light is always my first choice, so if possible, position your subject near a window or outside during the golden hour for a soft, flattering glow.
By manipulating the light, you can add depth and emotion to your portraits. I often use a single light source, whether it’s natural or artificial, to create a sense of intimacy and connection with my subject. Experiment with different lighting setups to find what works best for your portrait, and don’t be afraid to get creative and try new things – it’s all part of the fun of capturing a great shot.
5 Essential Tips to Elevate Your Homemade Portrait Backdrop
- Keep it simple: start with a plain colored wall or sheet, and experiment with textures and patterns to add depth to your portraits
- Play with fabrics: use different materials like cotton, linen, or even vintage clothing to create unique and intriguing backdrops
- Lighting is key: position your subject near a natural light source, and use basic lighting equipment like reflectors or softboxes to enhance the ambiance
- Get creative with props: incorporate everyday objects, flowers, or greenery to add context and storytelling to your portraits
- Experiment and have fun: don’t be afraid to try new things and make mistakes – it’s all part of the process of finding your unique visual style
Key Takeaways for Crafting Your Perfect Portrait Backdrop
Embracing the simplicity of a well-crafted backdrop can elevate your portraits, allowing the subject to be the focal point and telling a more intimate story
Lighting is not just about illuminating your subject, but also about setting the mood and atmosphere of your photograph – experiment with different lighting setups to find what works best for your vision
By experimenting with different materials, textures, and lighting conditions, you can create unique and personalized backdrops that reflect your subject’s personality and add depth to your storytelling
The Art of Simplicity
A simple portrait backdrop at home is not just about hanging a colored sheet, it’s about crafting a canvas that whispers the story of the subject, where every fold, every crease, and every ray of light becomes a brushstroke of character.
Julian Kade
Bringing Your Vision to Life
As we conclude this journey of creating a simple portrait backdrop at home, let’s reflect on the key elements that make a compelling image. We’ve discussed the importance of crafting simple backdrops that don’t distract from the subject, and illuminating portraits with basic lighting techniques that add depth and emotion. By mastering these fundamentals, you’ll be well on your way to capturing authentic moments that tell a story. Remember, the best portraits are those that reveal the essence of the person, and with a well-designed backdrop and thoughtful lighting, you’ll be able to unveil the canvas of your subject’s personality.
As you continue to experiment and refine your skills, keep in mind that the true magic happens when you combine technical proficiency with creative vision. Don’t be afraid to push boundaries and try new things – it’s often the unexpected moments that lead to the most remarkable photographs. With practice and patience, you’ll develop your unique visual style, and your portraits will become a testament to the beauty of everyday moments. So, go ahead, grab your camera, and start telling the stories that need to be told.
Frequently Asked Questions
What are some common household items that can be used to create a unique and interesting portrait backdrop?
I love repurposing everyday items as backdrops – it’s amazing what you can find. Old doors, windows, and even fabric scraps can add incredible texture and depth to your portraits. I’ve also used vintage sheets, blankets, and even a reclaimed wooden fence to create one-of-a-kind backdrops that tell a story.
How can I ensure that my DIY backdrop is properly lit to capture the best possible portrait?
To me, lighting is the unsung hero of portrait photography. For a DIY backdrop, I swear by natural light – position your subject near a window, or use a simple softbox to mimic that golden hour glow. Experiment with angles and intensities to find the perfect balance, and don’t be afraid to get creative with shadows and highlights.
What are some tips for styling and posing my subject in front of a simple portrait backdrop to create a more dynamic and engaging photo?
For me, the key to styling and posing is all about capturing authenticity. I love encouraging my subjects to move freely, to laugh, to be themselves. Forget rigid poses – I’m all about the unguarded moments, the ones that reveal true personality. Soft, natural light and a simple backdrop can help your subject shine, so keep it real, keep it relaxed, and let the beauty of the everyday unfold.