A Guide to Framing and Composition in Photography
I still remember the moment it clicked for me – I was shooting a documentary series in a small town, and I stumbled upon a scene that would change the way I approach a guide to framing and composition forever. It was a mundane moment, yet somehow, the quality of light and the emotional connection between the subjects made it extraordinary. As I looked through my lens, I realized that the best photos aren’t just about technical skills, but about telling a story that resonates with others. This experience solidified my passion for photography and my desire to share my knowledge with others.
In this article, I’ll share my personal approach to a guide to framing and composition, cutting through the noise and focusing on the essentials. You’ll learn how to harness the power of light and composition to create photos that truly speak to your audience. I’ll guide you through the process of developing your unique visual style, and by the end of this guide, you’ll be equipped with the skills to capture authentic moments that tell a story. Whether you’re a seasoned photographer or just starting out, my goal is to inspire you to see the world in a new light and to help you create photos that leave a lasting impression.
Table of Contents
- Guide Overview: What You'll Need
- Step-by-Step Instructions
- A Guide to Framing and Composition
- Framing Your Story: 5 Essential Tips for Mastering Composition
- Key Takeaways for Mastering Framing and Composition
- The Heart of Composition
- Conclusion: Framing Your Unique Perspective
- Frequently Asked Questions
Guide Overview: What You'll Need

Total Time: 3 hours
Estimated Cost: $50 – $100
Difficulty Level: Intermediate
Tools Required
- Camera (any type, including smartphone)
- Tripod (for stabilizing the camera)
- Measuring Tape (for measuring distances and angles)
- Level (for ensuring straight lines)
- Pencil and Paper (for sketching compositions)
Supplies & Materials
- 2-in x 4-in lumber (for creating a makeshift tripod or camera support)
- Black and White Prints (for studying composition and framing techniques)
- Framing Mat Board (for practicing matting and framing techniques)
- Picture Frame (for practicing framing and composition techniques)
Step-by-Step Instructions
- 1. First, let’s start by understanding that framing is not just about putting a border around your subject, but about creating a context that elevates the story you’re trying to tell. To begin, take a walk around your subject, looking for interesting angles and lines that can be used to create a frame within the frame. This could be a doorway, an arch, or even the branches of a tree.
- 2. Next, consider the rule of thirds, and how you can use it to add depth and visual interest to your composition. Imagine your image is divided into thirds both horizontally and vertically, and try to place your subject along one of those lines. This will help create a sense of balance and tension in the image, drawing the viewer’s eye to the subject.
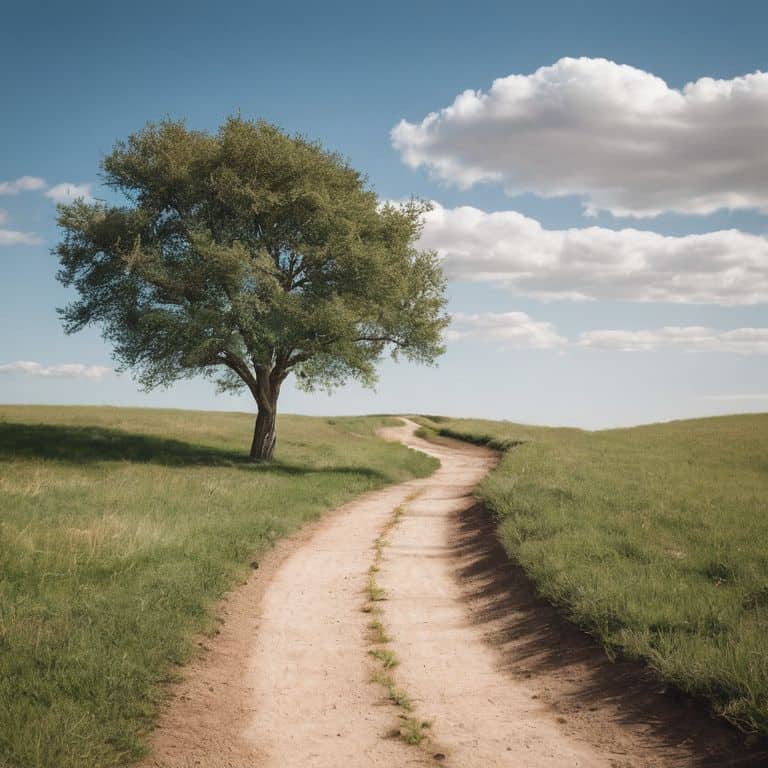
- 3. Now, let’s talk about leading lines, and how they can be used to guide the viewer’s eye through the image. Look for lines that converge or lead to your subject, such as roads, paths, or shorelines. These lines can help create a sense of movement and energy in the image, and can be especially effective when combined with a low vantage point.
- 4. When it comes to negative space, it’s all about creating a sense of simplicity and minimalism in your image. Don’t be afraid to use empty space to create a sense of breathing room around your subject, and to draw attention to the things that are truly important. This can be especially effective in portraits, where a simple background can help to emphasize the subject’s expression and personality.
- 5. As you’re composing your shot, pay attention to the quality of light, and how it’s affecting the mood and atmosphere of the image. Is the light soft and warm, or harsh and cool? How can you use the light to create depth and texture in the image, and to emphasize the subject’s features? Remember, the golden hour is a great time to shoot, but it’s not the only time – look for interesting light at any time of day.
- 6. Now, let’s talk about layering, and how you can use it to add depth and complexity to your image. Look for ways to create layers within the image, such as by placing your subject in front of a background, or by using foreground elements to frame the subject. This can help create a sense of dimensionality and visual interest, and can be especially effective in landscape or street photography.
- 7. Finally, don’t be afraid to experiment and take risks with your composition. Try new things, and see what works and what doesn’t. Remember, the best photographs are often the ones that take the most risks, and that challenge the viewer’s expectations in some way. So don’t be afraid to get creative, and to push the boundaries of what you think is possible with your camera.
A Guide to Framing and Composition
As I reflect on my own journey with photography, I’ve come to realize that mastering the rule of thirds in photography is an essential step in creating visually appealing images. This technique involves dividing the frame into thirds both horizontally and vertically, and placing important elements along these lines. By doing so, you can add a sense of balance and harmony to your photos. I’ve found that this technique is particularly effective when combined with the leading lines composition technique, which can help guide the viewer’s eye to the subject.
When it comes to framing with natural elements, I always look for opportunities to use the environment to add context and depth to my photos. This can be as simple as using a tree branch or a rock to frame my subject, or as complex as using a sweeping landscape to create a sense of scale. By using natural elements to frame my shots, I can create a sense of symmetry in photography composition that draws the viewer in.
One of the most powerful tools in photography is the effective use of negative space. By leaving empty space around my subject, I can create a sense of simplicity and elegance that allows the viewer to focus on the essential elements of the image. This technique is particularly useful for photography composition for beginners, as it can help to create a sense of visual balance and harmony in even the most simple compositions.
Mastering Leading Lines and Symmetry
As I wander through the city with my camera, I’m constantly on the lookout for leading lines that can elevate my compositions. These lines can be anything from a winding road to a row of streetlights, and they serve as a visual guide, drawing the viewer’s eye to the subject. I recall a shot I took during golden hour, where the lines of a pedestrian bridge led perfectly to a lone figure standing at the edge, lost in thought. It was one of those moments where the light, the lines, and the subject all came together in harmony.
Symmetry is another powerful tool in my compositional toolkit. I love finding reflections, archways, or patterns that create a sense of balance and order. When used effectively, symmetry can add a layer of depth and emotion to an image, making it feel more intentional and considered. By mastering leading lines and symmetry, you’ll be able to add a new level of sophistication to your photography, and start to see the world as a complex tapestry of visual stories waiting to be uncovered.
Unlocking Rule of Thirds Secrets
Unlocking Rule of Thirds Secrets
The rule of thirds is a fundamental principle in photography that can elevate your compositions from ordinary to extraordinary. I like to think of it as a guideline rather than a hard-and-fast rule – it’s all aboutbalance and tension. By dividing your frame into thirds both horizontally and vertically, you create nine equal parts. Placing your subject along these lines or at their intersections can add depth and visual interest to your image.
I’ve found that the key to making the rule of thirds work is to experiment and break free from its constraints. Don’t be afraid to try new things and push the boundaries of what you think is “correct.” Remember, the goal is to create a visually appealing image that tells a story, not to simply follow a formula.
Framing Your Story: 5 Essential Tips for Mastering Composition
- Play with negative space to create a sense of simplicity and focus, drawing the viewer’s eye to your subject
- Experiment with different vantage points, from low angles to bird’s-eye views, to add drama and depth to your images
- Pay attention to the quality of light, especially during the golden hour, when the soft, warm tones can elevate your photographs to a whole new level
- Look for framing opportunities within the scene, such as archways, doorways, or trees, to add context and layers to your composition
- Break free from the rules and try unconventional compositions, like intentionally placing your subject off-center or using unusual angles, to add a touch of personality to your photos
Key Takeaways for Mastering Framing and Composition
I’ve learned that the most powerful photographs are those that balance technical skill with a deep understanding of storytelling, and that the best way to achieve this is by experimenting with different framing and composition techniques
By embracing the rule of thirds, leading lines, and symmetry, you can add depth and visual interest to your images, but remember that these techniques are meant to be guides, not hard and fast rules – the most important thing is to stay true to your unique perspective and vision
Ultimately, the goal of mastering framing and composition is not just to take better photos, but to see the world in a new light, to slow down and appreciate the beauty in everyday moments, and to tell stories that resonate with others and leave a lasting impression
The Heart of Composition
Framing and composition are not just technical tools, but the keys to unlocking the emotional resonance of a photograph, allowing us to transform a mere snapshot into a timeless story that whispers to the soul.
Julian Kade
Conclusion: Framing Your Unique Perspective
As we conclude this guide to framing and composition, remember that the key to capturing stunning images lies in understanding the interplay between light, subject, and setting. We’ve explored the rule of thirds, leading lines, and symmetry, and how these techniques can be used to create visually appealing photographs. By applying these principles and experimenting with different approaches, you’ll develop your own unique visual voice and start to see the world in a new, exciting way.
So, the next time you pick up your camera, I encourage you to think beyond the technical aspects and focus on telling a story. Remember, the best photographs are those that evoke emotion and spark imagination. As you continue on your photographic journey, keep in mind that the true beauty of photography lies not just in the images we capture, but in the way they make us see and feel the world around us.
Frequently Asked Questions
How can I effectively use negative space in my composition to create a more balanced and visually appealing image?
Negative space is all about breathing room – it’s the unspoken language of photography. I love using it to create a sense of simplicity and calm. By intentionally leaving space around your subject, you can guide the viewer’s eye and add depth to your image, making it feel more balanced and visually appealing.
What are some common mistakes to avoid when applying the rule of thirds in photography?
When applying the rule of thirds, I see many photographers placing their subject directly on the lines, rather than using the intersections as a guide. Others neglect to consider the negative space, letting it overwhelm the frame. Remember, the rule of thirds is a starting point, not a hard rule – it’s all about balance and tension.
Can you provide examples of how to use everyday objects as leading lines to add depth and interest to my photos?
I love using everyday objects as leading lines – it’s amazing how a simple bike path, a row of park benches, or even a staircase can draw the viewer’s eye to your subject, adding depth and narrative to your image. Try experimenting with roads, shorelines, or railings to create a sense of movement and guide the viewer through your photo.