A Crafter’s Guide to Leatherworking Basics
I still remember the first time I stumbled upon a worn, vintage leather wallet at a flea market. It was as if I had uncovered a treasure, each crease and scratch telling a story of its own. This chance encounter sparked my fascination with a guide to leatherworking, and I’ve since dedicated myself to mastering the craft. There’s a common misconception that leatherworking is an intimidating, complex process, but I’m here to tell you that it’s actually a beautifully simple and rewarding journey. With the right mindset and tools, anyone can bring a piece of leather to life and create something truly unique.
As you embark on this journey with me, I promise to share my honest, no-frills approach to leatherworking. You won’t find any fancy jargon or overly complicated techniques here. Instead, I’ll guide you through the process of creating your own leather treasures, from selecting the perfect hide to stitching and finishing your masterpiece. My goal is to empower you with the knowledge and confidence to unleash your creativity and start crafting pieces that tell your own story. In this article, we’ll explore the fundamentals of a guide to leatherworking, and I’ll share my favorite tips and tricks for getting started.
Table of Contents
Guide Overview: What You'll Need
Total Time: 5 hours 30 minutes
Estimated Cost: $50 – $100
Difficulty Level: Intermediate
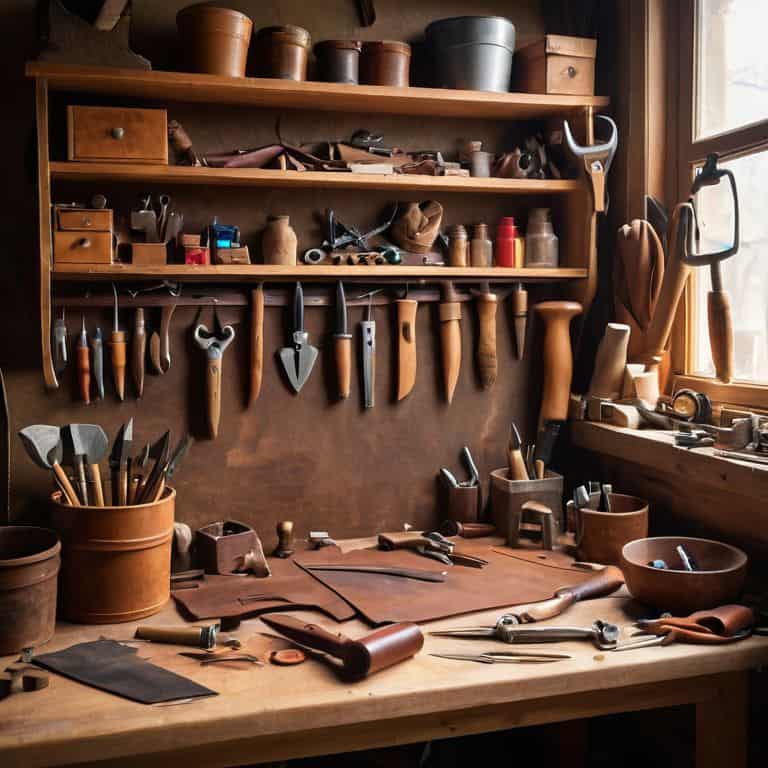
Tools Required
- Leather mallet for shaping and molding leather
- Utility knife (with extra blades)
- Ruler for measuring and cutting leather
- Cutting mat for protecting work surface
- Edge beveler for smoothing leather edges
- Hole punch for creating holes for stitching
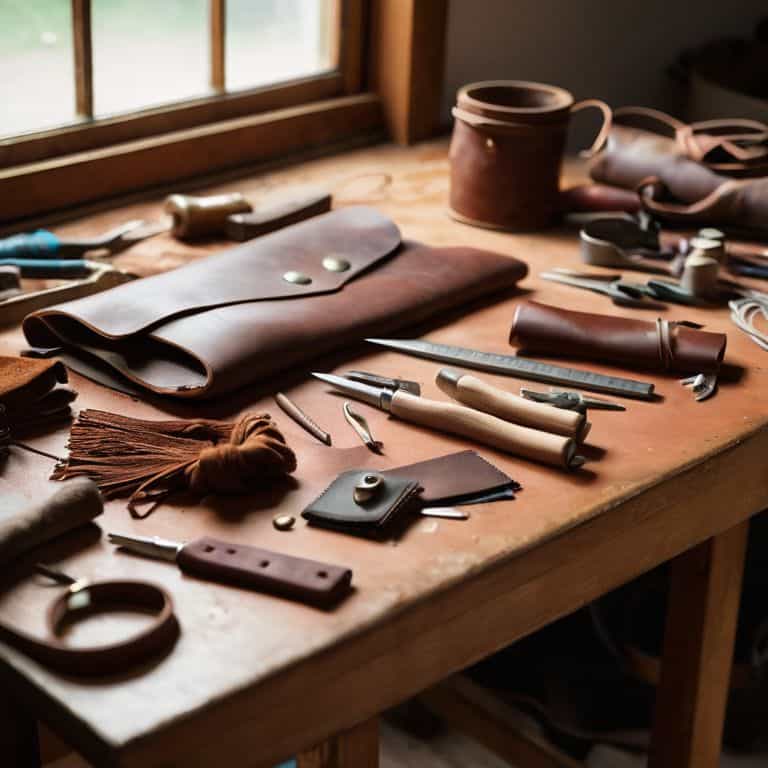
Supplies & Materials
- Leather hide available in various thicknesses and sizes
- Thread for stitching and sewing leather
- Leather glue for bonding leather pieces together
- Leather conditioner for protecting and moisturizing leather
- Wax or finish for protecting and enhancing leather appearance
Step-by-Step Instructions
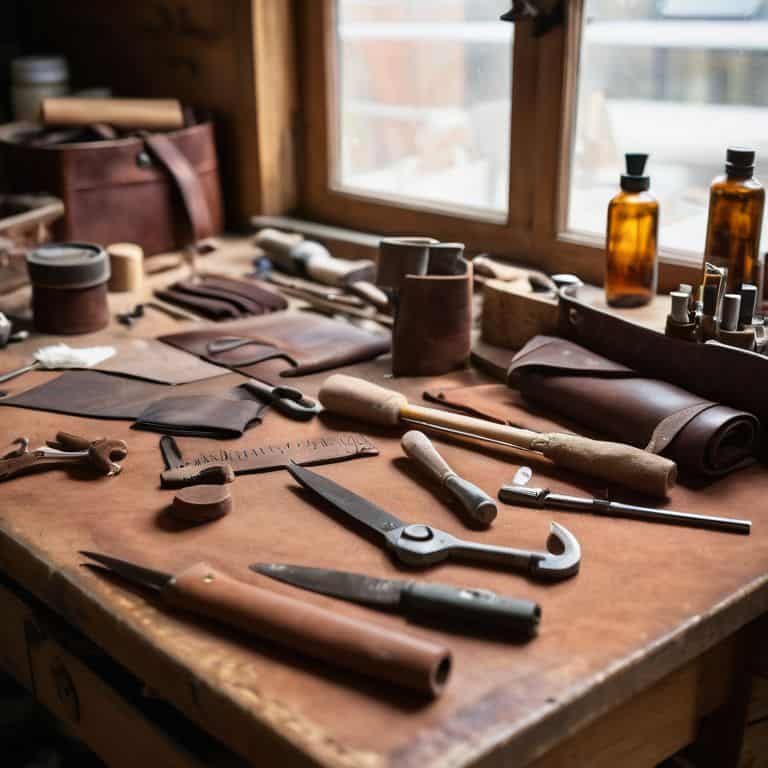
- 1. First, let’s start by gathering our materials – we’ll need a few basic tools like a leather cutter, a hammer, and some threads. I like to use a combination of traditional and modern tools to give my leatherwork a unique touch. Take some time to get familiar with each tool, and don’t be afraid to experiment with different types of leather and threads to find the ones that work best for you.
- 2. Next, we need to prepare our leather – this involves cutting it to the right size, and making sure it’s clean and dry. I always start by sketching out my design in my notebook, taking into account the natural imperfections of the leather. This is where the story of your leatherwork begins, so take your time and have fun with it.
- 3. Now it’s time to cut out our pattern – use your leather cutter to carefully cut along the lines you’ve drawn. Remember to work slowly and deliberately, as leather can be unforgiving. I like to listen to music or podcasts while I work, as it helps me get into a flow state and focus on the task at hand.
- 4. With our leather cut, it’s time to add some texture and depth – we can do this using a variety of techniques, such as stamping, tooling, or stitching. I love using a combination of these methods to create intricate designs and patterns. Don’t be afraid to experiment and try new things – it’s all part of the creative process.
- 5. Once we’ve added our texture and depth, it’s time to start stitching – this is where our leatherwork really starts to come together. I use a traditional saddle stitch, as it’s strong and durable, but you can experiment with different stitches to find the one that works best for you. Remember to take your time and focus on each individual stitch – it’s the small details that make a big difference.
- 6. As we continue stitching, we need to pay attention to the edges – we want to make sure they’re clean and even, and that our stitches are consistent. I like to use a leather edge beveler to give my edges a smooth, rounded finish. This is where the attention to detail really comes into play, so don’t rush this step.
- 7. Finally, we need to add a finish to our leatherwork – this can be a coat of wax, oil, or sealant, depending on the type of leather we’re using. I like to use a natural wax, as it brings out the rich colors and textures of the leather. Apply it evenly, and let it dry according to the manufacturer’s instructions – and then our leatherwork is complete.
- 8. The last step is to inspect and enjoy our finished leatherwork – take a step back and admire your handiwork. I love seeing the imperfections and unique characteristics that make each piece one-of-a-kind. Remember, the story of your leatherwork is just beginning – it will continue to evolve and unfold as you use and enjoy it over time.
A Guide to Leatherworking
As I delve deeper into the world of leather crafting, I’ve come to realize that leather tool maintenance is just as crucial as the crafting process itself. A well-maintained tool can make all the difference in the quality of your work, allowing you to focus on the creative aspects of leatherworking. I make it a point to regularly clean and condition my tools, ensuring they remain in top condition for my next project.
When it comes to bringing your leather project to life, hand stitching patterns can add a touch of elegance and sophistication. I’ve experimented with various patterns, from simple running stitches to more intricate designs, and I’m always amazed at how they can elevate the overall look of a piece. Whether you’re working on a small accessory or a larger item like a leather bag, taking the time to perfect your stitching technique will pay off in the end.
For those just starting out, I recommend exploring leather dyeing methods to add an extra layer of depth to your projects. With a little practice, you can achieve a wide range of colors and effects, from subtle, muted tones to bold, vibrant hues. This is where the true magic of leather crafting happens, and I encourage you to experiment and find the techniques that work best for you.
Mastering Hand Stitching Patterns
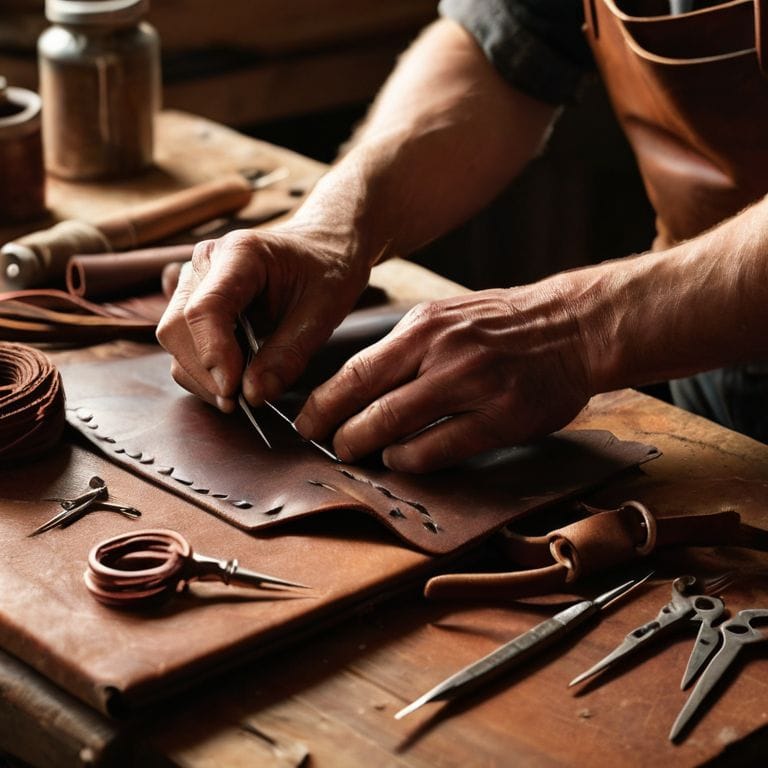
As I sit at my workbench, threading my needle with waxed cord, I’m reminded that hand stitching is where the true magic happens in leatherworking. It’s a meditative process that requires patience, but the rewards are well worth it. I love experimenting with different patterns, from the classic running stitch to more intricate designs like the saddle stitch. Each stitch is a testament to the human touch, a reminder that this piece was crafted with care and attention.
To master hand stitching patterns, start by practicing on scrap leather. Focus on even, consistent stitches, and don’t be afraid to make mistakes – they’re all part of the story. As you become more comfortable, you can begin to experiment with different threads, needles, and patterns, giving your leather pieces a unique, handmade character that’s all your own.
Uncovering Leather Crafting Techniques
As I delve deeper into the world of leather crafting, I’m constantly fascinated by the array of techniques that can be used to shape and mold this incredible material. From the simplicity of a hand-stitched seam to the complexity of intricate tooling, each method brings its own unique character to the finished piece. I’ve spent countless hours experimenting with different approaches, and I’m excited to share some of my favorites with you.
By mastering various leather crafting techniques, you’ll be able to add your own personal touch to every project, whether it’s a vintage-inspired wallet or a bespoke handbag. The possibilities are endless, and I’m eager to guide you through the process of discovering your own signature style.
Weaving Leather Tales: 5 Essential Tips to Bring Your Craft to Life
- Start with the right tools: Invest in a good leather awl, a sturdy cutting mat, and a set of sharp blades to make cutting and stitching a breeze
- Choose your leather wisely: Consider the type, thickness, and finish of the leather to ensure it suits your project, whether it’s a rugged bag or a sleek wallet
- Condition, condition, condition: Keep your leather soft and supple by applying a good leather conditioner, and watch it transform into a beautiful, aged patina over time
- Practice your stitches: Master the art of hand-stitching by practicing different patterns and techniques, from the simple running stitch to the intricate saddle stitch
- Embrace the imperfections: Remember, it’s the unique quirks and flaws that make your handmade leather goods truly special, so don’t be too hard on yourself if things don’t turn out perfectly – it’s all part of the story
Timeless Leatherworking Wisdom
Embracing the imperfections in handmade leather pieces is what gives them character and tells a story of human touch
Mastering hand stitching patterns requires patience, practice, and a deep understanding of the leather’s texture and grain
Infusing personal storytelling into your leatherworking projects can transform functional items into treasured family heirlooms that stand the test of time
Shaping Leather, Shaping Stories
As I cut, shape, and stitch leather, I’m reminded that every imperfection, every scar, and every unique mark tells a story – and it’s in these imperfections that the true beauty of handmade leatherwork lies.
Finn Rivera
Embracing the Art of Leatherworking
As we conclude this journey into the world of leatherworking, let’s take a moment to reflect on the key techniques we’ve uncovered. From the initial preparation of the leather to the final stitches that bring a piece to life, each step is a testament to the human touch that sets handmade items apart. We’ve explored the art of hand stitching, the patience required for mastering patterns, and the joy of seeing a project evolve from a simple idea into a tangible, functional work of art. Whether you’re a seasoned artisan or a beginner looking to add a personal touch to your belongings, the world of leatherworking offers a unique blend of creativity and practicality.
As you embark on your own leatherworking endeavors, remember that the true beauty of this craft lies not just in the end result, but in the process itself. The imperfections, the trials, and the moments of triumph all contribute to the soul of the piece. So, don’t be afraid to experiment, to try new things, and to make mistakes. For in the world of leatherworking, it’s the journey, not the destination, that truly matters. With every stitch, you’re not just creating something with your hands; you’re telling a story that will be passed down, a story of craftsmanship, of dedication, and of the human spirit.
Frequently Asked Questions
What are the essential tools and materials needed to get started with leatherworking?
To get started with leatherworking, you’ll need a few essential tools and materials. I always begin with the basics: a sturdy work surface, sharp cutting tools, and high-quality leather hides. You’ll also need threads, needles, and a reliable stitching awl. Don’t worry too much about the cost – start with the fundamentals and build your collection as you grow in the craft.
How do I properly condition and finish leather to achieve a desired texture and color?
To condition and finish leather, I swear by a combination of natural oils and waxes. For a soft, supple texture, I apply a beeswax balm, while a leather conditioner brings out the rich colors. Experimenting with different finishes, like a vintage patina or a sleek lacquer, can add an extra layer of depth to your piece, making it truly one-of-a-kind.
What are some common mistakes to avoid when hand-stitching leather patterns to ensure a professional-looking result?
When hand-stitching leather, I’ve found that uneven tension and inconsistent spacing can quickly derail a project. To avoid this, take your time and maintain a steady pace, using a thimble to protect your fingers and a ruler to guide your stitches. It’s also crucial to condition your leather beforehand, ensuring it’s supple and receptive to your needle.


