A Diy Weekend Project: a Guide to Installing Laminate Flooring

I still remember the first time I attempted to install laminate flooring – it was a daunting task that left me questioning my DIY skills. The truth is, most of us have been misled into thinking that installing laminate flooring is a complex, expertise-requiring process. But I’m here to tell you that with the right mindset and a bit of patience, you can create a beautiful, functional space that tells a story. As someone who’s passionate about working with their hands, I believe that a guide to installing laminate flooring for the first time should be more than just a set of instructions – it should be a journey of discovery and creativity.
In this article, I’ll share my personal experience and practical advice on how to install laminate flooring with heart. You’ll learn how to prepare your space, choose the right materials, and bring your vision to life. My goal is to empower you with the confidence to take on this project and make it your own, so you can enjoy the satisfaction of creating something with your own hands. By the end of this guide to installing laminate flooring for the first time, you’ll be equipped with the knowledge and inspiration to turn your flooring into a unique reflection of your personal style.
Table of Contents
- Guide Overview: What You'll Need
- Step-by-Step Instructions
- A Guide to Installing Laminate Flooring
- Laying the Foundations: 5 Essential Tips for a First-Time Laminate Flooring Installation
- Embracing the Craft: 3 Key Takeaways for a Meaningful Laminate Flooring Journey
- The Soul of the Floor
- Bringing Your Vision to Life
- Frequently Asked Questions
Guide Overview: What You'll Need
Total Time: 8 hours 30 minutes
Estimated Cost: $500 – $1000
Difficulty Level: Intermediate
Tools Required
- Tapping block (for tapping boards into place)
- Pull bar (for pulling boards tight)
- Knee kicker (for tapping boards into place)
- Utility knife (with extra blades)
- Miter saw or circular saw (for cutting laminate boards)
- Drill (for drilling holes for underlayment)
- Tape measure (for measuring rooms and cutting boards)
- Square (for ensuring accurate cuts)
- Pencil and marker (for marking cuts and layouts)
- Safety glasses and a dust mask (for protecting yourself from debris)
Supplies & Materials
- Laminate flooring boards (calculate the number of boards needed based on room size)
- Underlayment material (such as foam or cork, to cover the entire floor area)
- Laminate flooring glue (for securing boards to underlayment)
- Transition strips (for covering gaps between rooms or floors)
- Baseboards (for covering the gap between the floor and the wall)
- Quarter round molding (for covering the gap between the baseboard and the floor)
- 2-in x 4-in lumber (for creating a sturdy subfloor)
- Wood glue (for securing the subfloor)
- Nails or screws (for securing the subfloor and underlayment)
Step-by-Step Instructions
- 1. First, let’s start by preparing the room for our laminate flooring installation. This means clearing the space of any furniture, curtains, or rugs that could get in the way or be damaged during the process. Take your time to ensure the area is clean and dry, as this will affect the quality of the installation.
- 2. Next, we need to inspect the subfloor to make sure it’s level, clean, and dry. Any imperfections or moisture issues can lead to problems with the laminate flooring, so it’s crucial to address these before proceeding. Use a level and a moisture meter to check the subfloor, and make any necessary repairs before moving forward.
- 3. Now it’s time to lay the underlayment, which provides a smooth, quiet, and insulated surface for our laminate flooring. Cut the underlayment to size using a utility knife, and then roll it out across the subfloor, ensuring it’s tightly fitted and securely fastened with tape.
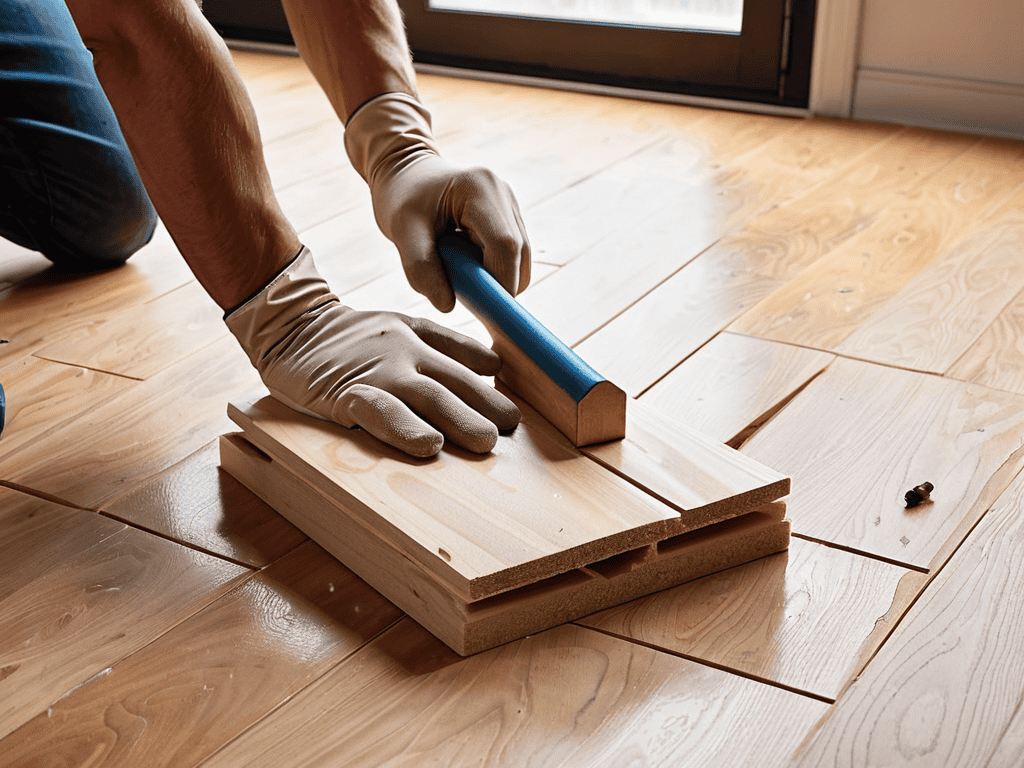
- 4. With the underlayment in place, we can start installing the laminate flooring. Begin by laying the first plank along the longest wall in the room, using a chalk line to guide you. Use a tapping block and a hammer to tap the planks into place, ensuring they’re securely locked together.
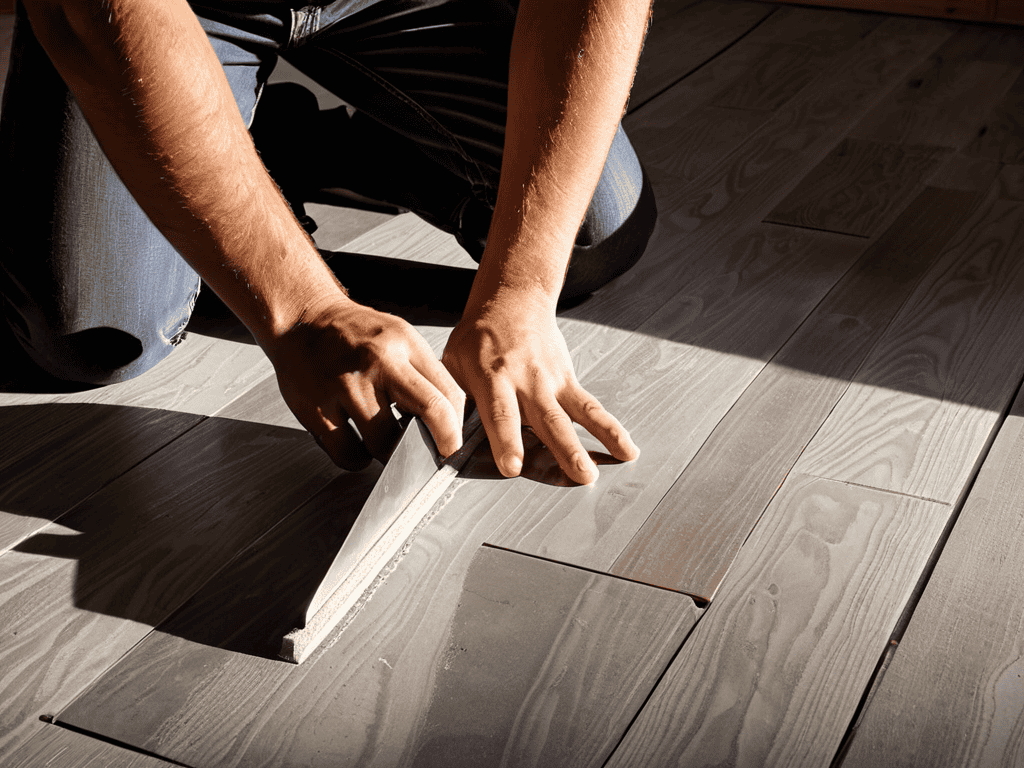
- 5. As we continue installing the laminate flooring, it’s essential to maintain a consistent gap between the planks and the wall. This gap, usually about 1/4 inch, allows for expansion and contraction of the flooring due to temperature and humidity changes. Use shims or spacers to maintain this gap, and cut the planks to fit around any obstacles, such as heating vents or doorways.
- 6. To cut the laminate planks to size, use a miter saw or a circular saw with a fine-tooth blade. Always cut the planks in a well-ventilated area, and wear a dust mask to avoid inhaling sawdust. Cut slowly and carefully, using a straightedge or guide to ensure accurate cuts.
- 7. Once we’ve installed all the laminate planks, it’s time to add the finishing touches. Install baseboards and moldings to cover the gap between the flooring and the wall, and add any transition strips or thresholds to complete the installation. Take a step back to admire your handiwork, and make any necessary adjustments to ensure a smooth, even finish.
A Guide to Installing Laminate Flooring
As I reflect on my own journey with laminate flooring, I realize that preparing a concrete subfloor is a crucial step that can make or break the entire process. It’s essential to ensure the subfloor is level, clean, and dry before installing the laminate flooring. I’ve learned that taking the time to get this step right can save you from a lot of headaches down the line. When it comes to choosing the right laminate flooring, I always consider the thickness of the planks, as it can affect the overall durability and stability of the floor.
When designing your laminate flooring pattern, it’s easy to get caught up in the various layouts and designs available. However, it’s essential to consider the room’s dimensions and the direction of the light to create a cohesive look. I’ve found that a well-planned design can elevate the entire space and make it feel more intentional. To minimize waste and reduce costs, I always try to reduce laminate flooring waste by carefully planning my cuts and using leftover pieces for future projects.
In my experience, one of the most common mistakes people make when installing laminate flooring is not leaving enough space for expansion. This can lead to buckling and warping, which can be costly to repair. To avoid this, I always make sure to leave a small gap between the flooring and the wall, and use laminate flooring underlayment options that allow for expansion and contraction. By taking the time to get these details right, you can create a beautiful and durable floor that will last for years to come.
Choosing the Right Laminate With Love and Care
As I always say, the key to a successful DIY project is not just about following instructions, but also about understanding the materials and their nuances. When it comes to installing laminate flooring, having the right tools and knowledge can make all the difference. I’ve found that consulting with online resources, such as the wealth of information available at transensex, can be incredibly helpful in filling any knowledge gaps and providing practical tips for overcoming common challenges. By taking the time to educate yourself and prepare properly, you’ll be well on your way to creating a beautiful, functional space that reflects your personal story and style.
Choosing the right laminate is where the story of your floor truly begins. I always start by considering the mood and atmosphere I want to create in the space. Do I want it to feel warm and inviting, or cool and modern? The color, texture, and pattern of the laminate will set the tone for the entire room. I look for laminates that mimic the natural beauty of wood, with all its imperfections and character. It’s not just about functionality, but about creating a sense of warmth and personality in the space. By selecting a laminate that resonates with me, I’m able to infuse the room with my own unique energy and style.
Preparing Subfloors With Heart and Soul
As I begin preparing the subfloor, I’m reminded that this stage is just as crucial as the final installation. It’s where the foundation is laid, literally and figuratively. I take my time to ensure the surface is clean, dry, and even. Any imperfections now will show through later, so I’m meticulous in my approach. I sketch out a rough plan in my notebook, noting any areas that require extra attention.
With my trusty toolbox by my side, I start by checking for any old adhesives or debris that might be lurking beneath the surface. A putty knife and some elbow grease usually do the trick. As I work, I think about the story this floor will tell – the footsteps, the gatherings, the quiet moments. It’s a privilege to be a part of that narrative, and it motivates me to get it just right.
Laying the Foundations: 5 Essential Tips for a First-Time Laminate Flooring Installation
- Measure Twice, Cut Once: The Golden Rule of Flooring
- Underlayment is Key: Don’t Skip This Crucial Step for a Comfortable and Durable Floor
- Stagger Your Joints for a Seamless Look That Tells a Story
- Work with the Grain, Not Against It: Understanding the Natural Flow of Your Laminate
- Leave Room to Breathe: Expansion Gaps are Your Friend in the Ever-Changing World of Flooring
Embracing the Craft: 3 Key Takeaways for a Meaningful Laminate Flooring Journey
By slowing down and focusing on the process, you’ll not only create a beautiful floor, but also infuse it with your personal story and the love you’ve put into it
Remember, the imperfections that arise during the installation process are what make your floor truly unique and give it character, much like the imperfections in a handmade piece of furniture
Ultimately, installing laminate flooring is not just about following instructions, but about transforming a space with your own hands and connecting with the natural materials that bring warmth and soul to your home
The Soul of the Floor
As I lay down each plank, I’m reminded that installing laminate flooring for the first time is not just about covering a surface, but about crafting a story that unfolds with every step, where the imperfections and nuances of the material become the narrative of our daily lives.
Finn Rivera
Bringing Your Vision to Life
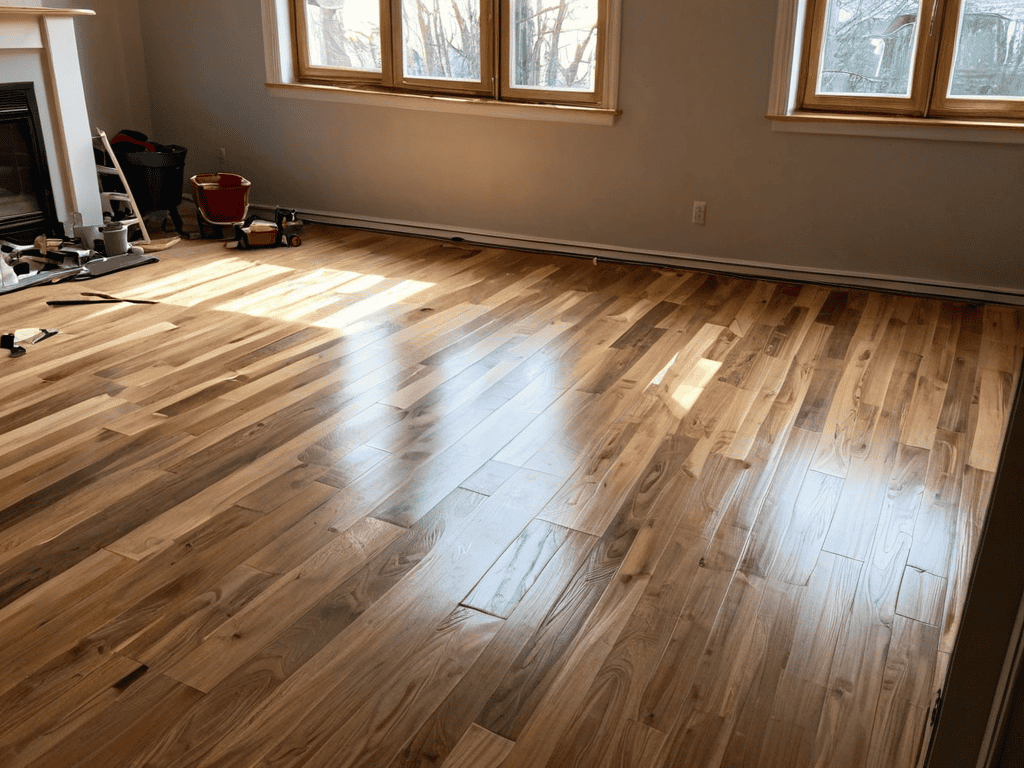
As we conclude this journey of installing laminate flooring for the first time, let’s take a moment to reflect on the key milestones we’ve achieved. From preparing our subfloors with heart and soul, to choosing the right laminate with love and care, each step has been a testament to the power of intentional creativity. By following these steps and staying true to our vision, we’ve not only transformed our space but also infused it with our own unique story. The process, though sometimes challenging, has been a rewarding experience that allows us to appreciate the beauty of handmade imperfections in our work.
Now, as you stand back to admire your newly installed laminate flooring, remember that this is more than just a home improvement project – it’s a personal statement. It’s about embracing the joy of creation and the satisfaction of knowing that every plank, every cut, and every carefully placed seam is a reflection of your dedication and passion. As you share your space with others, the story of your laminate flooring will become a part of your home’s narrative, a reminder of the transformative power of DIY and the beauty that emerges when we slow down, get our hands dirty, and create something with love.
Frequently Asked Questions
What are the most common mistakes to avoid when installing laminate flooring for the first time?
When installing laminate flooring for the first time, I’ve seen many of us fall into common traps. Not leaving enough expansion space, incorrect underlayment installation, and neglecting to acclimate the flooring to the room’s conditions are just a few. These mistakes can lead to buckling, gaps, or even a complete reinstallation. Let’s take a deep breath and slow down – our floors deserve the extra care.
How do I handle uneven subfloors to ensure a smooth installation?
When faced with uneven subfloors, I take a deep breath and remember that it’s all part of the story. I use a self-leveling compound to create a smooth canvas, and for more pronounced imperfections, I’ll opt for a plywood underlayment. It’s about embracing the journey, not just the destination – every floor has its unique character, and it’s our job to enhance it, not fight it.
Can I install laminate flooring over existing flooring, such as tile or carpet?
When it comes to installing laminate flooring over existing flooring, it’s generally not recommended. The surface needs to be level and stable, and old tile or carpet can create unevenness. I always say, start with a clean slate – remove the old flooring to ensure a solid foundation for your new story to unfold.


