An Explainer: a Guide to Aperture Priority Mode
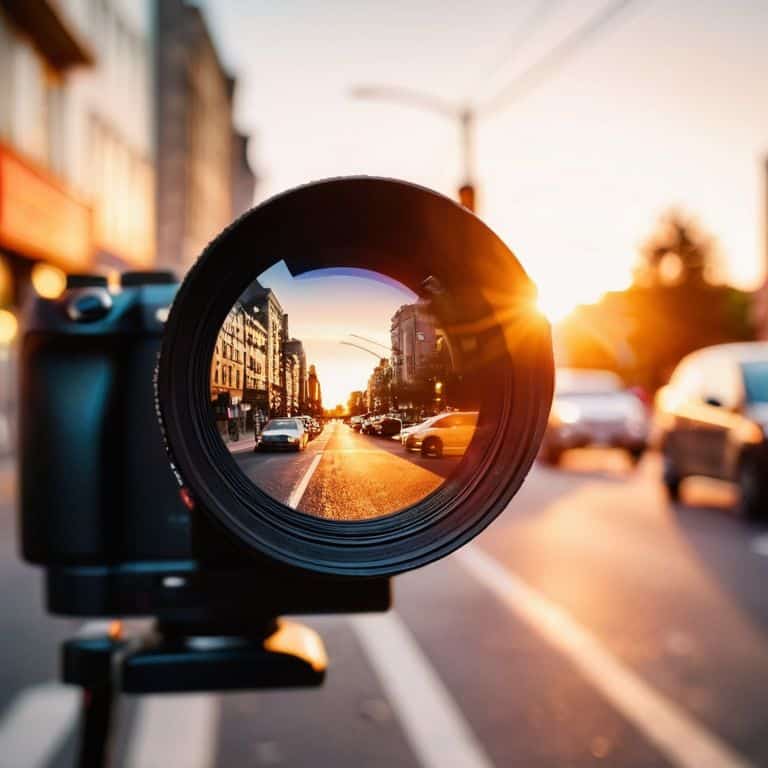
I still remember the first time I discovered the power of a guide to aperture priority mode. I was on a photo walk in the city, trying to capture the vibrant street life, when I realized that my camera’s automatic settings were holding me back. The images were dull, lacking the depth and emotion I knew was there. It wasn’t until I switched to aperture priority mode that the story of the city began to unfold before my lens. The golden hour took on a new meaning, and the faces of the people I photographed became etched with character.
As you dive into this article, I promise to share with you the practical secrets of mastering aperture priority mode. You’ll learn how to harness the creative potential of this mode, and uncover the why behind the how. We’ll explore the nuances of light, composition, and emotion, and I’ll share my own experiences, both successes and failures, to help you find your unique visual voice. By the end of this guide, you’ll be equipped with the knowledge to capture stunning, story-driven images that reveal the beauty in the everyday, using a guide to aperture priority mode as your foundation.
Table of Contents
- Guide Overview: What You'll Need
- Step-by-Step Instructions
- A Guide to Aperture Priority Mode
- Unlocking Aperture Priority Mode: 5 Essential Tips to Elevate Your Photography
- Key Takeaways for Mastering Aperture Priority Mode
- Embracing the Art of Aperture
- Embracing the Art of Aperture Priority Mode
- Frequently Asked Questions
Guide Overview: What You'll Need
Total Time: 1 hour 30 minutes
Estimated Cost: $0 – $0
Difficulty Level: Intermediate
Tools Required
- Camera (with aperture priority mode)
- Tripod (optional)
- Lenses (with different aperture ranges)
Supplies & Materials
- None No additional supplies needed
Step-by-Step Instructions
- 1. First, let’s start by understanding what aperture priority mode is and how it can be a game-changer for your photography. Aperture priority mode allows you to set the aperture, or f-stop, of your lens, and the camera will automatically adjust the shutter speed to achieve a proper exposure. This mode is ideal for portrait and landscape photography, where you want to control the depth of field.
- 2. To get started with aperture priority mode, you’ll need to set your camera to the manual mode or aperture priority mode, usually denoted by the letters “A” or “Av” on your camera’s mode dial. Once you’ve done this, you can begin to adjust the aperture to your desired setting. Remember, a lower f-stop value (like f/2.8) will result in a shallower depth of field, while a higher value (like f/16) will keep more of your image in focus.
- 3. Next, you’ll want to consider the lighting conditions of your scene. If you’re shooting in bright sunlight, you may want to use a higher f-stop value to avoid overexposing your image. On the other hand, if you’re shooting in low light, you may need to use a lower f-stop value to let more light into the lens. I always try to shoot during the golden hour, when the light is soft and warm, as it adds a unique quality to my photographs.
- 4. Now, let’s talk about composition. When using aperture priority mode, it’s essential to consider the placement of your subject within the frame. You can use the aperture to create a sense of depth or to isolate your subject from the background. Remember, the goal is to tell a story with your image, so think about what you want to convey and how you can use the aperture to achieve that.
- 5. As you start to experiment with aperture priority mode, I encourage you to pay attention to the shutter speed. If the shutter speed is too slow, you may introduce camera shake or blur into your image. On the other hand, if the shutter speed is too fast, you may freeze the motion of your subject, which can be desirable in certain situations. I always try to find a balance between the two, as it allows me to capture the essence of the moment.
- 6. Another important aspect to consider when using aperture priority mode is the lens you’re using. Different lenses have different aperture ranges, so it’s essential to understand the capabilities of your lens. For example, a wide-angle lens may have a smaller aperture range than a telephoto lens. I love using vintage lenses, as they often have unique aperture characteristics that can add a distinct quality to my images.
- 7. Finally, don’t be afraid to experiment and take risks. Aperture priority mode is all about creative control, so don’t be afraid to try new things and see what works for you. Remember, the most important thing is to have fun and enjoy the process of creating. As I always say, the best photographs are the ones that tell a story, so don’t be afraid to push the boundaries and see what you can create.
A Guide to Aperture Priority Mode
As I delve deeper into the world of aperture priority mode, I want to share some golden nuggets that have helped me refine my craft. One of the most crucial aspects of mastering aperture priority mode is understanding aperture in photography. It’s essential to recognize how aperture affects the overall mood and atmosphere of your image. For instance, when shooting in aperture priority mode for portraits, I often opt for a wider aperture to create a shallower depth of field, drawing the viewer’s attention to my subject.
When it comes to mastering depth of field techniques, I’ve found that aperture priority mode can be a powerful tool. By adjusting the aperture, you can control the amount of background blur, adding a sense of intimacy or grandeur to your image. However, it’s crucial to be mindful of common mistakes in aperture priority mode, such as under or overexposing your image. To avoid this, I always keep a close eye on my camera’s metering mode and adjust accordingly.
In my experience, the key to unlocking the full potential of aperture priority mode lies in using aperture to control background blur. By carefully selecting the right aperture, you can create a beautiful bokeh effect, separating your subject from the background and adding depth to your image. Whether you’re shooting in aperture priority mode or manual mode, the principles remain the same: it’s all about understanding how to harness the power of aperture to tell your story.
Mastering Depth of Field Techniques
To truly harness the power of aperture priority mode, you need to understand how to master depth of field techniques. This is where the magic happens, and your photos start to tell a story. I always say that a shallow depth of field can be a photographer’s best friend, as it allows you to isolate your subject and create a sense of intimacy. By adjusting your aperture, you can control how much of your image is in focus, drawing the viewer’s eye to exactly where you want it.
For me, it’s all about experimentation and feeling the scene. I love shooting during golden hour, when the soft light seems to dance across my subject’s face. By using a wide aperture, I can create a beautiful bokeh that enhances the emotional impact of the image. It’s a delicate balance, but one that’s worth mastering – and with practice, you’ll start to see the world in a whole new way.
Understanding Aperture in Photography
As I delve into the world of aperture, I’m reminded of the countless hours I spent in my darkroom, experimenting with different f-stops to capture the perfect portrait. Aperture, to me, is the heartbeat of photography – it’s what sets the tone for the entire image. It’s not just about the technicality of it, but the creative freedom it offers. By adjusting the aperture, I can control the amount of light that enters the lens, and in turn, dictate the mood of the photo.
In aperture priority mode, I have the flexibility to prioritize the aperture, allowing the camera to adjust the shutter speed accordingly. This synergy between aperture and shutter speed is what makes photography so captivating. By understanding how to harness the power of aperture, you’ll be able to unlock new dimensions in your storytelling, and that’s what gets me excited about sharing my knowledge with you.
Unlocking Aperture Priority Mode: 5 Essential Tips to Elevate Your Photography
- Start by understanding how aperture and shutter speed intersect in aperture priority mode, and how this relationship can be leveraged to create stunning, high-contrast images
- Pay close attention to the lighting conditions, as the golden hour can be a game-changer when using aperture priority mode to capture portraits with a shallow depth of field
- Experiment with different aperture settings to master the art of depth of field, from the intimacy of a small f-stop to the expansive view of a large one
- Remember, the best portraits are often unposed, so use aperture priority mode to capture candid moments that tell a story, focusing on the interplay between your subject and their environment
- Shoot in manual mode occasionally to develop a deeper understanding of how aperture priority mode works, and to refine your skills in anticipating and adjusting to changing light conditions
Key Takeaways for Mastering Aperture Priority Mode
Embracing aperture priority mode as a creative tool allows you to focus on the storytelling aspect of photography, leveraging the interplay between aperture, shutter speed, and ISO to capture compelling images
Understanding how to manipulate depth of field through aperture control enables you to isolate subjects, create context, or convey mood, making your photographs more expressive and engaging
Practice and experimentation with aperture priority mode, coupled with an understanding of light and composition, will help you develop your unique visual voice and style, leading to more authentic and impactful photography
Embracing the Art of Aperture
Aperture priority mode is not just a setting, it’s a gateway to unlocking the emotional depth of your photographs, a reminder that the right light and the right moment can elevate a simple scene into a timeless story.
Julian Kade
Embracing the Art of Aperture Priority Mode
As we conclude this guide to aperture priority mode, let’s take a moment to reflect on the key points we’ve covered. We’ve explored the fundamentals of aperture in photography, and I’ve shared my own approach to mastering depth of field techniques. By now, you should have a solid understanding of how to use aperture priority mode to capture stunning images that tell a story. Remember, it’s all about experimenting with different aperture settings to find the perfect balance between light and composition. With practice, you’ll develop your own unique style and be able to convey emotion and mood through your photographs.
As you continue on your photographic journey, I encourage you to keep pushing the boundaries of what’s possible with aperture priority mode. Don’t be afraid to take risks and try new things – it’s often the unexpected shots that turn out to be the most memorable. And always keep in mind that photography is a personal expression of your vision and creativity. By embracing the art of aperture priority mode, you’ll not only improve your technical skills but also develop a deeper understanding of the world around you. So, go out there and capture the beauty in everyday moments – and never stop exploring the possibilities of aperture priority mode.
Frequently Asked Questions
How do I determine the optimal aperture setting for a given scene to achieve the desired depth of field?
For me, determining the optimal aperture setting is all about storytelling. I consider the scene’s context and my desired narrative. A smaller f-stop value, like f/2.8, creates a shallow depth of field, emphasizing my subject, while larger values, like f/11, bring more of the scene into focus, adding context.
Can I use aperture priority mode in low-light conditions, and if so, what are some tips for getting the best results?
Low-light conditions can be a challenge, but aperture priority mode can still shine. I recommend using a wide-aperture lens, like my trusty 50mm f/1.4, to let more light in. You can also bump up the ISO, but be mindful of noise. Shoot during the blue hour or use available light sources to add depth to your images. Experiment and see what works best for your story.
How does aperture priority mode interact with other camera settings, such as ISO and shutter speed, to produce a well-exposed image?
When I’m shooting in aperture priority mode, I love how it interacts with ISO and shutter speed to create a harmonious balance. Essentially, the camera adjusts the shutter speed to ensure a well-exposed image, while I can also tweak the ISO to fine-tune the exposure, allowing me to prioritize my desired depth of field and freeze or blur motion.