A Simple Guide on How to Transfer Your Design Onto a Lino Block
I still remember the first time I tried to transfer my design onto a lino block. I was excited to see my artwork come to life, but I was met with frustration and disappointment. The process seemed daunting, and I found myself wondering if it was really worth the hassle. But as I delved deeper into the world of lino block printing, I discovered that it’s not as complicated as it seems. In fact, learning how to transfer your design onto a lino block is a straightforward process that requires just a few simple steps.
As you read through this guide, I’ll walk you through the step-by-step process of bringing your design to life on a lino block. You’ll learn how to prepare your block, transfer your design, and get started with printing. My goal is to provide you with honest and practical advice that will help you overcome any obstacles and achieve professional-looking results. By the end of this article, you’ll be equipped with the knowledge and confidence to transfer your design onto a lino block like a pro, and start creating your own unique pieces of art.
Table of Contents
Guide Overview: What You'll Need
Total Time: 1 hour 15 minutes
Estimated Cost: $10 – $30
Difficulty Level: Intermediate
Tools Required
- Pencil sharp
- Tracing Paper for transferring design
- Burnishing Tool or similar object for rubbing design
- Cutting Mat for protecting work surface
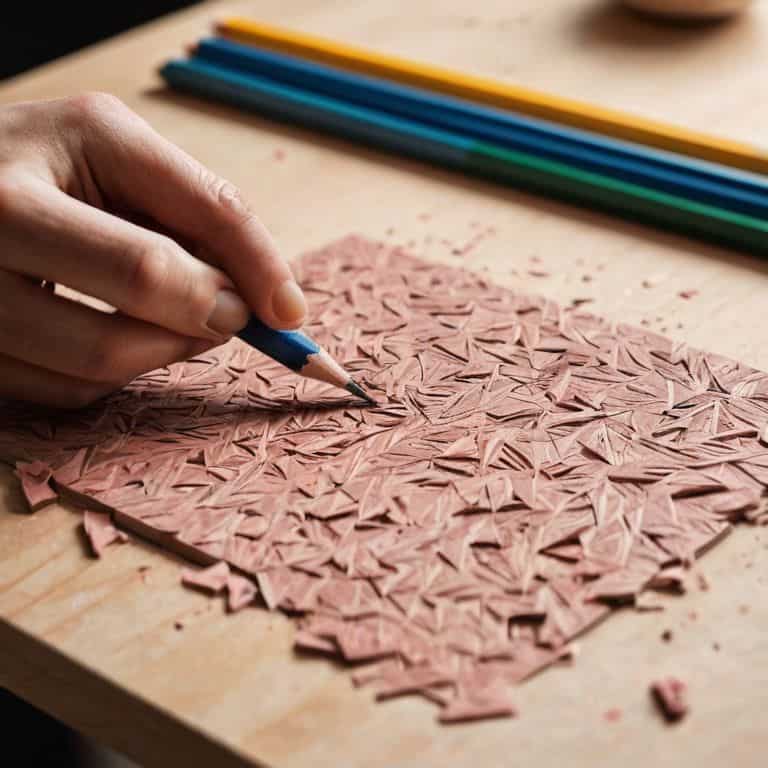
- Lino Cutting Tools for carving lino block
Supplies & Materials
- Lino Block available in various sizes
- Ink for printing
- Paper for printing
- Carbon Paper or tracing paper for transferring design
Step-by-Step Instructions
- 1. First, let’s get started on bringing your design to life – begin by giving your lino block a good clean and dry! This is a crucial step, as any dirt or moisture can affect the adhesion of the design. Use a soft brush to gently sweep away any debris, and then wipe it down with a dry cloth.
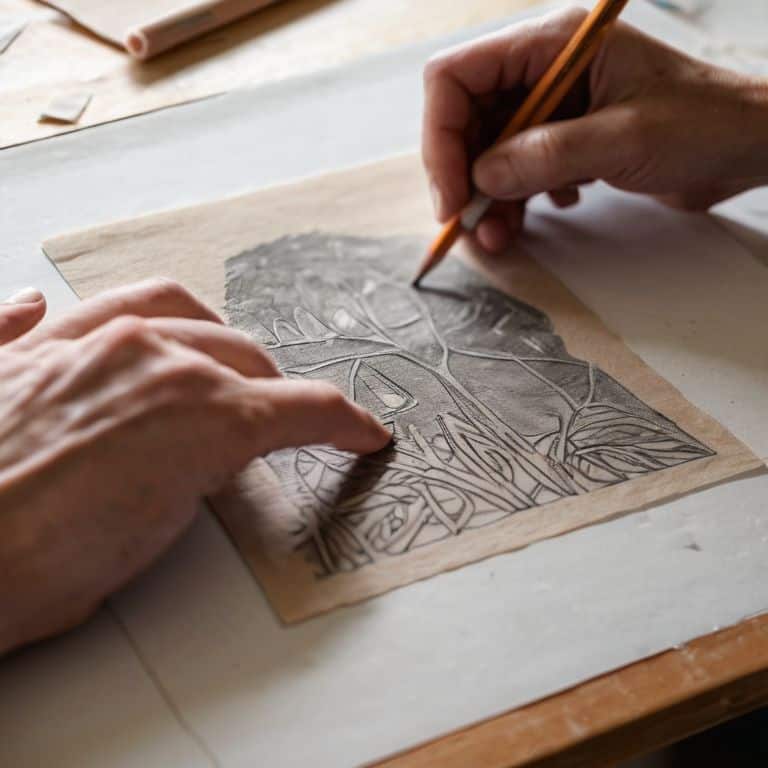
- 2. Next, you’ll need to prepare your design for transfer. If you’re working with a digital design, print it out onto transparent paper or tracing paper. If you’re working with a hand-drawn design, make sure it’s reversed, as the image will be mirrored when it’s transferred onto the lino block. Take your time with this step, as a clear and crisp design will make all the difference in the final result.
- 3. Now it’s time to apply a thin, even layer of transfer medium to the back of your design. You can use a specialized transfer medium or a homemade solution, such as a mixture of water and glycerin. Make sure to cover the entire design, but don’t overdo it – too much medium can cause the design to become blurry or distorted.
- 4. With your design ready, it’s time to apply it to the lino block. Place the design, medium-side down, onto the block, and use a brayer or roller to gently press it down. Start from the center and work your way outwards, applying even pressure to ensure the design adheres evenly. This is where the magic happens, and your design starts to take shape.
- 5. Once the design is applied, use a sharp tool or needle to carefully remove any air bubbles or excess medium. Work slowly and carefully, as you don’t want to damage the design or the lino block. If you do encounter any air bubbles, don’t worry – they can be easily removed with a little patience and care.
- 6. Allow the design to dry completely, following the instructions on your transfer medium. This can take anywhere from a few minutes to an hour, depending on the medium you’re using. Once it’s dry, use a soft brush to gently remove any excess medium or debris. Your design should now be permanently bonded to the lino block.
- 7. Finally, use a sharp cutting tool to carefully trim any excess lino block material from around the design. This will help you achieve a clean, crisp edge and prevent any excess material from getting in the way of your printing process. Take your time with this step, as a clean edge will make all the difference in the final result.
Bringing Designs Alive
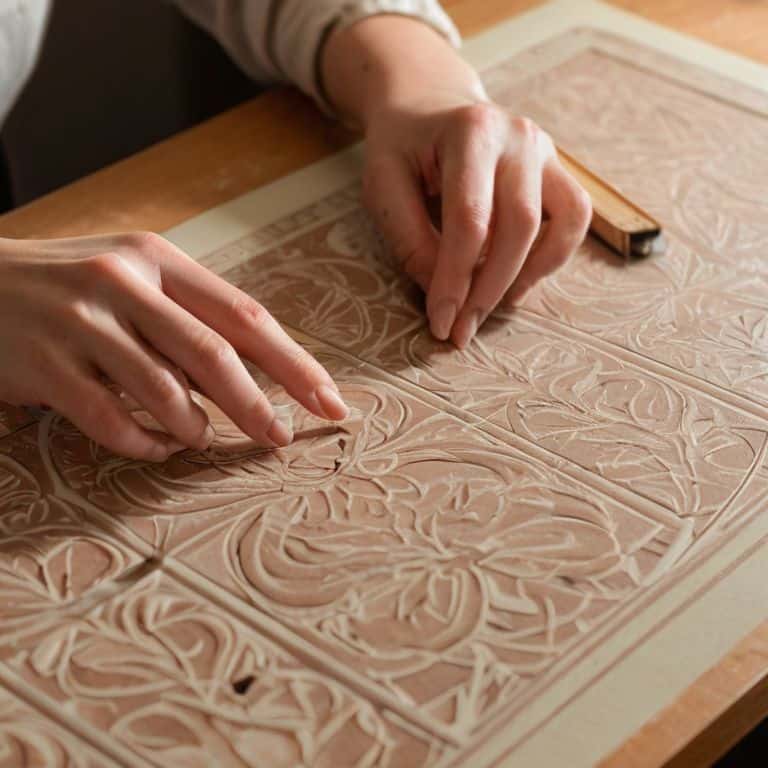
As I work on transferring designs onto lino blocks, I’ve come to realize that creating intricate designs is all about paying attention to the smallest details. It’s the subtle nuances in the design that make it truly special. To achieve this, I always start by preparing my design carefully, ensuring that it’s scaled correctly and that the lines are crisp and clear. This step is crucial in lino block printing techniques, as it sets the tone for the entire process.
When it comes to tips for tracing designs onto lino, I’ve found that using a sharp pencil and a steady hand is essential. It’s also important to consider the design transfer methods you’ll be using, as some may require more precision than others. For instance, if you’re using a carbon paper method, you’ll want to make sure your design is mirrored correctly to avoid any mistakes. By taking the time to get this step right, you’ll be able to achieve beautiful, intricate designs on your lino block.
One of the most common mistakes in lino block design transfer is rushing through the process. It’s easy to get excited about seeing your design come to life, but lino block design preparation is key. Take your time, and don’t be afraid to make adjustments as needed. With practice and patience, you’ll be able to create stunning designs that showcase your unique style and creativity.
Mastering Lino Block Printing Techniques
As I delve deeper into the world of lino block printing, I’ve come to realize that mastering the techniques is what truly sets your designs ablaze. It’s not just about transferring a design onto a block, but about coaxing the ink to dance across the paper in a beautiful, imperfect waltz. The pressure, the speed, the gentle touch – all these factors play a role in bringing your design to life.
With practice, you’ll develop a sense of when to push and when to pull back, allowing the unique textures of the lino block to shine through. It’s a meditative process, really – one that requires patience, attention to detail, and a willingness to experiment and learn from your mistakes.
Tips for Tracing Intricate Designs With Ease
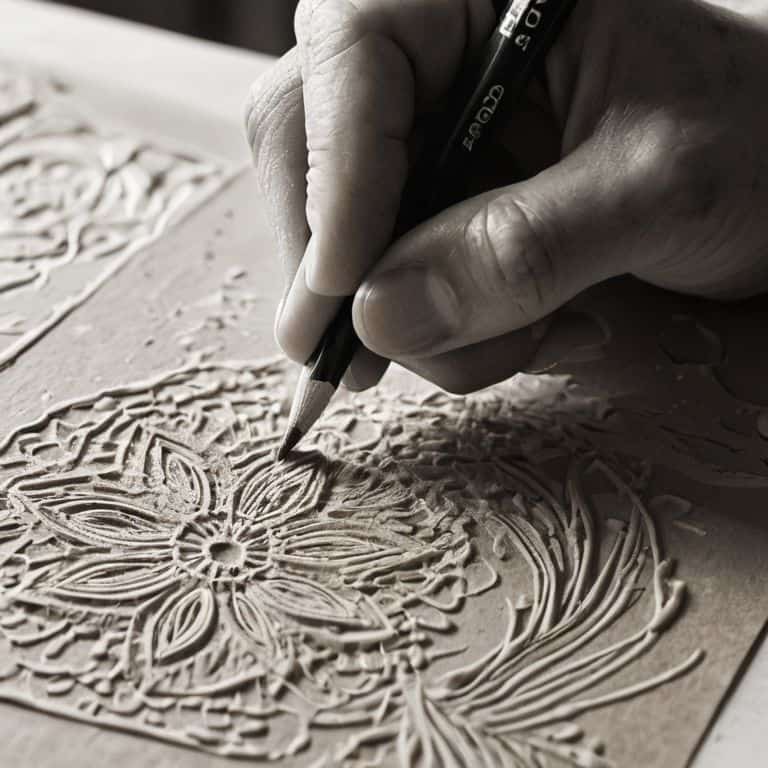
To trace intricate designs with ease, I always start by breaking down the image into simpler components. This helps me focus on one element at a time, ensuring that every detail is accurately transferred onto the lino block. I also find that using a soft pencil or a fine-tip pen allows for more precise lines and delicate curves. Additionally, taking my time and working in a well-lit space is crucial – it’s amazing how much of a difference good lighting can make when trying to capture the subtleties of a design.
By slowing down and being intentional with each stroke, I’m able to infuse the design with a sense of personality and character. It’s almost as if the design begins to tell its own story as I carefully trace each line and curve. This mindful approach not only helps me achieve a more accurate transfer but also allows me to connect with the design on a deeper level, which I believe is essential for bringing it to life.
Transferring Your Design with Ease: 5 Essential Tips
- Prepare your lino block by giving it a good clean and dry, ensuring a smooth surface for your design to adhere to
- Use a high-quality transfer paper or carbon paper to trace your design, allowing for crisp lines and precise details
- Apply even pressure when tracing your design onto the lino block, taking care not to smudge or blur the lines
- Work in a well-lit area, using natural light to illuminate your design and help you achieve accurate transfers
- Take your time and be patient, as transferring a design onto a lino block can be a meditative process that requires focus and attention to detail
Key Takeaways for Bringing Your Designs to Life
Always start by preparing your lino block with a good clean and dry to ensure your design transfers smoothly and evenly
Mastering the art of tracing intricate designs requires patience, the right tools, and a gentle touch to achieve crisp, detailed lines
Remember, the imperfections in your handmade prints are what give them character, so don’t be too hard on yourself if things aren’t perfect – it’s all part of the storytelling process
The Art of Transferring Designs
As you carefully transfer your design onto the lino block, remember that the imperfections are not mistakes, but the fingerprints of your creativity, telling a story of human touch and intention.
Finn Rivera
Bringing Your Vision to Life
As we conclude this journey of transferring your design onto a lino block, remember that the process is just as important as the final product. We’ve covered the essential steps, from preparing your block to mastering the art of tracing intricate designs. It’s crucial to recall that practice makes perfect, and it’s okay if your first attempts don’t yield the desired results. The key is to enjoy the process, learn from your mistakes, and continually challenge yourself to improve.
Now that you have the tools and knowledge to bring your designs to life, don’t be afraid to experiment and push boundaries. Remember, the beauty of handmade objects lies in their unique imperfections, which tell a story of their own. As you embark on this creative journey, keep in mind that every cut, every mark, and every imperfection is a testament to the human touch that makes your work truly special. So, go ahead, get creative, and watch your designs come alive in ways you never thought possible.
Frequently Asked Questions
What kind of ink or medium is best for transferring designs onto a lino block?
For transferring designs, I swear by a good quality, oil-based ink or a sharp graphite pencil. The ink gives a crisp, bold transfer, while the pencil allows for more delicate, detailed work. Experiment with both to see what works best for your design – and don’t be afraid to mix it up for unique effects.
How do I ensure my design is reversed properly before transferring it to the lino block?
To ensure your design is reversed properly, I like to use a simple trick: flip your design horizontally before printing it out or tracing it onto the lino block. This way, when you transfer it, the image will be mirrored correctly, giving you the desired result. Trust me, it’s a step worth double-checking!
Can I use a photocopied image or does the design need to be hand-drawn for lino block printing?
When it comes to transferring your design, it doesn’t have to be hand-drawn – a photocopied image works beautifully. Just ensure it’s a high-contrast copy, and you’re good to go. I often use photocopies of my sketches to get a crisp, clear image onto the lino block.