A Guide on How to Do Block Printing on Fabric and Paper
I still remember the first time I stumbled upon how to do block printing – it was like uncovering a hidden world of creative possibilities. I was at a local artisan market, and a vendor was demonstrating this ancient technique with such ease and precision. What struck me was the common myth that block printing is a complicated, messy process that only experienced artists can master. But the truth is, with the right guidance and a willingness to get your hands dirty, anyone can learn how to do block printing and bring a touch of handmade beauty into their lives.
As you embark on this journey with me, I promise to share practical tips and tricks to help you navigate the world of block printing. You’ll learn how to prepare your materials, carve your designs, and print your unique creations onto various surfaces. My goal is to empower you with the knowledge and confidence to experiment and make block printing your own. Whether you’re a seasoned crafter or a curious beginner, this guide will walk you through the process, and before you know it, you’ll be unleashing your creativity and stamping your personal style onto anything from fabrics to walls.
Table of Contents
- Guide Overview: What You'll Need
- Step-by-Step Instructions
- Unleash Block Printing Magic
- Bringing Your Block Printing to Life: 5 Essential Tips
- Embracing the Art of Block Printing: 3 Key Takeaways
- The Heart of Block Printing
- Bringing it All Together: The Art of Block Printing
- Frequently Asked Questions
Guide Overview: What You'll Need
Total Time: 2 hours 30 minutes
Estimated Cost: $20 – $50
Difficulty Level: Intermediate
Tools Required
- Carving Tool (or linoleum cutter)
- Brayer (for applying ink)
- Baren or Spatula (for pressing paper onto block)
- Pencils and Markers (for designing and tracing patterns)
- Ruler (for measuring and cutting blocks)
- Cutting Mat (for protecting work surface)
- Ink Plate (for holding and rolling out ink)
Supplies & Materials
- Linoleum Blocks (or softwood blocks, 6 inches x 9 inches)
- Printing Ink (various colors)
- Paper (for printing, 8.5 inches x 11 inches)
- Newsprint (for testing and proofing)
- Ink Rollers (for applying ink to blocks)
- Tracing Paper (for creating designs and patterns)
Step-by-Step Instructions
- 1. To begin our block printing journey, let’s start by gathering our materials. This includes a piece of wood or linoleum for our block, some carving tools, a brayer, ink, and the surface we want to print on, such as paper or fabric. I like to lay everything out in front of me to get a sense of the project’s scope and to ensure I have all the necessary tools within arm’s reach.
- 2. Next, we need to design our block. This is the fun part where our creativity shines. Think about the patterns, shapes, or images you want to print. Sketch out a few ideas in your notebook, considering the size and complexity of the design. For beginners, simpler designs are more forgiving, but don’t be afraid to challenge yourself – it’s all part of the learning process.
- 3. With our design in mind, it’s time to transfer it onto the block. You can do this by drawing directly onto the wood or linoleum with a pencil or by creating a mirror image of your design on tracing paper, placing it face down on the block, and rubbing it with a pencil or a tool to transfer the image. This step requires patience and a steady hand, as the quality of the transfer will affect your final print.
- 4. Now, let’s carve out our design. This is where the magic happens, and your block starts to take shape. Use your carving tools to carefully remove the areas around your design, making sure to carve in relief – meaning the parts of the block that you want to print should be raised. It’s a meditative process that requires focus and attention to detail, but remember, the imperfections are what make it unique.
- 5. After carving, we need to prepare our ink and brayer. Squeeze out a small amount of ink onto a flat surface and use your brayer to roll it out into a smooth, even layer. This step is crucial for achieving consistent prints. Make sure your brayer is well-inked but not overloaded, as too much ink can lead to a messy print.
- 6. It’s time to ink our block. Use your brayer to apply a thin, even layer of ink to the raised surfaces of your block. Be careful not to press too hard, which can push ink into the carved-out areas. You want a smooth, consistent coat of ink for the best results.
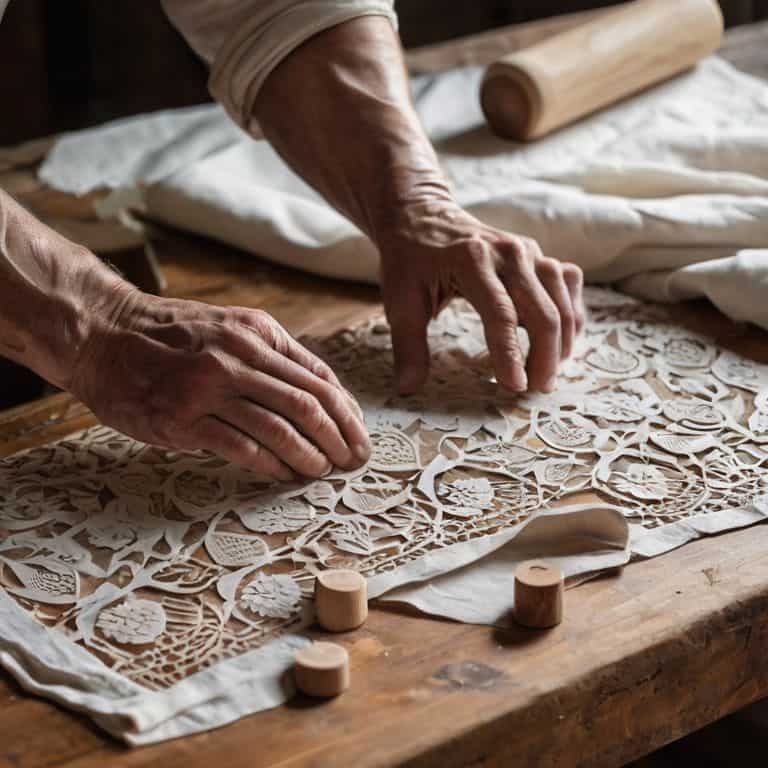
- 7. Finally, let’s create our print. Place your inked block face down on the surface you want to print on and apply gentle, even pressure. You can use a baren or the back of a spoon to press down on the block, ensuring good contact between the block and the printing surface. Lift the block carefully to reveal your print. This moment is always full of anticipation and joy, as you get to see your design come to life.
- 8. To add multiple colors to your print, you can repeat the inking and printing process with different colors, allowing each layer to dry before adding the next. This requires patience but can lead to stunning, multi-dimensional prints. Remember to clean your block thoroughly between colors to prevent mixing.
- 9. Once you’ve completed your print, let it dry completely before handling it. Depending on the ink, this could take anywhere from a few minutes to several hours. Be patient, as rushing this step can smudge your beautiful print. After it’s dry, you can frame it, use it as a decorative element, or give it as a gift – a truly handmade piece of art.
Unleash Block Printing Magic
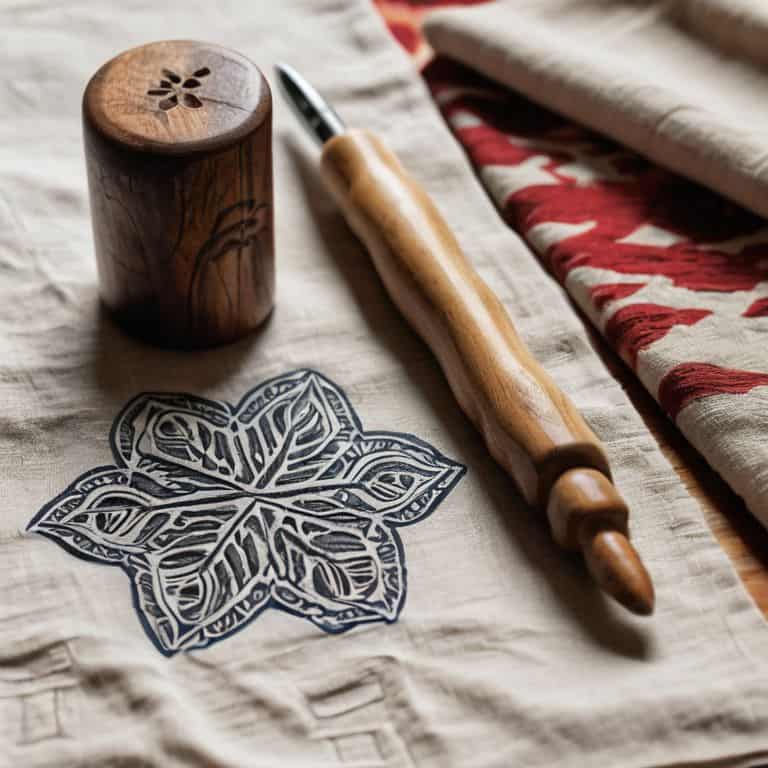
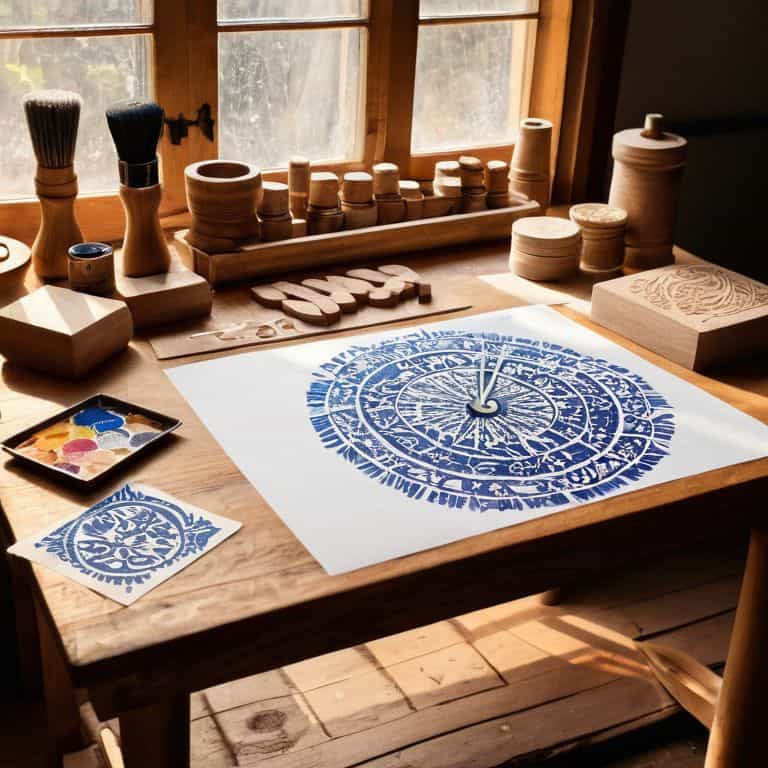
As I delve deeper into the world of block printing, I’m constantly reminded of the importance of experimenting with different materials. For instance, block printing on fabric can add a unique touch to your home decor or apparel. The key is to choose the right type of fabric and ink to achieve the desired effect. I’ve found that natural fibers like cotton and linen work beautifully with block printing ink types that are specifically designed for textiles.
When it comes to creating intricate designs, relief printing techniques can be a game-changer. By using carving tools for block printing, you can create complex patterns and shapes that would be difficult to achieve with other methods. I recommend starting with simple designs and gradually moving on to more complex ones as you gain confidence in your skills. Remember, the beauty of block printing lies in its imperfections, so don’t be too hard on yourself if your designs aren’t perfect.
To take your block printing to the next level, consider playing with paper selection. Different types of paper can produce unique textures and effects, adding an extra layer of depth to your designs. For beginners, I recommend starting with linocut art for beginners kits that usually include a variety of papers and tools to get you started. As you experiment with different papers and techniques, you’ll find that your block printing journey becomes a fun and creative process of discovery.
Linocut Art for Beginners Starts Here
As I dive into the world of linocut art, I’m reminded of the first time I carved my own design into a linoleum block. The feeling of transforming a simple material into a unique piece of art was exhilarating. For beginners, it’s essential to start with simple designs and gradually move on to more complex ones. I recommend beginning with bold lines and geometric shapes, allowing you to get a feel for the carving process.
Remember, the beauty of linocut art lies in its imperfections, so don’t be too hard on yourself if your first attempts aren’t perfect. With practice, you’ll develop your own style and technique, and before long, you’ll be creating stunning pieces that reflect your personality.
Relief Printing Techniques to Master
To take your block printing to the next level, it’s essential to experiment with relief printing techniques. This is where the magic happens, and your designs start to gain depth and texture. I love playing around with different tools and materials to achieve unique effects – from the soft, feathery edges of a hand-carved linoleum block to the crisp, sharp lines of a meticulously cut woodblock. By mastering these techniques, you’ll be able to add intricate details and patterns to your prints, giving them a truly handmade feel.
As you explore relief printing, remember to keep it simple at first, and don’t be afraid to make mistakes. They often lead to unexpected, exciting results. With practice, you’ll develop your own style and voice, and your prints will start to tell a story that’s uniquely yours.
Bringing Your Block Printing to Life: 5 Essential Tips
- Start with the right materials: choose a high-quality linoleum block, sharp cutting tools, and a range of vibrant inks to bring your designs to life
- Experiment with different patterns and textures: from geometric shapes to natural forms, don’t be afraid to try new things and see what unique effects you can create
- Pay attention to ink consistency: too thick and it won’t transfer well, too thin and it may bleed – finding the perfect balance is key to achieving crisp, clean prints
- Don’t underestimate the power of pressure: applying the right amount of pressure to your block can make all the difference in getting a solid, even print – practice makes perfect, so don’t be discouraged if it takes a few tries to get it just right
- Embrace the imperfections: block printing is all about character and charm, so don’t stress if your prints aren’t perfect – the tiny flaws and variations are what make each one unique and special
Embracing the Art of Block Printing: 3 Key Takeaways
By embracing the imperfections of handmade block printing, you can create unique and personalized designs that reflect your character and style, giving your space a soulful touch
Mastering relief printing techniques, such as linocut art, can help you unlock new creative possibilities and experiment with different textures and patterns, allowing you to tell your story through art
Through the process of block printing, you can slow down, connect with natural materials, and experience the joy of crafting something with your own hands, making each piece a meaningful and lasting part of your personal narrative
The Heart of Block Printing
As you carve your design into the block, remember that every cut, every imperfection, is a brushstroke of your story – it’s not just about transferring ink onto paper, it’s about leaving a piece of yourself behind.
Finn Rivera
Bringing it All Together: The Art of Block Printing
As we’ve explored the world of block printing, from preparing our materials to mastering relief printing techniques, it’s clear that this craft is all about embracing the process. We’ve delved into linocut art for beginners, understanding that it’s okay to start small and that every mistake is an opportunity to learn. Through our journey, we’ve uncovered the magic of block printing, from the initial sketch to the final print, and how it allows us to tell our own unique stories through handmade objects.
Now, as you put down your tools and step back to admire your creations, remember that the true beauty of block printing lies not just in the end result, but in the journey itself. It’s about the connection to the materials, the thrill of seeing your design come to life, and the sense of pride that comes with creating something with your own hands. So, don’t be afraid to experiment, to try new things, and to make block printing a part of your storytelling arsenal.
Frequently Asked Questions
What kind of ink is best to use for block printing on different surfaces?
For block printing, I swear by oil-based inks for wood and fabric, while water-based inks work beautifully for paper and ceramics. Experiment with Speedball or Akua inks for vibrant results – and don’t be afraid to mix and match to create unique hues that tell your story.
How do I achieve crisp, detailed designs with my linocut blocks?
To achieve crisp, detailed designs with your linocut blocks, focus on carving with precision and using the right ink viscosity. I find that a mixture of relief and detail carving gives the best results. Experiment with different gouge sizes and ink consistencies to find your sweet spot – it’s all about balance and patience.
Can I mix and match different block printing techniques to create unique, layered designs?
Absolutely, I love experimenting with combining techniques to create one-of-a-kind designs. Try layering linocut with screen printing or relief printing with hand-painting – the possibilities are endless. By mixing and matching, you’ll add depth and visual interest to your pieces, making each one truly unique and reflective of your personal style.