A Guide on How to Create a Cinematic Lighting Setup With 3 Lights
I still remember the first time I tried to create a cinematic lighting setup with 3 lights for one of my documentary projects. I was determined to capture the perfect shot, but I ended up with a mess of harsh shadows and unflattering hues. It was a frustrating experience, but it taught me a valuable lesson: that good lighting is not just about throwing a few lights together, but about crafting a mood and atmosphere that draws the viewer in. As I delved deeper into the world of cinematography, I discovered that how to create a cinematic lighting setup with 3 lights is not just a technical exercise, but an art form that requires patience, practice, and a keen eye for detail.
In this article, I’ll share my personal approach to creating a cinematic lighting setup with 3 lights, one that emphasizes simplicity and creativity over expensive equipment and complicated setups. You’ll learn how to use just three lights to create a visually stunning and emotionally resonant scene, and how to avoid common mistakes that can ruin an otherwise great shot. Whether you’re a seasoned filmmaker or just starting out, my goal is to provide you with practical advice and inspirational examples to help you take your lighting skills to the next level and bring your stories to life in a way that’s both authentic and captivating.
Table of Contents
- Guide Overview: What You'll Need
- Step-by-Step Instructions
- Weaving Magic With Light
- Illuminating Insights: 5 Essential Tips for a 3-Point Cinematic Lighting Setup
- Bringing Your Vision to Life: 3 Essential Takeaways
- Illuminating the Art of Cinematic Storytelling
- Bringing Your Cinematic Vision to Life
- Frequently Asked Questions
Guide Overview: What You'll Need
Total Time: 3 hours
Estimated Cost: $100 – $300
Difficulty Level: Intermediate
Tools Required
- Light Stands (3 stands, adjustable height)
- Clamp Lights (for securing lights to stands)
- Screwdriver (for assembling light stands)
Supplies & Materials
- Key Light (a strong, directional light source)
- Fill Light (a softer, less intense light source)
- Backlight (a light source positioned behind the subject)
- Diffusion Filters (for softening light)
- Gels (for coloring the light)
- Extension Cords (25 feet long, for connecting lights to power sources)
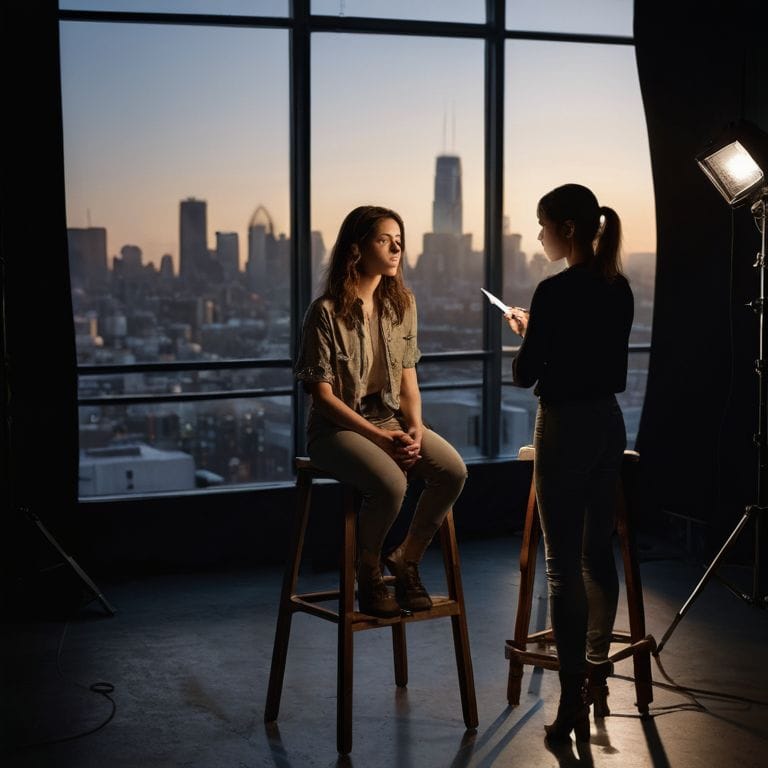
Step-by-Step Instructions
- 1. First, let’s start by understanding the basics of a three-point lighting setup, which is the foundation of creating a cinematic atmosphere. This setup consists of a key light, a fill light, and a backlight, each serving a unique purpose in shaping the visual narrative of your scene. To begin, position your key light, which should be the brightest light in the setup, at a 45-degree angle to your subject’s face, about 2-3 feet away.
- 2. Next, we’ll add the fill light, which is used to soften the shadows created by the key light and add depth to the scene. The fill light should be placed on the opposite side of the key light, also at a 45-degree angle, but this time, it should be about 1-2 feet away from your subject. Remember, the fill light is not meant to be as bright as the key light, so adjust the intensity accordingly to achieve a natural balance between light and shadow.
- 3. Now, let’s move on to the backlight, which is arguably the most cinematic element of our three-point setup. The backlight is used to create a subtle rim of light around your subject’s hair and shoulders, separating them from the background and adding a sense of depth to the scene. Place the backlight directly behind your subject, making sure it’s not visible in the shot, and adjust its intensity to create a subtle glow that enhances the overall visual appeal.
- 4. With our three lights in place, it’s time to consider the color temperature of each light source. For a cinematic look, you often want to create a contrast between warm and cool tones. Your key light could be a warm, softbox light, while your fill light might be a cooler, LED panel. The backlight can also be a cool light, but this depends on the mood you’re trying to create. Experiment with different color temperatures to find the combination that best serves your story.
- 5. The next step is to fine-tune the lighting ratios between your key, fill, and backlight. This is where you can really start to see the cinematic quality of your setup come to life. A common starting point is a 3:1 ratio between the key and fill lights, but this can vary depending on the scene and the look you’re going for. Remember, the backlight should be subtle, so start with a lower intensity and adjust to taste.
- 6. Now that we have our basic setup and ratios established, let’s talk about lighting for mood and atmosphere. This is where you can really get creative and use lighting to tell your story. Consider the time of day, the weather, and the emotional state of your character. For example, a low-key lighting setup with deep shadows can create a sense of tension or foreboding, while a high-key setup with minimal shadows can create a brighter, more upbeat mood.
- 7. Finally, don’t forget the importance of practical lighting in your scene. Practical lights are any light sources that are visible within the shot, such as table lamps, floor lamps, or even the glow of a computer screen. These can add a layer of realism to your scene and help to create a more immersive cinematic experience. Consider how these practical lights can interact with your three-point setup to enhance the overall lighting design and draw the viewer into the world of your story.
Weaving Magic With Light
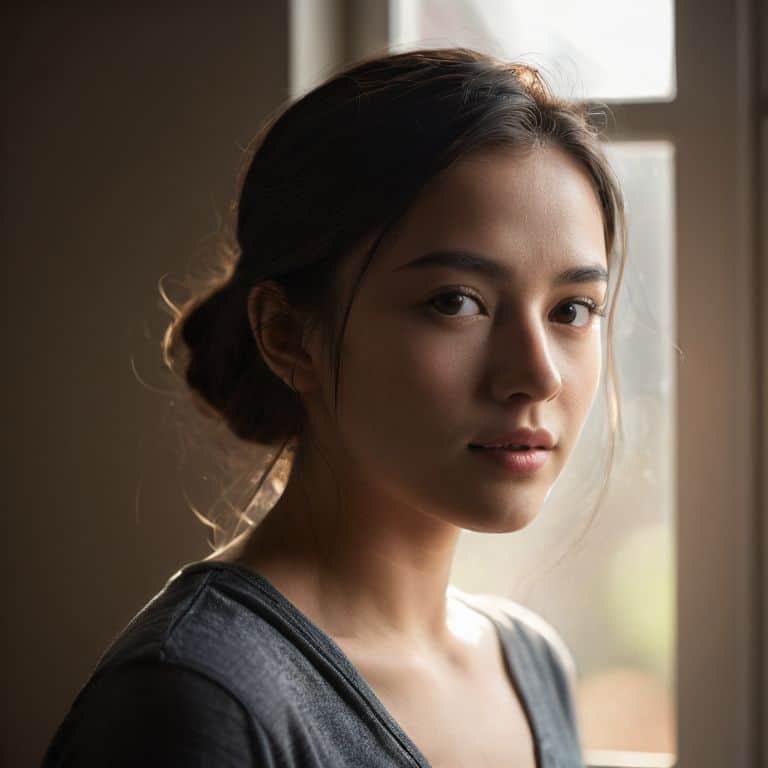
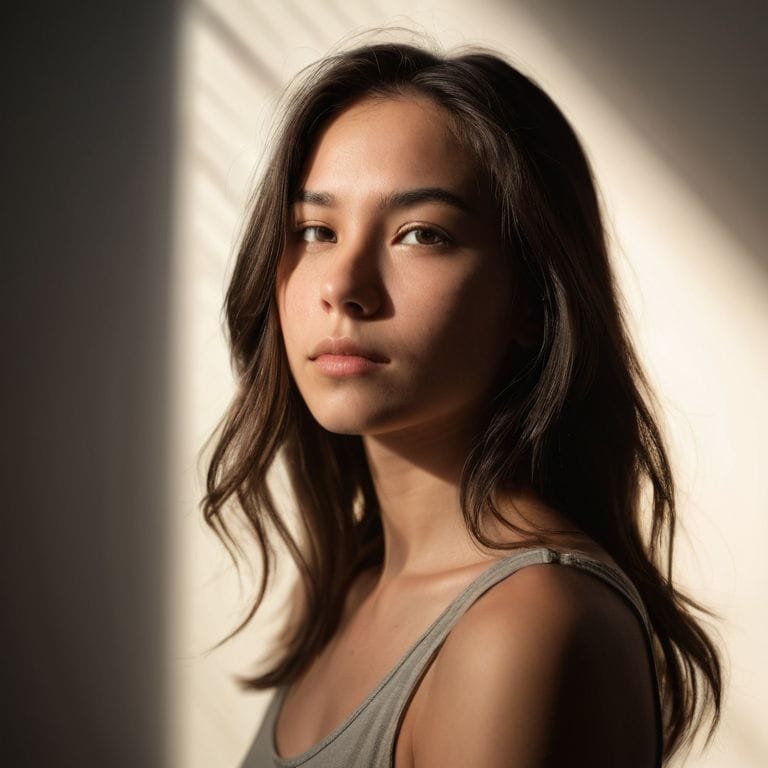
As I delve into the world of cinematic lighting, I’m reminded of the power of softbox lighting in creating a warm and inviting atmosphere. When working with a 3-light setup, it’s essential to consider the interplay between natural and artificial light. This balance can make or break the mood of your scene. I’ve found that using softbox lights in conjunction with natural light can add a layer of depth and dimensionality to your footage.
When it comes to achieving a cinematic look, color temperature plays a crucial role. I often experiment with different color temperatures to evoke a specific emotional response from my audience. For instance, a warm color temperature can create a cozy and intimate atmosphere, while a cool color temperature can produce a more dramatic and moody effect. By carefully selecting the right color temperature, you can elevate your scene and draw your viewer in.
In my experience, lighting ratios are also vital when it comes to interviews. I aim to create a balanced ratio between the key light, fill light, and backlight to produce a visually appealing and engaging image. By investing in a budget-friendly lighting kit, you can achieve professional-looking results without breaking the bank. Remember, it’s not just about the equipment – it’s about understanding the art of lighting and how to use it to tell your story.
Balancing Natural and Artificial Light
When combining natural and artificial light, it’s all about striking a harmonious balance. I love experimenting with this mix, as it can add depth and visual interest to a scene. By blending the soft, warm glow of natural light with the precision of artificial lighting, you can create a captivating atmosphere that draws the viewer in. For instance, try positioning your subject near a window with a softbox or LED panel as a fill light – the result is a beautifully nuanced, cinematic look.
In my own films, I’ve found that balancing natural and artificial light can make even the most mundane settings feel extraordinary. It’s a delicate dance, but one that’s well worth mastering. By playing with the interplay between these two light sources, you can evoke emotions, convey mood, and ultimately, tell a more compelling story.
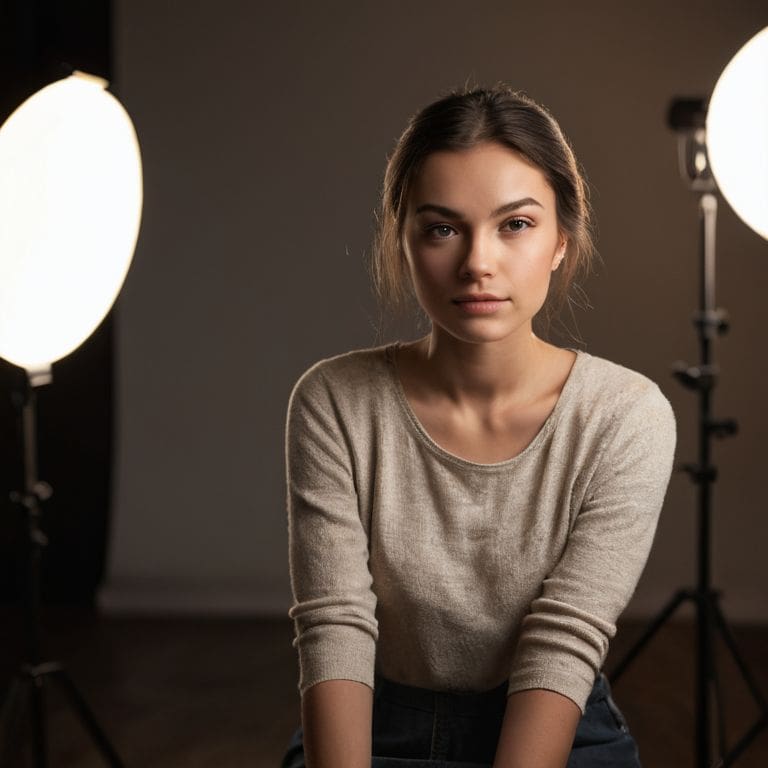
Softbox Secrets for Cinematic Glow
To take your cinematic lighting to the next level, let’s dive into the world of softboxes. These magical tools can create a gentle, wraparound glow that adds depth and dimension to your scene. I like to think of softboxes as the “sweethearts” of lighting – they’re always going to make your subject look lovely. By positioning a softbox above or to the side of your subject, you can craft a soft, flattering light that’s perfect for interviews, close-ups, or anytime you want to create a sense of intimacy.
When using softboxes, remember that the size and distance of the box from your subject will greatly impact the quality of light. Experiment with different placements and sizes to find the perfect balance for your shot. Trust me, the extra effort will be worth it – a well-placed softbox can be the key to unlocking a truly cinematic glow.
Illuminating Insights: 5 Essential Tips for a 3-Point Cinematic Lighting Setup
- Start by understanding the role of each light: your key light sets the tone, your fill light softens the shadows, and your backlight separates your subject from the background
- Experiment with different light placements to create depth and dimensionality – don’t be afraid to break the rules and try unconventional angles
- Pay attention to the color temperature of your lights and how they interact with the natural light in your scene – it can make or break the mood of your shot
- Use softboxes and diffusers to create a cinematic glow, but also know when to use harsh light to add contrast and visual interest
- Remember, lighting is all about balance and harmony – take the time to tweak and adjust your setup until it feels like it’s serving the story, not overwhelming it
Bringing Your Vision to Life: 3 Essential Takeaways
Illumination is not just about lighting a scene, but about crafting an atmosphere that transports your audience into the story
The balance between natural and artificial light is crucial, as it can make or break the cinematic feel of your footage – experiment with different combinations to find the perfect blend
Remember, lighting is a storytelling tool, not just a technical aspect of filmmaking – use it to evoke emotions, set the tone, and guide your viewer’s attention through the narrative
Illuminating the Art of Cinematic Storytelling
The dance of light and shadow is where the true magic of filmmaking unfolds – with just three lights, you can conjure an atmosphere that transports your audience, makes them feel, and leaves a lasting impression.
Maya Jenson
Bringing Your Cinematic Vision to Life
As we’ve explored the world of cinematic lighting, we’ve touched on the importance of balancing natural and artificial light, and how softbox secrets can help you achieve a cinematic glow. By mastering these techniques and understanding how to work with just three lights, you’ll be well on your way to creating visually stunning scenes that draw your audience in. Remember, the key to a successful cinematic lighting setup is not just about the equipment, but about telling a story through the careful placement and manipulation of light and shadow.
So, the next time you’re on set, I encourage you to think of lighting as an emotional narrative tool, one that can elevate your story and transport your viewers to new and exciting worlds. Don’t be afraid to experiment, to try new things, and to push the boundaries of what’s possible with just three lights. With practice, patience, and a willingness to take risks, you’ll be weaving magic with light in no time, and bringing your cinematic vision to life in ways you never thought possible.
Frequently Asked Questions
What are the essential qualities to look for when selecting a key light, fill light, and backlight for a cinematic lighting setup?
When choosing your key, fill, and backlight, I look for lamps with a high CRI for accurate color representation, adjustable brightness for flexibility, and a soft, wraparound quality to create depth and dimension in my scene.
How can I effectively balance the intensity and color temperature of my three lights to achieve a cohesive visual aesthetic?
To balance intensity and color temperature, I adjust my lights’ wattage and gel them to match the scene’s mood. For example, I might use a warm key light, a cool backlight, and a soft, neutral fill light to create depth and visual interest. This harmony of light and shadow brings my story to life.
What are some common mistakes to avoid when setting up a 3-point lighting system to ensure my footage looks polished and professional?
When setting up a 3-point lighting system, I see many creators forget to consider the 180-degree rule or neglect to soften harsh shadows. Others misplace their backlight, causing an unflattering glow. To avoid these mistakes, take a step back, and assess your setup as a whole, ensuring each light serves a purpose in crafting a polished, cinematic look that elevates your story.