A Guide on How to Get a Shallow Depth of Field in Your Videos

I still remember the first time I saw a film that truly mastered the art of how to get a shallow depth of field. It was a documentary about a solo hike through the mountains, and the way the cinematographer used a shallow depth of field to blur the background and focus on the hiker’s journey was nothing short of magical. It’s a technique that can make or break the mood of a scene, and yet, so many of us struggle to achieve it. The common myth is that you need the most expensive equipment to get that perfect blur, but I’m here to tell you that’s just not true.
In this article, I’ll share my personal tips and tricks for achieving a stunning shallow depth of field without breaking the bank. You’ll learn how to choose the right lens, adjust your aperture, and pay attention to the distance between your subject and the background. By the end of this guide, you’ll be equipped with the practical knowledge to take your filmmaking to the next level and create scenes that draw your audience in. Whether you’re a seasoned filmmaker or just starting out, mastering how to get a shallow depth of field is a skill that will elevate your storytelling and leave a lasting impression on your viewers.
Table of Contents
Guide Overview: What You'll Need
Total Time: 30 minutes to 1 hour
Estimated Cost: $0 – $100
Difficulty Level: Easy
Tools Required
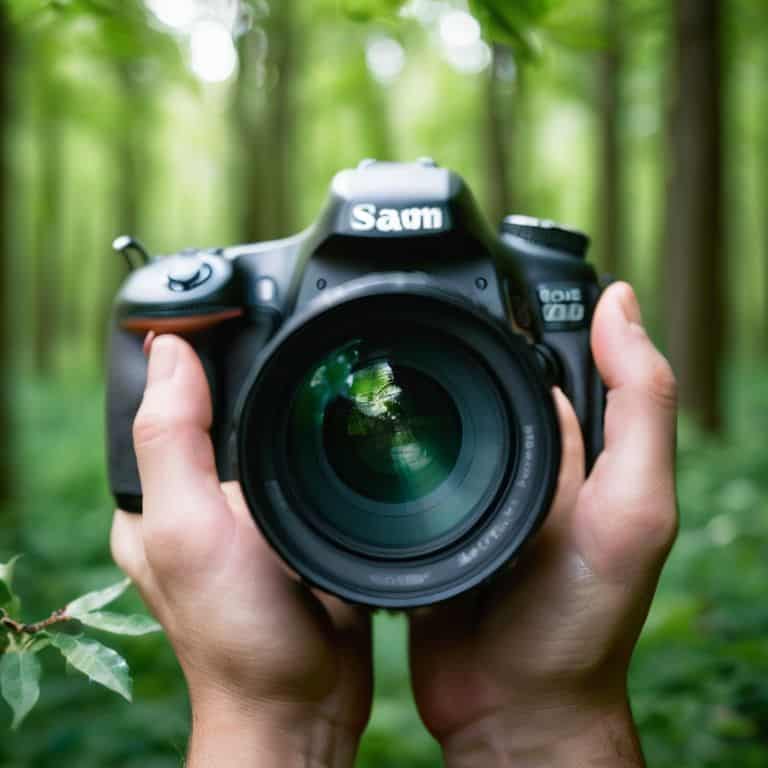
- DSLR Camera (or camera with manual aperture control)
- Prime Lens (or lens with wide aperture, e.g., f/1.4 or f/2.8)
- Tripod (optional, for stabilizing the camera)
Supplies & Materials
- None No additional supplies are required, but a shallow depth of field can be achieved using everyday objects, such as a 6 inches distance between the subject and background
Step-by-Step Instructions
- 1. First, let’s talk about the lens aperture and how it affects the depth of field in your footage. To achieve a shallow depth of field, you’ll want to use a lens with a large aperture, which is represented by a small f-stop number. I like to think of it as the “eye” of the camera, and just like our eyes, it can open and close to let more or less light in.
- 2. Next, you’ll want to _understand your camera’s settings_ and how to adjust them to get the desired effect. Most cameras have a manual mode that allows you to control the aperture, shutter speed, and ISO. Take some time to familiarize yourself with these settings and practice using them to get a feel for how they work together.
- 3. Now, let’s move on to choosing the right lens for the job. As a documentary filmmaker, I’ve had the chance to work with a variety of lenses, and I can tell you that the right one can make all the difference. Look for a lens with a wide aperture, such as a 50mm or 35mm lens, and consider the focal length and how it will affect the perspective of your shot.
- 4. When it comes to composing your shot, think about the story you’re trying to tell and how you can use the shallow depth of field to enhance it. Consider placing your subject in the foreground, with a blurry background that draws the viewer’s attention to them. You can also experiment with different angles and perspectives to add visual interest to your shot.
- 5. To really make your subject stand out, try using a shallow focus technique where you focus on a specific part of the image and let the rest fall out of focus. This can be especially effective when working with portraits or close-ups, as it helps to create a sense of intimacy and connection with the subject.
- 6. Another important thing to consider is the lighting in your scene, as it can greatly impact the overall mood and atmosphere of your footage. Natural light can be especially beautiful, so try to shoot near a window or outside during the golden hour for a warm, soft light. Avoid harsh or direct light, as it can create unflattering shadows and highlights.
- 7. Once you’ve got your shot, it’s time to experiment with color grading in post-production. This is where you can really enhance the mood and atmosphere of your footage, and make your subject stand out even more. Consider using a _color palette_ that complements the natural colors in your scene, and don’t be afraid to push the boundaries and try out new and interesting combinations.
- 8. Finally, don’t forget to pay attention to sound design, as it can be just as important as the visuals in creating a compelling story. Consider adding background noise or music that complements the mood and atmosphere of your scene, and make sure to record high-quality audio to match your stunning visuals.
Mastering Shallow Depth

As I delve into the world of large aperture photography, I’m reminded of the incredible impact it can have on a scene. The ability to create a beautiful bokeh effect in the background, while keeping your subject sharp, is a powerful tool in any filmmaker’s or photographer’s arsenal. When used correctly, it can add a sense of intimacy and depth to your images.
When it comes to close up portrait photography, a shallow depth of field is essential for creating a sense of connection with your subject. By blurring out the background, you’re able to focus the viewer’s attention on the subject’s eyes and emotions. I’ve found that using a fast lens is crucial for achieving this effect, as it allows for a larger aperture and a more pronounced bokeh effect.
In addition to lens choice, sensor size and depth of field also play a significant role in achieving a shallow depth of field. Understanding how these factors interact can help you make informed decisions about your camera and lens setup. By mastering these techniques, you’ll be able to add a new level of depth and emotion to your images, and take your storytelling to the next level.
Bokeh Effect Techniques Revealed
To take your shallow depth of field to the next level, it’s all about mastering the bokeh effect. This beautiful blur can add a touch of elegance to your footage, drawing the viewer’s eye to your subject. I love experimenting with different aperture settings to achieve unique bokeh patterns – it’s amazing how a simple lens change can transform the mood of a scene. By carefully controlling the bokeh, you can create a sense of depth and dimensionality, making your subject stand out in a crowded environment.
For me, the bokeh effect is all about creating a sense of intimacy and atmosphere. By blurring the background, you can focus attention on your subject’s emotions and story, rather than distractions in the environment. It’s a powerful tool for visual storytelling, and one that I use extensively in my own documentary work.
Large Aperture Magic Unleashed
When I’m editing a scene, I love watching how a large aperture can transform the mood and focus of the story. It’s like a breath of fresh air for the visuals. By using a lens with a big aperture, you’re not just blurring the background – you’re creating a sense of intimacy and immediacy. Your subject pops, and the viewer’s attention is drawn right to them. I’ve seen this technique used to stunning effect in films like “The Grand Budapest Hotel”, where the shallow depth of field adds to the sense of wonder and fantasy.
As I experiment with different apertures in my own projects, I’m always amazed by the emotional impact it can have. A large aperture can make a scene feel more urgent, more personal. It’s a powerful tool in our storytelling toolkit, and one that I believe can elevate even the simplest of scenes into something truly captivating.
Unlocking the Secrets of Shallow Depth: 5 Essential Tips
- Use a lens with a big aperture, like an f/1.4 or f/2.8, to blur out the background and make your subject pop
- Choose the right camera format – full-frame cameras tend to produce a shallower depth of field than crop sensors
- Get up close and personal with your subject – a shorter distance between the camera and subject will help separate them from the background
- Pay attention to the background itself – a busy or cluttered background can make it harder to achieve a shallow depth of field, so try to simplify it if possible
- Experiment with different focal lengths – a longer focal length, like 85mm or 135mm, can help compress the perspective and create a more pronounced shallow depth of field
Key Takeaways for Capturing Shallow Depth of Field
Use a lens with a large aperture to create a shallow depth of field, making your subject stand out by blurring the background
Experiment with different bokeh effects to add an artistic touch to your footage, using the aperture and lens choice to control the blur’s shape and size
Consider the story you want to tell and use shallow depth of field to guide the viewer’s attention, creating a visual narrative that draws them into the scene
Unlocking Cinematic Depth
To me, a shallow depth of field is more than just a technical trick – it’s a storytelling superpower that lets you guide the viewer’s eye and heart into the world of your film, where every blurred line and sharp focus is a deliberate choice that deepens the emotional impact of your narrative.
Maya Jenson
Bringing It All Into Focus

As we’ve explored the world of shallow depth of field, it’s clear that mastering this technique is all about creative experimentation. From selecting the right lens with a large aperture to understanding the impact of distance and compression, each element plays a crucial role in achieving that beautifully blurred background and a crisp, in-focus subject. By applying the large aperture magic and bokeh effect techniques we’ve discussed, you’ll be well on your way to creating visually stunning images and videos that draw your audience in and tell a deeper story.
Now, as you embark on your own journey to harness the power of shallow depth of field, remember that the true art of filmmaking and photography lies not just in the technical aspects, but in the emotional connection you create with your audience. So, don’t be afraid to push boundaries, try new things, and always keep experimenting – for it’s in those moments of creative risk-taking that you’ll uncover the invisible art that sets your work apart and leaves a lasting impression.
Frequently Asked Questions
What is the minimum aperture value required to achieve a noticeable shallow depth of field?
To get a noticeable shallow depth of field, you’ll want to use a lens with an aperture of at least f/2.8, but honestly, the lower the f-stop, the shallower the depth. I personally love working with lenses around f/1.4 or f/2 – it’s where the magic happens, and your subject really starts to pop against a beautifully blurred background!
How does the distance between the subject and the background affect the shallow depth of field?
The distance between your subject and background is crucial for a shallow depth of field. The farther away the background is, the more blurred it will be, adding depth to your image. Think of it as a layering effect – your subject pops, while the background softly falls away, creating a beautiful, cinematic feel.
Can I still achieve a shallow depth of field with a kit lens or do I need to invest in a prime lens?
While kit lenses can be versatile, they often don’t open as wide as prime lenses, making it tougher to achieve a super shallow depth of field. That being said, you can still get a decent blur with a kit lens, especially if you’re shooting close to your subject or using a longer focal length.