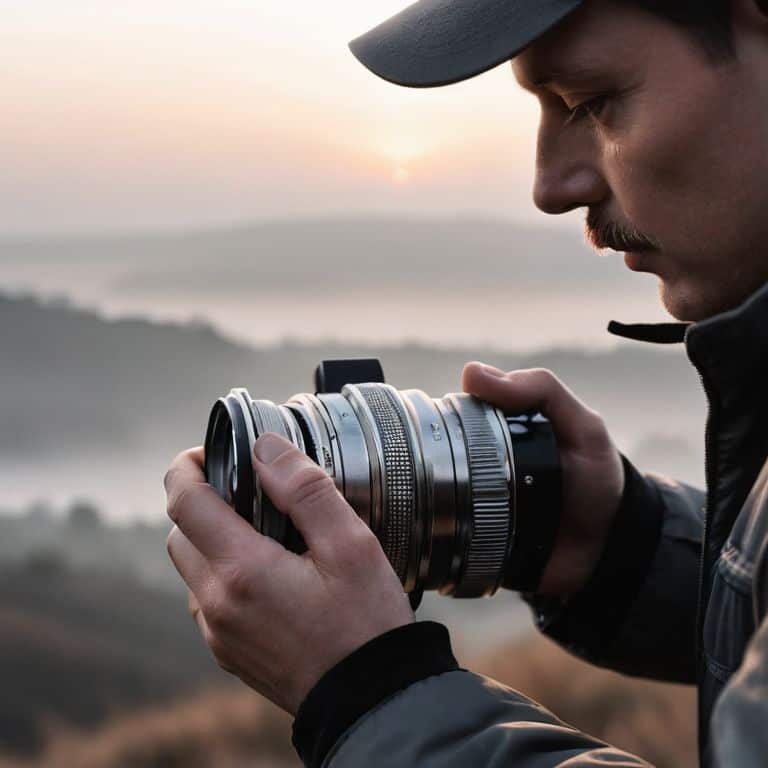
A Guide to Editing Black and White Photos in Lightroom

I still remember the first time I stumbled upon a beautifully edited black and white photo in a magazine – it was as if the image was speaking to me, telling a story that transcended words. That moment sparked my fascination with the art of editing, and I’ve spent years honing my skills in a guide to editing black and white photos in Lightroom. What I’ve learned is that it’s not just about tweaking sliders, but about uncovering the essence of the photograph. Many photographers believe that editing black and white photos is a tedious, formulaic process, but I’m here to tell you that it’s an art form that requires patience, practice, and a keen eye for detail.
As you dive into this guide, I promise to share my honest, no-hype approach to editing black and white photos in Lightroom. You’ll learn how to bring out the best in your images, from adjusting the tone curve to adding subtle textures and nuances. My goal is to empower you with the skills and confidence to take your black and white photography to the next level, and to help you develop a unique visual style that sets your work apart. By the end of this guide, you’ll be equipped with the knowledge and inspiration to create stunning, timeless images that tell a story and evoke emotion.
Table of Contents
- Guide Overview: What You'll Need
- Step-by-Step Instructions
- A Guide to Editing Black and White Photos in Lightroom
- Converting Color to Timeless Black and White Masterpieces
- Unleashing Monochrome With Lightroom Black and White Presets
- Elevating Your Craft: 5 Essential Tips for Editing Black and White Photos in Lightroom
- Key Takeaways for Mastering Black and White Photography in Lightroom
- The Essence of Monochrome
- Mastering the Art of Black and White Photography in Lightroom
- Frequently Asked Questions
Guide Overview: What You'll Need

Total Time: 1 hour 30 minutes
Estimated Cost: free – $10 per month for Adobe Lightroom subscription
Difficulty Level: Intermediate
Tools Required
- Computer with Adobe Lightroom installed
- Graphics Tablet optional
Supplies & Materials
- None digital photos only
Step-by-Step Instructions
- 1. To start editing your black and white photos in Lightroom, import your images into the program by going to the “Library” module and clicking on “Import” in the bottom left corner of the screen. This will allow you to select the photos you want to work with and bring them into the Lightroom ecosystem.
- 2. Once your images are imported, navigate to the “Develop” module, where you’ll find all the tools you need to edit your photos. Begin by selecting the photo you want to work on and then click on the “Basic” panel to access the fundamental editing controls. Here, you can adjust the exposure, contrast, and highlight settings to get a sense of the overall tone you want to achieve.
- 3. Next, convert your image to black and white by clicking on the “Basic” panel’s “Treatment” dropdown menu and selecting “Grayscale”. This will immediately remove all color information from your image, allowing you to focus on the tonal range and texture. You can then use the “Tone Curve” panel to fine-tune the brightness and darkness of specific areas in your image.
- 4. To add depth and dimensionality to your black and white image, use the “Clarity” and “Texture” sliders in the “Effects” panel. These tools will help enhance the mid-tone contrast and bring out the subtle details in your photo, making it more engaging and visually appealing.
- 5. Now, let’s talk about local adjustments. In the “Develop” module, you can use the “Adjustment Brush” tool to apply targeted edits to specific parts of your image. This is particularly useful for dodging and burning, where you can lighten or darken areas to create a more balanced and nuanced composition.
- 6. As you continue editing, don’t forget to keep an eye on the histogram, which provides a graphical representation of your image’s tonal range. This will help you identify any areas that may be overexposed or underexposed, allowing you to make adjustments accordingly. You can find the histogram at the top of the “Develop” module.
- 7. Finally, to give your black and white image a unique and stylized look, experiment with the “Split Toning” panel. Here, you can apply a subtle color tone to the shadows and highlights, adding a touch of warmth or coolness to your photo. This can help create a distinct atmosphere and mood, making your image even more captivating and expressive.
A Guide to Editing Black and White Photos in Lightroom
As I delve deeper into the world of monochrome editing, I’ve come to realize that mastering tone curves is essential for creating striking black and white images. By adjusting the tone curves, you can add depth and contrast to your photos, making them truly unforgettable. I often find myself experimenting with different curve adjustments to achieve the perfect balance of light and dark.
When it comes to converting color to black and white, it’s not just about desaturating the image. You need to consider the overall mood and atmosphere you want to convey. I’ve found that using lightroom black and white presets can be a great starting point, but it’s essential to fine-tune the settings to suit your unique vision. By doing so, you can create a cohesive look that ties your entire portfolio together.
One of my favorite techniques for adding subtle nuances to my black and white edits is using the gradient filter in lightroom. This tool allows me to make targeted adjustments to specific areas of the image, adding a level of sophistication to my edits. By combining this technique with black and white photography tips such as paying attention to texture and composition, I can create images that are not only visually stunning but also emotionally resonant.
Converting Color to Timeless Black and White Masterpieces
When I convert a color image to black and white, I’m not just desaturating it – I’m uncovering a new narrative. The absence of color allows the viewer’s eye to focus on texture, tone, and composition. I recall a photograph I took during golden hour, where the warm light danced across my subject’s face. Converting it to black and white revealed the subtle contours of their features, elevating the emotional impact of the image. In Lightroom, I use the ‘Black & White’ mix panel to fine-tune the conversion, often emphasizing the red and orange tones to add depth and dimension.
By doing so, I transform a fleeting moment into a timeless masterpiece, one that invites the viewer to immerse themselves in the story I’m telling. The key is to experiment and find the right balance, as every image is unique.
Unleashing Monochrome With Lightroom Black and White Presets
As I delve into the world of monochrome editing, I often find myself turning to Lightroom’s black and white presets to unleash the full potential of my images. These presets offer a fantastic starting point, allowing me to quickly experiment with different tones and moods. I’ve found that the “Contrast” and “Tone Curve” adjustments are particularly effective in adding depth and nuance to my black and white photos. By combining these presets with my own manual adjustments, I can create a unique visual style that elevates my photographs to the next level.
I love how these presets can evoke the feel of classic film photography, with their subtle grain and rich tonal ranges. Whether I’m shooting portraits or landscapes, Lightroom’s black and white presets help me to distill the essence of the scene, stripping away distractions and focusing the viewer’s attention on the subject.
Elevating Your Craft: 5 Essential Tips for Editing Black and White Photos in Lightroom

- Understanding the Power of Contrast: Learn to balance your highlights and shadows to create depth and dimension in your monochrome images
- Mastering the Art of Tone Curve: Adjusting the tone curve can make or break your black and white edit – I’ll show you how to use it to add mood and emotion to your photos
- The Importance of Grain and Texture: Adding subtle grain or texture can give your black and white photos a timeless, film-like quality – here’s how to do it effectively in Lightroom
- Converting Color to Black and White with Intent: It’s not just about desaturating – learn how to thoughtfully convert your color images to black and white, considering the story you want to tell
- Attention to Details: From removing distractions to adding a touch of vignette, the small details can make a big difference in your final edit – I’ll share my favorite tricks for polishing your black and white photos in Lightroom
Key Takeaways for Mastering Black and White Photography in Lightroom
Embracing the power of presets and manual adjustments to uncover the perfect balance of contrast and tone in your black and white images
Learning to see and convert color photographs into timeless black and white masterpieces that evoke emotion and tell a story
Understanding that the true art of black and white photography lies not just in the technical aspects, but in the ability to convey mood, atmosphere, and the human experience through the careful manipulation of light and composition
The Essence of Monochrome
Black and white photography is not just about stripping away color, but about revealing the very soul of the image, where light and shadow conspire to tell a story that transcends time and trend.
Julian Kade
Mastering the Art of Black and White Photography in Lightroom
As we conclude this journey through the world of black and white photography in Lightroom, remember that the key to unleashing your creative vision lies in understanding the nuances of light and composition. We’ve explored the power of black and white presets, and how to convert color images into timeless monochrome masterpieces. By mastering these techniques and embracing your unique perspective, you’ll be well on your way to creating photographs that tell compelling stories and evoke emotional responses from your viewers.
So, the next time you sit down to edit a black and white photo in Lightroom, I encourage you to think about the mood and atmosphere you want to create, and to experiment with different techniques to achieve your vision. Remember, the art of photography is a journey, not a destination – and by continually pushing yourself to see the world in new and exciting ways, you’ll unlock the true potential of your camera and capture the beauty in the everyday.
Frequently Asked Questions
How do I adjust the tone curve in Lightroom to achieve a more nuanced black and white image?
To refine your black and white image, try adjusting the tone curve in Lightroom’s Develop module. I like to think of it as ‘massaging’ the contrast – subtle tweaks can make a huge difference. Click the ‘Tone Curve’ tab, then adjust the highlights, midtones, and shadows to taste. For a more nuanced look, try the ‘Medium Contrast’ curve as a starting point.
What are some tips for using the 'split-toning' feature in Lightroom to add depth and interest to my black and white photos?
I love experimenting with split-toning in Lightroom – it’s a game-changer for adding depth to black and white photos. To get started, try adjusting the highlights and shadows separately, using complementary tones to create a sense of tension or harmony. For example, warm highlights and cool shadows can add a beautiful, nuanced feel to your images.
Can you provide some examples of when to use the 'grain' effect in Lightroom to enhance the texture and feel of a black and white photograph?
I love adding grain to my black and whites – it’s all about enhancing the texture and feel. I use it to give urban landscapes a gritty edge or to add warmth to intimate portraits. For me, grain is about embracing imperfection and creating a sense of authenticity, especially in images with high contrast or moody lighting.