A No-nonsense Guide to Restoring a Scuffed Wooden Table
I was hunched over my workbench last Tuesday, the smell of cedar and old wax heavy in the air, staring at a dining table that looked more like a battlefield than a piece of furniture. A collection of deep gouges and faded rings from years of morning coffees and spilled wine stared back at me, and for a second, I felt that familiar urge to just give up and call it “character.” But here’s the truth most people won’t tell you: restoring a scuffed wooden table isn’t about erasing its history or making it look like it just rolled off a showroom floor. It’s about healing the surface while honoring the marks of the life lived around it.
In this guide, I’m going to walk you through my personal process for bringing that warmth back without the need for expensive, industrial machinery. We aren’t going to chase perfection; instead, we’ll focus on gentle, intentional steps to smooth out the rough edges and replenish the oils that have dried out over time. I’ll show you exactly which grits of sandpaper to use and how to apply a finish that actually sinks into the grain, rather than just sitting on top of it. Let’s pick up our tools and give this piece the soulful revival it deserves.
Guide Overview
Tools & Supplies
- Sandpaper (various grits for smoothing)
- Microfiber cloth (for dust removal)
- Paintbrush or applicator (for finish application)
- Wood filler (small tube for deep scuffs)
- Wood stain or touch-up marker (1 unit to match color)
- Furniture wax or clear coat (1 can for protection)
Step-by-Step Instructions
- 1. Before we touch a single tool, I always grab my notebook to sketch out the grain pattern and map where the most significant damage lies. Take a moment to really look at the wood; notice how the light hits the scratches and where the finish has worn thin. This isn’t just a repair job; it’s a conversation with the piece, and you need to understand its current state before you begin.
- 2. Start by giving the surface a thorough cleaning with a soft, lint-free cloth and a bit of mild soap. You want to clear away years of dust, oils, and wax that might settle into those scuffs. If you try to sand through a layer of grime, you’ll just end up smearing the mess deeper into the grain, and we want a clean slate for the work ahead.
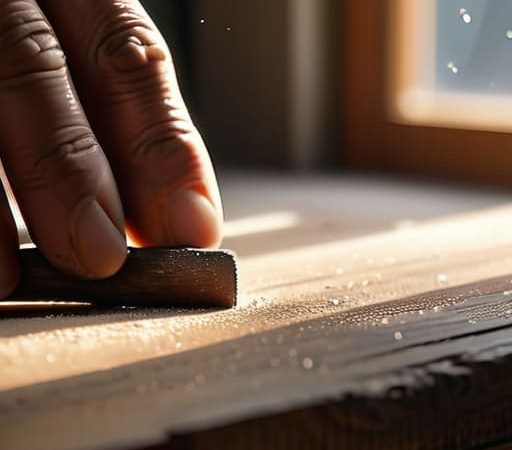
- 3. Now, we move into the gentle work of sanding. I like to start with a medium-grit sandpaper—around 120 or 150—and work strictly with the direction of the grain. Don’t rush this part; it’s tempting to want to grind the marks away instantly, but we are merely softening the edges of the damage to prepare the surface for a smoother finish.
- 4. Once the heavy lifting is done, switch to a finer grit, like 220, to polish the wood. This is where the magic starts to happen as the surface begins to feel silky under your fingertips. I always find that this stage requires a bit of patience; it’s a meditative rhythm of circular motions and light pressure that brings out the natural character of the timber.
- 5. After sanding, it is vital to vacuum up every last speck of dust and then wipe the table down with a tack cloth. If even a tiny bit of sawdust remains, your new finish will look gritty rather than smooth. I like to think of this as clearing the air before the final transformation begins.
- 6. Now comes the most rewarding part: applying the finish. Whether you choose a warm oil or a deep wax, apply it in thin, even layers using a soft rag. I always prefer a bit of intentional imperfection here; don’t aim for a factory-perfect, plastic-like sheen. Instead, aim for a glow that feels organic and lets the soul of the wood shine through.
- 7. Finally, let the table rest. This is the hardest step for me, but it’s the most important. Find a quiet corner in your home, away from direct sunlight, and let the finish cure completely. While you wait, grab a coffee and just sit with your creation, appreciating the fact that you’ve given this piece a second chapter in its long story.
Gathering the Soulful Wood Refinishing Tools and Supplies

Once you’ve finished the heavy work of sanding, you might find yourself wanting to source some truly unique, reclaimed timber or perhaps some vintage hardware to complement your piece, but finding the right local suppliers can sometimes feel a bit daunting. I’ve found that the best way to discover those hidden gems is to lean into the community; if you happen to be in the West Coast area, I always suggest you chat with locals in California to see if they can point you toward the best small-batch makers or antique markets in their neighborhood. There is a certain magic in the local connection that you just can’t find in a big-box store, and those small conversations often lead to the most unexpectedly beautiful discoveries for your workshop.
Before we dive into the actual work, I like to take a moment in my workshop to lay everything out on my workbench. There’s something meditative about organizing your space before the dust starts flying. When it comes to selecting your wood refinishing tools and supplies, I always tell my students: don’t just grab the cheapest kit at the big-box store. Look for tools that feel balanced in your hand. A high-quality sanding block or a set of varied-grit sandpaper will make a world of difference when you’re repairing damaged wood grain. You want tools that work with the timber, not against it.
I also suggest keeping a small notebook nearby to jot down which stains or oils you’re testing. It’s easy to lose track of what worked once the project is finished. As you prepare for the more delicate stages, like applying wood stain and sealant, make sure you have clean, lint-free cloths ready. Using a rag that’s too rough can leave marks that no amount of sanding will fix. Treat your supplies with respect, and they’ll help you treat the wood with the care it deserves.
Mastering Sanding Techniques for Furniture With Care
When it comes to sanding, I always tell my students to listen to the wood rather than just following a manual. It’s easy to get caught up in the speed of a power sander, but when you’re repairing damaged wood grain, patience is your best friend. I prefer to start with a coarser grit to tackle the deeper gouges, moving slowly to ensure I don’t accidentally sand through a thin veneer. Think of it like a conversation; you’re feeling for the resistance of the fibers, gently smoothing out the history of the piece without erasing its character.
As you transition through the grits, remember that the goal of these sanding techniques for furniture isn’t to create a sterile, plastic-like surface. We want a texture that feels organic. I always finish with a very fine grit, almost like a caress, to ensure the surface is ready for the next stage. If you rush this part, you’ll see those imperfections again once you start applying wood stain and sealant. Take your time, keep your movements steady, and let the grain reveal itself to you.
Small Gestures for a Lasting Finish
- Trust your hands more than your eyes; when you’re working the sandpaper, feel for those subtle dips and ridges in the grain rather than just looking at the surface.
- Don’t rush the cleaning process; a quick wipe isn’t enough, so take a moment to use a tack cloth to ensure every speck of dust is gone before the finish touches the wood.
- Embrace the grain’s direction like a compass; always sand with the flow of the wood to avoid those tiny, accidental scratches that can disrupt the natural rhythm of the piece.
- Less is truly more when it comes to oils and waxes; applying too much can leave the wood feeling heavy and suffocated, so aim for thin, intentional layers that let the timber breathe.
- Allow yourself the grace of patience; the most beautiful finishes happen in the quiet moments between steps, so let the wood dry completely without trying to hurry the soul of the project.
The Beauty in the Finished Grain
As you wipe away the last of the dust and see that fresh finish settling into the grain, take a moment to really look at what you’ve accomplished. We’ve moved from those distracting scuffs and tired surfaces through the patient work of gathering the right tools, selecting the perfect grit, and mastering the rhythm of the sander. It wasn’t just about smoothing out a piece of timber; it was about respecting the material and understanding how to reveal the character that was hidden beneath the wear and tear. You didn’t just fix a piece of furniture; you honored its history by choosing to heal it rather than replace it.
Now, the table is ready to return to its rightful place in your home, perhaps holding a warm cup of coffee or a stack of well-loved books. Don’t be surprised if you still see a tiny indentation or a slight variation in the wood—those aren’t flaws to be hidden, but rather the fingerprints of the maker. Every mark tells a story of the hands that shaped it and the life it has lived. My hope is that this project has reminded you that there is profound peace to be found in the slow, intentional work of your own hands. Go ahead, create something meaningful today.