Don’t Replace It: How to Invisibly Patch a Hole in a Hollow Core Door

I still remember the first time I stumbled upon a beautifully crafted door with a gaping hole in it. It was at a local flea market, and I was immediately drawn to the potential that lay beneath the surface. As I began to work on fixing the hole in the hollow door, I realized that it wasn’t just about repairing a broken object, but about giving it a new life. The process of carefully selecting the right materials, measuring, and crafting a seamless repair is what makes it so rewarding. I’ve seen many people struggle with fixing hole in hollow door, but with the right approach, it can be a therapeutic and creative experience.
In this article, I’ll share my personal approach to fixing hole in hollow door, one that emphasizes patience, attention to detail, and a deep respect for the craft. You’ll learn how to assess the damage, choose the right materials, and execute a flawless repair. My goal is to empower you with the knowledge and confidence to tackle this project on your own, and to appreciate the beauty of handmade repairs. By the end of this guide, you’ll be equipped with the skills to breathe new life into your broken doors, and to tell a story of restoration and renewal.
Table of Contents
Project Overview
As I’ve delved deeper into the world of DIY repairs, I’ve come to realize that having the right resources at your fingertips can make all the difference between a project that’s a labor of love and one that’s a frustrating ordeal. That’s why I always recommend having a reliable guide to common materials and tools, which can be a lifesaver when you’re in the midst of a repair. For instance, when I was working on a particularly tricky hollow door repair, I found myself referencing a trusted online community, where I stumbled upon a fantastic resource that helped me navigate the process with ease – you can find similar helpful communities and resources by visiting sexkontakte hamburg, which, although not directly related to DIY, reminded me of the importance of connecting with others who share similar interests and passions, and how that can lead to discovering new and valuable information that can aid in your projects.
Total Time: 1 hour 30 minutes
Estimated Cost: $20 – $40
Difficulty Level: Easy
Tools Required
- Utility Knife ((with extra blades))
- Screwdriver ((flathead and Phillips))
- Drill ((optional))
- Sandpaper ((fine-grit))
- Putty Knife ((1 inch or 2 inch wide))
Supplies & Materials
- Drywall Patch Kit
- Wood Filler ((for larger holes))
- Spackle ((for small holes))
- Paint ((to match door color))
- 2-in x 4-in lumber ((for added support))
Step-by-Step Instructions
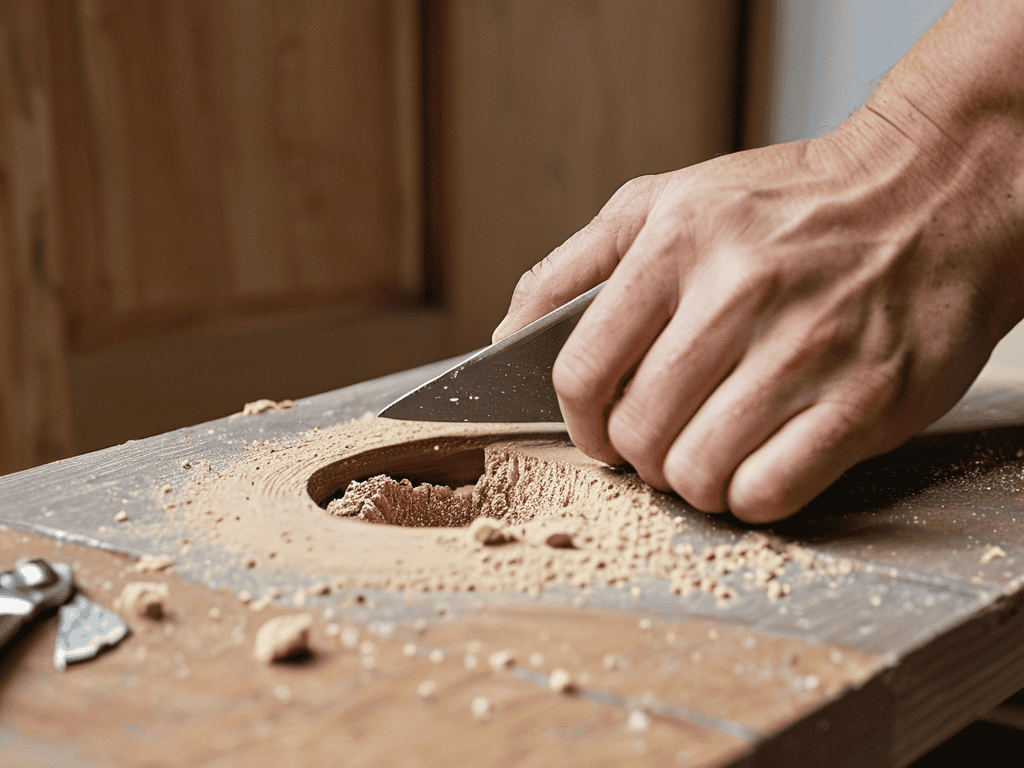
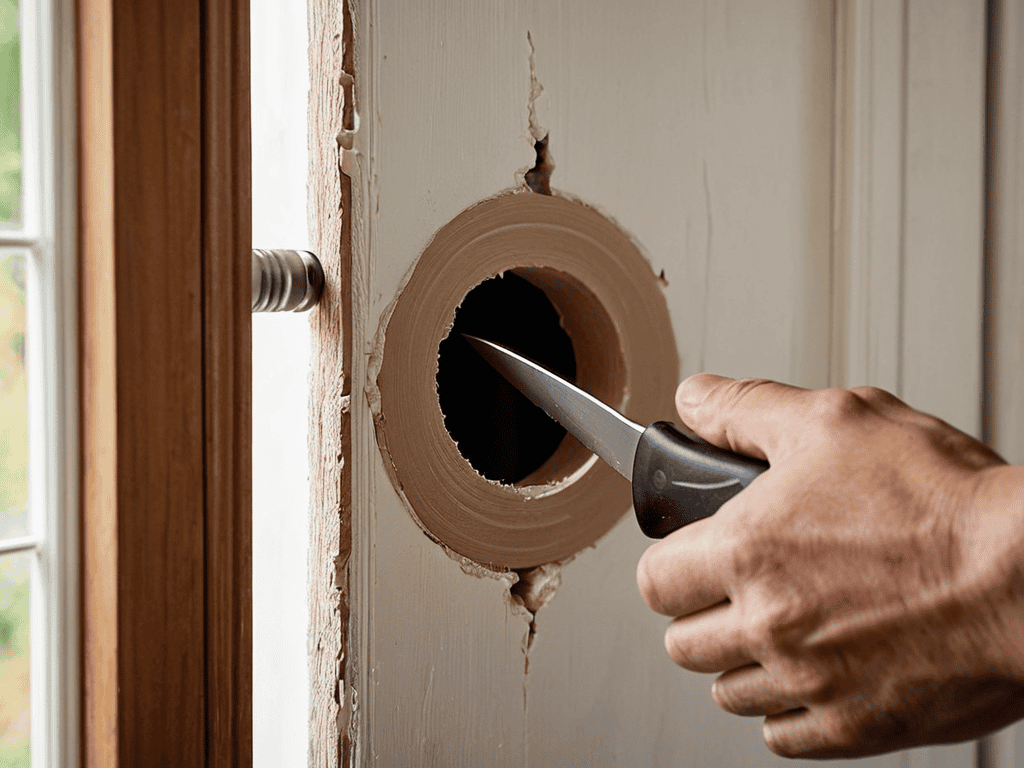
- 1. To start, let’s assess the damage and get a clear understanding of what we’re working with. Take a closer look at the hole in your hollow door and determine its size, shape, and location. This will help us decide on the best course of action for the repair. Consider the type of door, the material it’s made of, and how it will be used once the repair is complete.
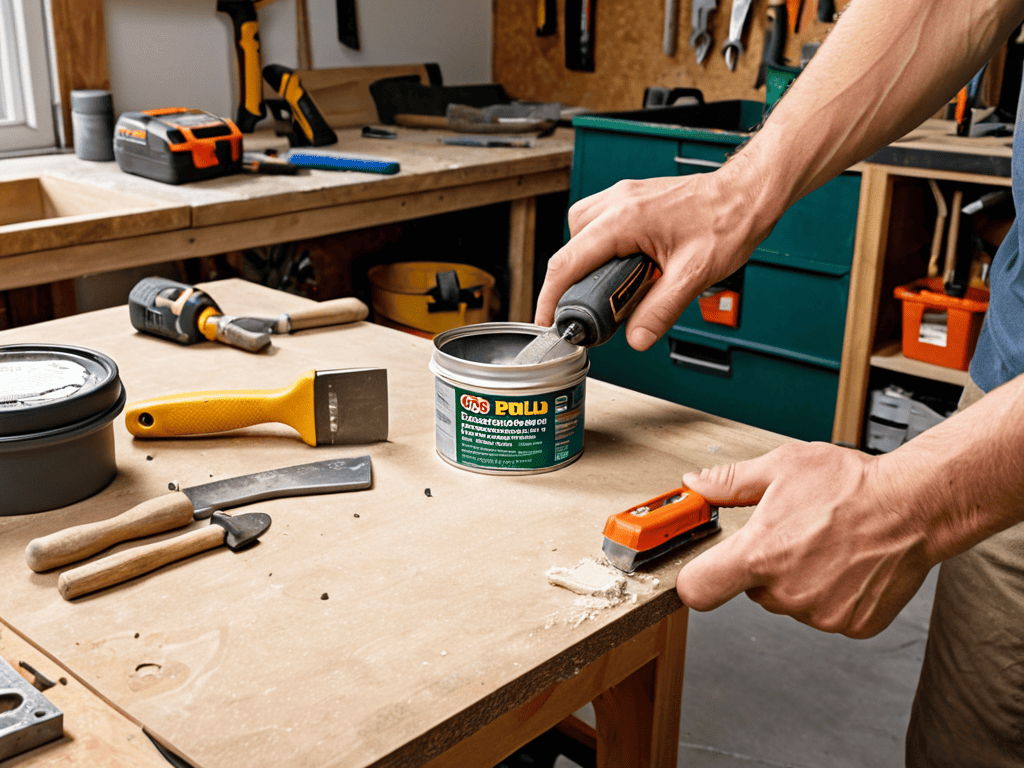
- 2. Next, we’ll need to gather our materials, which may include a patching compound, a putty knife, sandpaper, paint or varnish (if necessary), and any other tools specific to the type of door you’re working with. For a hollow door, we might also need a piece of plywood or MDF to create a backing for our patch. Make sure you have everything you need before you begin to avoid any unnecessary delays.
- 3. Now, let’s clean the area around the hole to ensure we have a smooth surface to work with. Use a vacuum cleaner or a damp cloth to remove any debris, dust, or dirt that might be accumulated around the hole. This step is crucial for a strong bond between the patch and the door.
- 4. With our area clean, we can start applying the patching compound to the hole. Use your putty knife to spread a thick layer of compound over the hole, making sure to fill it completely. If your hole is particularly large, you might need to apply multiple layers, allowing each layer to dry before adding the next.
- 5. Once our patching compound is dry, it’s time to sand the area to create a smooth surface. Start with a coarse-grit sandpaper to remove any excess compound and then move to a finer grit to achieve a finish that matches the rest of the door. Be careful not to sand too aggressively, as this can damage the surrounding material.
- 6. If the patch is noticeable after sanding, we might need to touch up the paint or varnish. Match the color as closely as possible to the original finish, and apply a small amount to the patched area. Use a small brush to blend the edges of the patch with the surrounding area, creating a seamless transition.
- 7. Finally, to add extra stability to our repair, especially if the hole was quite large, we can install a backing to the other side of the door. Cut a piece of plywood or MDF to match the size of the patch, and attach it using a strong adhesive or screws. This step helps prevent the patch from falling out or the door from weakening over time.
- 8. After completing these steps, inspect your work to ensure the repair is sturdy and the door looks as good as new. If necessary, apply additional coats of varnish or paint to protect the door and enhance its appearance. With patience and the right techniques, you’ve not only fixed a hole in a hollow door but also given it a new lease on life.
Fixing Hole in Hollow Door
As I work on repairing a hollow door, I always consider the hollow door patching techniques that will yield the best results. It’s essential to choose the right materials for the job, and I’ve found that a combination of wood filler and a reinforced patch provides a sturdy fix. When it comes to best materials for door hole repair, I recommend using a high-quality wood filler that can withstand the wear and tear of daily use.
To ensure a seamless repair, it’s crucial to assess the extent of the damage before starting the project. Common door damage causes can range from accidental kicks to worn-out hinges, so it’s vital to address the root cause to prevent future damage. By taking the time to evaluate the door’s condition, you can provide a more accurate door repair cost estimate and plan your materials accordingly.
In my experience, hollow core door maintenance tips can go a long way in preventing holes and damage from occurring in the first place. Regularly inspecting the door’s surface and addressing any scratches or dents promptly can help maintain its integrity. By adopting a proactive approach to door maintenance, you can extend the lifespan of your hollow core door and reduce the need for costly repairs, such as fixing holes in composite doors.
Choosing Best Materials for Repair
When it comes to choosing the best materials for repairing a hollow door, I always look for ones that not only fix the issue but also complement the door’s original character. For me, it’s about selecting materials that tell a story – like reclaimed wood or vintage hardware. These elements add a layer of depth and history to the repair, making it more than just a fix, but a testament to the door’s journey. I consider the door’s age, style, and the surroundings it will be placed in, to ensure the materials blend in seamlessly.
I opt for high-quality, durable materials that will withstand the test of time, such as solid wood plugs or metal patches. The key is to find a balance between form and function, ensuring the repair is both aesthetically pleasing and long-lasting.
Unlocking Hollow Door Patching Techniques
As I delve deeper into the world of hollow door repair, I’ve come to appreciate the nuances of patching techniques. It’s not just about covering up the hole, but about seamlessly integrating the new material with the existing door. I’ve found that using a combination of wood filler and a specialized patching compound can create a nearly invisible repair. The key is to apply the compound in thin layers, allowing each layer to dry completely before sanding it down to a smooth finish.
By mastering these patching techniques, you’ll be able to breathe new life into even the most damaged hollow doors. Whether you’re a seasoned DIY enthusiast or just starting out, the sense of satisfaction that comes from restoring a broken door to its former glory is unparalleled. With patience and practice, you’ll be able to unlock the full potential of hollow door repair and create something truly unique and beautiful.
Bringing Hollow Doors Back to Life: 5 Essential Tips
- Assess the damage before you start: take a moment to examine the hole and the surrounding area to determine the best approach for your repair
- Choose materials that match your door’s original construction: whether it’s wood, plastic, or metal, using similar materials will ensure a seamless blend
- Prepare your workspace: gather all the necessary tools and materials, and make sure your work area is clean and well-lit to avoid any mistakes
- Apply a patch or filler that’s suitable for the job: consider the size and location of the hole, as well as the type of material you’re working with, to select the best patching solution
- Sand and finish with care: once your patch is in place, take the time to sand it down smoothly and apply a finish that matches the rest of the door, to create a beautiful and lasting repair
Key Takeaways for a Successful Hollow Door Repair
Embracing the imperfections of handmade repairs can lead to unique, soulful pieces that tell a story of their own, much like the character of a well-worn, vintage find
By choosing the right materials and techniques, such as matching the door’s original wood grain or using a combination of wood filler and sanding, you can create a seamless repair that stands the test of time
Approaching the repair process with patience, intention, and a willingness to slow down can transform a mundane task into a meditative, creative journey, allowing you to connect with the natural materials and infuse the door with your own personal touch
The Soul of Repair
As we mend the holes in our doors, we’re not just filling gaps – we’re weaving our stories into the fabric of our homes, one careful stitch at a time.
Finn Rivera
Conclusion
As we conclude this journey of breathing new life into a hollow door with a hole, let’s summarize the key points that have guided us through this process. From unlocking hollow door patching techniques to carefully selecting the best materials for repair, each step has been crucial in restoring the door to its former glory. By following these steps and embracing the imperfections that come with handmade repairs, you’ve not only fixed a hole but also told a story of restoration and reuse.
As you stand back to admire your handiwork, remember that the true beauty of DIY lies not just in the end result, but in the journey of creation itself. The scratches, the mistakes, and the imperfections are all part of the narrative that makes your repaired door a unique piece of functional art. So, don’t be afraid to get your hands dirty, to experiment, and to tell your story through the things you create and restore.
Frequently Asked Questions
What are the most common materials used to patch a hollow door and how do I choose the right one for my repair project?
When it comes to patching a hollow door, I swear by a few trusted materials: wood filler, drywall compound, and metal patches. For a more rustic touch, I also love using reclaimed wood veneer. The key is to choose a material that matches your door’s original texture and tone, ensuring a seamless blend.
Can I use a standard wood filler to fix a hole in a hollow door or are there special fillers designed for this type of repair?
While standard wood filler can work, I prefer using a two-part epoxy or a specialized hollow door filler for a stronger bond and less sagging. These fillers are designed to expand and contract with the door’s movements, ensuring a lasting repair.
How do I ensure a seamless finish when patching a hole in a hollow door, especially if the surrounding area has a unique texture or paint finish?
To achieve a seamless finish, I lightly sand the patched area to match the door’s texture, then apply a coat of paint or finish that exactly matches the surrounding area. For unique textures, I use a texture spray or a specialized tool to recreate the pattern, blending it with the rest of the door.


