A Guide on How to Make Pottery at Home (without a Wheel)
As I sit amidst the chaos of my workshop, surrounded by half-fired ceramics and scattered sketches, I’m reminded of the misconception that making pottery at home is a daunting, impossible task. The truth is, with a little patience and practice, anyone can learn how to make pottery at home. I’ve spent years honing my craft, from restoring vintage furniture to shaping clay into functional works of art. My journey began with a simple desire to create something with my own hands, and I’ve found that the process of bringing raw materials to life is just as rewarding as the end result.
In this guide, I promise to share my hands-on experience and practical advice on how to get started with making pottery at home. We’ll dive into the basics of setting up your workspace, selecting the right materials, and mastering fundamental techniques. I’ll walk you through my own process, from conceptualizing a piece to bringing it to life on the wheel. My goal is to empower you with the knowledge and confidence to create your own unique, handmade pieces that reflect your personality and style. By the end of this journey, you’ll be well on your way to crafting beautiful, functional pottery that tells a story of its own, and discovering the joy of creating with your own hands.
Table of Contents
Guide Overview: What You'll Need
Total Time: 2 hours 30 minutes
Estimated Cost: $50 – $100
Difficulty Level: Intermediate
Tools Required
- Pottery Wheel (electric or manual)
- Wire Cutter (for cutting and shaping)
- Wooden Modeling Tool (for shaping and smoothing)
- Metal Rib (for shaping and refining)
- Kiln or Oven (for firing the pottery)
- Measuring Cups and Spoons (for accurate measurements)
- Scale (for weighing clay and materials)
- Work Surface (covered with a plastic tablecloth or canvas, approximately 4 feet by 6 feet)
Supplies & Materials
- Pottery Clay (white or terracotta, 25 pounds)
- Water (for mixing and thinning clay)
- Glaze (various colors, 1 pint each)
- Underglaze Pencils (for decoration and design)
- Clear Glaze (for a glossy finish, 1 pint)
- Sponges (for applying glaze and water, 2-3)
- Drop Cloth (for protecting work surface, approximately 6 feet by 9 feet)
Step-by-Step Instructions
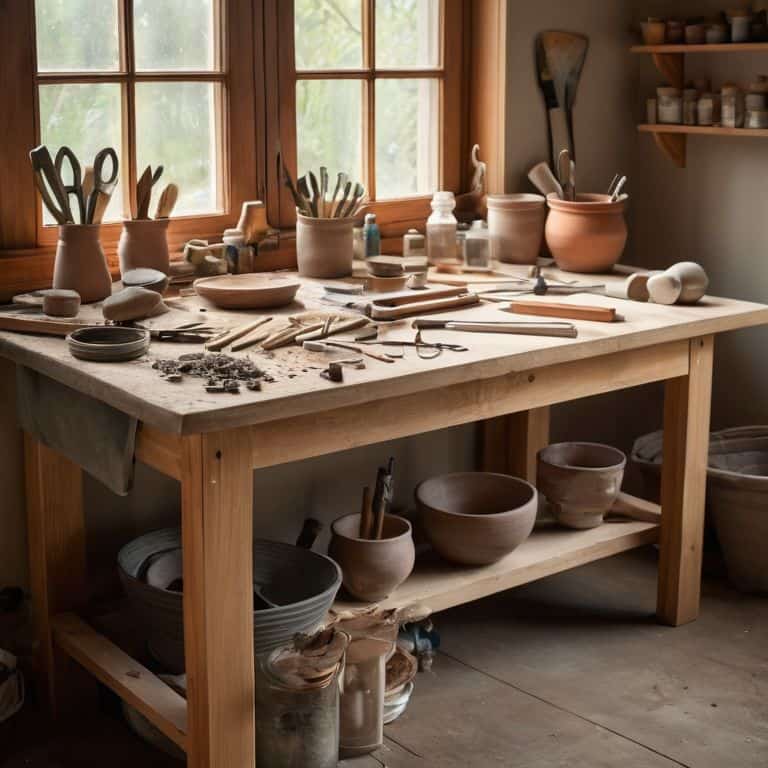
- 1. To start our pottery-making journey, let’s gather our materials. We’ll need a few basic tools like a pottery wheel (which can be electric or manual), a wire cutter, a metal rib, and a wooden modeling tool. Don’t worry too much about the quality of these tools to begin with; the most important thing is to get started and feel the clay between your fingers.
- 2. Next, we need to prepare our workspace. This means covering our work surface with a drop cloth or an old sheet to prevent any damage from the clay. It’s also essential to have a bucket of water nearby to keep our hands and tools clean and moist. I like to think of this step as setting the stage for our creative process, where every detail matters.
- 3. Now, let’s talk about the clay. For beginners, it’s best to start with a simple earthenware clay that’s easy to work with. We’ll need to knead the clay to remove any air pockets and make it more pliable. This process is a bit like meditation, as it requires patience and a gentle touch to get the clay to the right consistency.
- 4. With our clay ready, it’s time to start shaping it. If you’re using a pottery wheel, start by centering a small amount of clay on the wheel head. Then, use your fingers to open up the clay and create a small indentation in the center. If you’re working by hand, you can start shaping your clay into the desired form using your wooden modeling tool.
- 5. As we shape our clay, it’s essential to pay attention to symmetry and balance. This doesn’t mean our piece has to be perfect; in fact, I believe that imperfections are what give handmade objects their character. However, we do want to aim for a certain level of harmony in our design, whether we’re making a functional item like a bowl or a purely decorative piece.
- 6. Once we’re happy with the shape of our piece, it’s time to refine the details. This might involve using a metal rib to smooth out the surfaces or adding some texture with a small tool. It’s also a good time to think about the functional aspects of our piece, such as the size of the handle or the depth of the bowl.
- 7. After we’ve refined our piece, it’s time to let it dry slowly under a damp cloth. This is a crucial step, as it helps prevent cracking and ensures that our piece will be strong and durable. It’s also a good opportunity to step back and admire our handiwork, thinking about the story we’re telling through our creation and the journey it’s taken to get to this point.
- 8. Finally, once our piece is completely dry, it’s ready to be fired in a kiln. This is the most exciting part of the process, as it’s when our piece transforms into a hard, durable, and often beautiful work of art. Whether we’re using a home kiln or taking our piece to a local studio, the end result is always a thrill, and it’s what makes all the hard work worth it.
How to Make Pottery at Home
As I sit at my wheel, surrounded by the earthy scent of clay, I’m reminded that the process of creating pottery is just as important as the end result. When it comes to hand building techniques for beginners, it’s essential to start with simple projects, like small bowls or planters, to get a feel for the material. This approach allows you to develop your skills and build confidence, eventually moving on to more complex pieces.
One of the most exciting aspects of pottery is the ability to experiment with different pottery glaze recipes at home. By mixing and matching various ingredients, you can create unique, personalized glazes that reflect your style and personality. For those who prefer a more instant gratification, air dry clay projects for kids can be a great way to introduce them to the world of pottery, teaching them about texture, color, and form.
As you progress in your pottery journey, you may find yourself wondering about the best way to fire your pieces. The debate between kiln vs oven firing for pottery is ongoing, with each method having its own advantages and disadvantages. While kiln firing offers more control and consistency, oven firing can be a convenient and cost-effective alternative for small-scale projects, allowing you to bring your ceramic art ideas for home decor to life.
Exploring Hand Building Techniques for Beginners
As I sit at my workbench, surrounded by wedges of clay and half-formed vessels, I’m reminded of the tactile joy of hand-building. This technique allows for a level of intimacy and expressiveness that’s hard to replicate with a wheel. For beginners, I recommend starting with simple forms like pinch pots or coiled vessels. These exercises help develop your sense of touch and timing, essential for coaxing life from a lump of clay.
With each piece, I encourage you to experiment with different textures and patterns, allowing the natural imperfections of the material to shine through. Remember, it’s the unique, human touch that gives handmade objects their soul. Don’t be afraid to get a little messy and let your creativity unfold, one gentle press of the clay at a time.
Unlocking Diy Pottery Wheel Plans
As I delve into the world of DIY pottery, I find myself drawn to the thrill of creating my own pottery wheel. There’s something special about crafting the tools that help bring my ideas to life. Unlocking DIY pottery wheel plans allows me to merge functionality with self-expression, giving my workshop a personal touch. I start by sketching out my design, considering the space and materials I have available.
With a clear plan in mind, I begin gathering reclaimed wood and other sustainable materials to construct my wheel. The process is meditative, requiring patience and attention to detail. As I work, I feel a sense of pride and accomplishment, knowing that this handmade wheel will soon help me shape clay into beautiful, functional pieces that tell a story of their own.
Sculpting Wisdom: 5 Essential Tips for Making Pottery at Home
- Start with the right clay: Choose a clay body that suits your project, whether it’s earthenware, stoneware, or porcelain, and consider factors like shrinkage and drying time
- Prepare your workspace: Set up a clean, well-ventilated area with a wedging table, a potter’s wheel, and necessary tools to ensure a smooth and efficient workflow
- Understand the drying process: Learn about the different stages of drying, from soft leather-hard to bone dry, to avoid cracking and ensure successful firing
- Experiment with glazes and textures: Don’t be afraid to try new glaze combinations and techniques, like slip trailing or stenciling, to add unique character to your pieces
- Practice patience and persistence: Making pottery at home can be a trial-and-error process, so be prepared to learn from your mistakes and celebrate small victories along the way
Embracing the Art of Homemade Pottery: 3 Key Takeaways
By embracing the imperfections and uniqueness of handmade pottery, you can create pieces that not only serve a functional purpose but also tell a story of their own
Starting small and experimenting with different clay types, tools, and techniques can help you develop your skills and find what works best for you in the world of DIY pottery
Whether you’re using a homemade pottery wheel or hand-building techniques, the process of creating something with your own hands can be a deeply rewarding and meditative experience that brings a sense of fulfillment and joy
The Soul of Homemade Pottery
As we shape the clay, we’re not just crafting objects, we’re weaving tales of our own – tales of patience, of imperfection, and of the beauty that emerges when human hands touch the earth.
Finn Rivera
Embracing the Art of Homemade Pottery
As we conclude our journey into the world of homemade pottery, let’s reflect on the key takeaways from our step-by-step guide. From understanding the basics of pottery to exploring DIY pottery wheel plans and mastering hand building techniques for beginners, we’ve covered it all. The process of creating something with your own hands is not just about the end product, but about the journey itself, the mistakes, the learning, and the growth. It’s about embracing the imperfections that make each piece unique and telling a story through the objects you create.
As you embark on your own pottery-making adventures, remember that the true beauty of this craft lies in its ability to bring people together. Whether you’re creating pieces for your home, as gifts, or simply for the joy of it, every piece is a reflection of you. So, don’t be afraid to get your hands dirty, experiment with new techniques, and make mistakes. For in the world of pottery, it’s the imperfections that give each piece its soul, and it’s the stories behind them that make them truly unforgettable.
Frequently Asked Questions
What are the essential tools and materials needed to get started with making pottery at home?
To start crafting pottery at home, you’ll need a few essential tools and materials. I always begin by gathering my favorites: a pottery wheel, wire cutter, metal rib, and a wedge. For materials, you’ll need clay, of course, along with water, a kiln or access to one, and some basic glazes to bring your pieces to life.
How do I achieve the right consistency and texture with my clay for different pottery projects?
To achieve the perfect consistency and texture, I always start by wedging my clay to remove any air pockets. Then, I adjust the moisture levels, adding water or letting it dry, until it feels just right – not too sticky, not too dry. It’s all about developing a sense of touch and intuition with the clay.
What are some common mistakes to avoid when firing homemade pottery for the first time?
When firing homemade pottery for the first time, beware of inconsistent temperatures, inadequate ventilation, and overloading the kiln. These mistakes can lead to cracked or discolored pieces. Take your time, follow a reliable firing schedule, and don’t overcrowd the kiln to ensure your handmade creations emerge from the fire with the beauty and soul you intended.


