A Guide to the Coptic Stitch Binding Method
As I sit amidst the soft glow of my workshop, surrounded by half-finished bookbinding projects and the gentle scent of leather, I’m reminded of the beauty in imperfection. I’ve often been told that mastering a guide to the coptic stitch binding method requires a level of precision that’s daunting, even for the most skilled craftsmen. But I’m here to tell you that this couldn’t be further from the truth. The Coptic stitch, with its intricate dance of thread and paper, is not about achieving perfection; it’s about embracing the unique character that each handmade book embodies.
In this article, I promise to guide you through the practical steps of mastering a guide to the coptic stitch binding method, stripping away the mystique and focusing on the tangible, hands-on process. You’ll learn how to select the right materials, prepare your signatures, and weave the stitches that will bring your book to life. My goal is to empower you with the knowledge and confidence to create something truly special – a book that tells a story not just through its words, but through the very fabric of its being. By the end of this journey, you’ll be equipped with the skills to craft your own unique, handmade books, each one a testament to the joy of creation.
Table of Contents
- Guide Overview: What You'll Need
- Step-by-Step Instructions
- A Guide to the Coptic Stitch Binding Method
- Handmade Journal Binding With Exposed Spine Techniques
- Weaving Stories With Coptic Stitch Tutorial for Beginners
- Unlocking the Secrets of Coptic Stitch: 5 Essential Tips for Beginners
- Key Takeaways from the Coptic Stitch Binding Journey
- The Soul of Bookbinding
- Embracing the Art of Coptic Stitch Binding
- Frequently Asked Questions
Guide Overview: What You'll Need
Total Time: 2 hours 30 minutes
Estimated Cost: $20 – $40
Difficulty Level: Intermediate
Tools Required
- Awl (or a similar piercing tool)
- Scissors (sharp, dedicated to cutting paper)
- Bone folder (or similar tool for creasing paper)
- Ruler (12 inches long)
- Pencil (for marking paper and board)
- Cutting mat (for protecting work surface)
- Weight (for holding paper in place)
Supplies & Materials
- Paper for book pages (preferably 80 gsm or higher)
- Cardstock or book board (for covers, about 1/8 inch thick)
- Thread (cotton or linen, suitable for bookbinding)
- Needle (sharp, beading or tapestry needle)
- Glue (PVA or similar, for attaching covers)
- Decorative paper (optional, for endpapers)
Step-by-Step Instructions
- 1. To begin our journey into the world of Coptic stitch binding, we need to prepare our materials. This includes high-quality paper for the book’s pages, a sturdy thread or yarn for the stitching, and a needle that’s comfortable to work with. I find that using natural materials, like cotton thread or hemp paper, adds a unique character to each book.
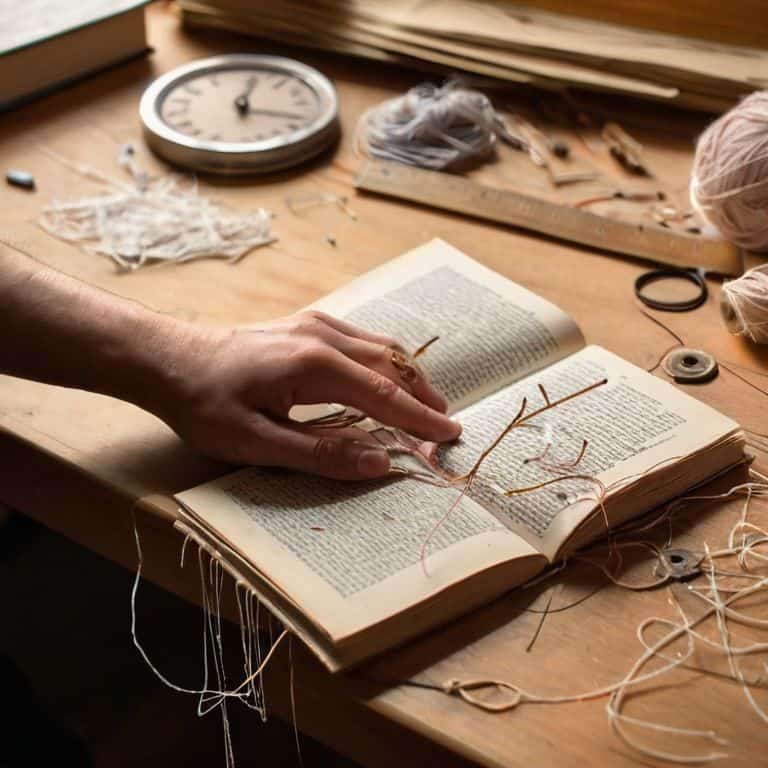
- 2. Next, we’ll create the signature of our book, which is essentially a section of pages that will be stitched together. Typically, a signature consists of 4-6 pages, but this can vary depending on the size and theme of your book. It’s essential to ensure that all pages are aligned properly and that the edges are smooth, as this will affect the overall appearance of the finished book.
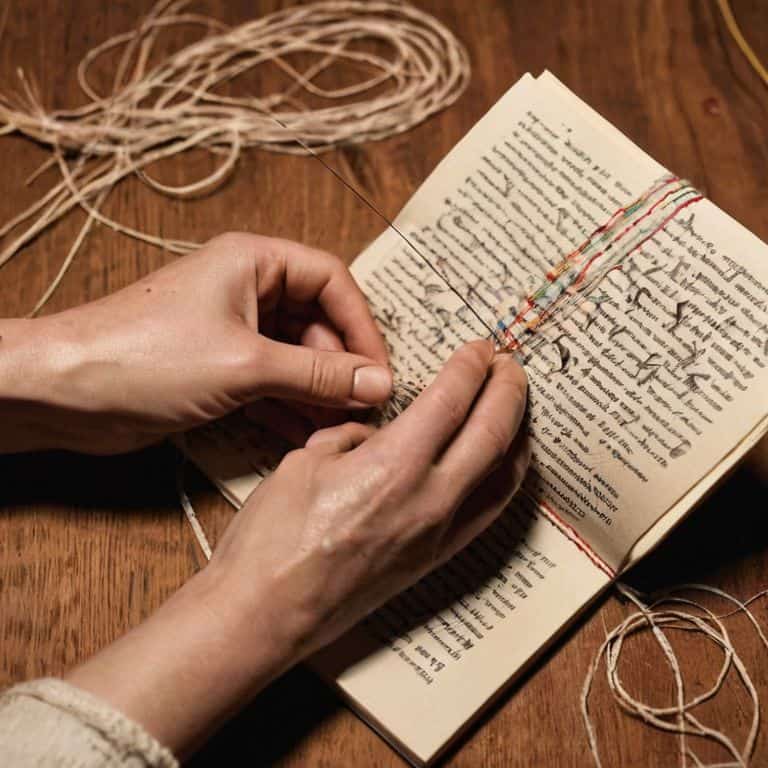
- 3. With our signatures ready, it’s time to punch the holes for the stitching. This is a crucial step, as the placement and spacing of these holes will determine the pattern of our Coptic stitch. I use a simple awl to create the holes, making sure they’re evenly spaced and not too close to the edge of the page.
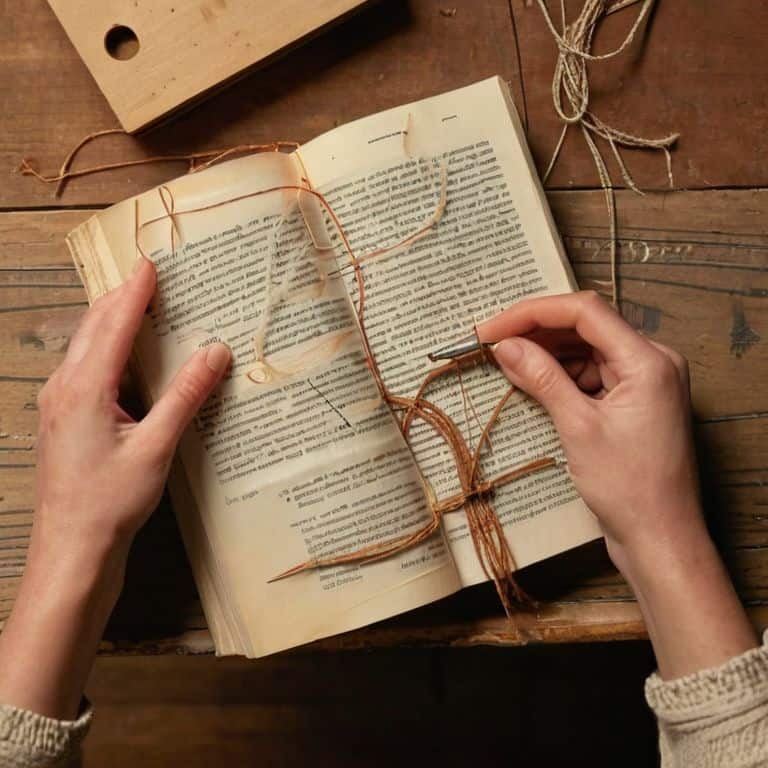
- 4. Now, let’s move on to the threading process. Cut a length of thread that’s comfortable to work with, and thread your needle. I prefer to use a needle with an eye big enough to accommodate my thread, making it easier to weave in and out of the pages. Begin by inserting the needle into the first hole from the outside in, then pull the thread gently to create a small stitch.
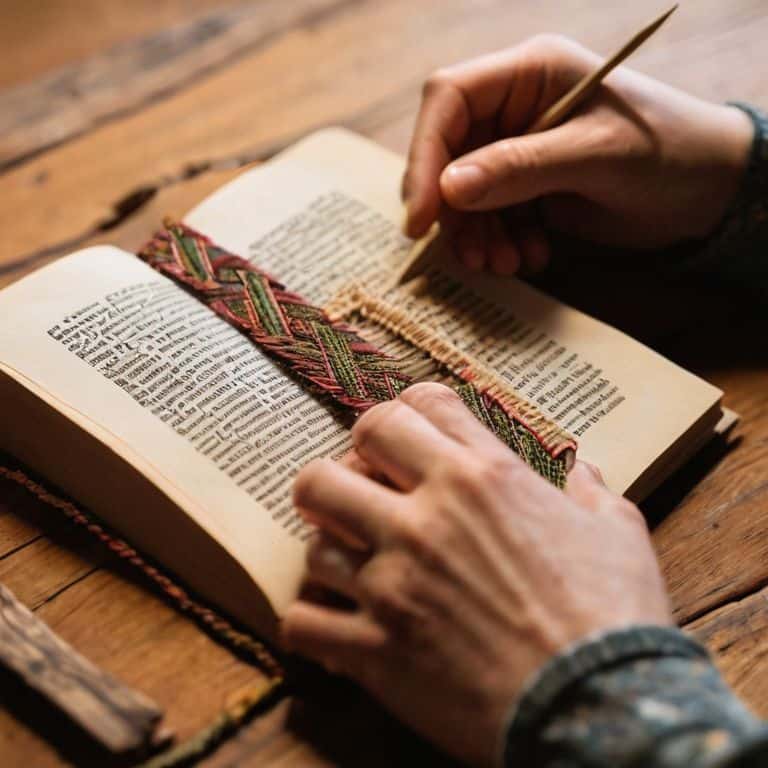
- 5. As we start to weave the Coptic stitch, it’s essential to maintain a consistent pattern. Bring the needle back out through the next hole, then insert it into the subsequent hole, creating a small loop on the outside of the page. This loop is what gives the Coptic stitch its unique character, and it’s what will hold our book together.
- 6. Continue stitching through each signature, making sure to keep your tension even and your stitches consistent. As you work, you’ll start to see the book come together, and the Coptic stitch will begin to emerge. Don’t be afraid to experiment with different patterns or thread colors – this is where the true artistry of bookbinding comes alive.
- 7. Once you’ve stitched all of your signatures together, it’s time to add the cover. Cut two pieces of sturdy cardboard or wooden boards to the desired size, and cover them with your choice of material – I often use leather or decorative paper. Attach the cover to the book using a strong adhesive or stitching, making sure it’s secure and even.
- 8. Finally, add any decorative touches you like – a ribbon bookmark, a title page, or even a custom illustration. This is where you can truly make your book unique, and add a personal touch that reflects your personality and style. Remember, the imperfections in your handmade book are what give it soul, so don’t be too hard on yourself if things aren’t perfect – it’s all part of the charm.
A Guide to the Coptic Stitch Binding Method
As I delve deeper into the world of Coptic stitch binding, I’m reminded of the importance of patience and practice. This ancient technique requires a gentle touch and a willingness to slow down, allowing the materials to guide your hands. For those just starting out, I recommend exploring coptic stitch tutorial for beginners to get a feel for the basic stitches and techniques involved.
When it comes to creating a beautiful, handmade journal, the exposed spine bookbinding methods used in Coptic stitch binding are truly unique. The way the threads weave in and out of the spine, creating a intricate pattern, is a testament to the beauty of this craft. To achieve this look, it’s essential to have the right bookbinding tools for coptic stitch, including a sewing needle and a sturdy thread.
As you work on your project, consider adding a personal touch with decorative paper for book covers. This can add an extra layer of depth and visual interest to your finished journal. Remember, the key to mastering the Coptic stitch is to focus on the sewing techniques for bookbinding, taking your time to ensure each stitch is even and secure. With practice, you’ll be creating stunning, one-of-a-kind journals that tell a story of their own.
Handmade Journal Binding With Exposed Spine Techniques
As I delve into the world of handmade journal binding, I’m drawn to the elegance of exposed spine techniques. There’s something poetic about the visible threads that weave the pages together, a testament to the human touch. With the Coptic stitch, I can create a journal that not only tells a story through its contents, but also through its very construction. The exposed spine becomes a decorative element, a celebration of the craftsmanship that goes into each and every stitch.
By incorporating this technique into my journal binding, I invite the maker’s hand to be a part of the narrative. The subtle imperfections, the varying thread tensions, all contribute to a unique and personal object. As I work, I feel a sense of connection to the artisans who have come before me, their own hands having shaped and stitched countless pages into being. In this way, the handmade journal becomes a tangible connection to the past, while also embracing the beauty of the present moment.
Weaving Stories With Coptic Stitch Tutorial for Beginners
As I sit at my workbench, surrounded by threads, needles, and papers, I’m reminded that the Coptic stitch is more than just a technique – it’s a way to weave stories into every page. For beginners, it can seem daunting, but trust me, the journey is well worth it. With each stitch, you’ll begin to see your book take shape, its unique character unfolding like a tale of its own.
In this tutorial, we’ll take it one step at a time, exploring the basics of Coptic stitch binding and how to bring your own story to life. From selecting the perfect paper to mastering the stitch itself, we’ll dive into the details that make this ancient art form so captivating.
Unlocking the Secrets of Coptic Stitch: 5 Essential Tips for Beginners
- Start with the right thread: Choose a waxed thread or a durable cotton thread that can withstand the wear and tear of handling, and make sure it’s the right color to complement your book’s cover
- Prepare your signatures with precision: Fold and cut your paper to the correct size, and make sure they’re evenly stacked to ensure a professional-looking finish
- Use the right needle: A blunt tapestry needle is ideal for Coptic stitch binding, as it won’t slip out of the stitches or damage the paper
- Keep your tension consistent: Apply even pressure to your stitches to maintain a uniform tension, which will prevent your book from becoming too tight or too loose over time
- Embrace the imperfections: Don’t be too hard on yourself if your stitches aren’t perfect – the unique character of handmade books is what makes them special, and a few minor flaws can add to their charm
Key Takeaways from the Coptic Stitch Binding Journey
As you master the Coptic stitch, remember that it’s not just about the technicality of the stitch, but the story you’re weaving into every book you bind
Embracing the imperfections in your handmade journals and books is what gives them character and soul, making each piece uniquely yours
Whether you’re a seasoned artisan or a beginner, the Coptic stitch binding method offers a timeless and beautiful way to create functional pieces of art that tell your story
The Soul of Bookbinding
As I weave the threads of the Coptic stitch, I’m reminded that the true beauty of bookbinding lies not in perfection, but in the gentle imperfections that tell the story of the human hand that crafted it.
Finn Rivera
Embracing the Art of Coptic Stitch Binding
As we conclude this journey through the Coptic stitch binding method, it’s essential to reflect on the key elements that make this technique so unique and rewarding. From the initial preparation of the bookboard and paper to the final weaving of the stitches, each step requires patience, attention to detail, and a deep appreciation for the craft. By mastering the exposed spine technique and understanding how to work with different materials, you’ve not only acquired a practical skill but also opened yourself up to a world of creative possibilities. Whether you’re binding a personal journal, a photography album, or a literary masterpiece, the Coptic stitch method offers a level of customization and personal touch that is hard to find in mass-produced books.
Now, as you close this guide and perhaps look at your own handmade creations, remember that the true beauty of the Coptic stitch binding method lies not just in its functionality or aesthetic appeal, but in the story it tells about the person who made it. Every imperfection and unique detail is a testament to the human touch, a reminder that what you hold in your hands is not just a book, but a piece of art crafted with love and dedication. So, don’t be afraid to experiment, to try new things, and to make mistakes. For in the world of handmade bookbinding, it’s often the unexpected that leads to the most extraordinary creations.
Frequently Asked Questions
What type of thread or yarn is best suited for the Coptic stitch binding method?
For Coptic stitch binding, I swear by a good linen or cotton thread – it’s all about the texture and durability. I also love using a waxed cord for a more rustic feel. The key is to choose a thread that complements your book’s cover and pages, and doesn’t overpower the story within.
How do I determine the optimal number of stitches per inch for a secure and visually appealing bind?
To determine the optimal number of stitches per inch, I consider the thickness of the paper and the desired tension of the bind. As a rule of thumb, I aim for 8-10 stitches per inch for a secure and visually appealing bind, but this can vary depending on the specific project and the story I’m trying to tell with the book.
Can I use the Coptic stitch binding method for binding books with a large number of pages or heavy paper stock?
While the Coptic stitch binding method can work beautifully for smaller books, it may not be the best choice for large or heavily stocked books. The exposed spine can be prone to strain, and the stitching may not provide enough support. For thicker books, I recommend exploring other binding methods, like the longstitch or linkstitch, which offer more stability and durability.


