A Guide on How to Finish and Oil a Carved Wooden Spoon
As I sit in my workshop, surrounded by the scent of wood shavings and the soft glow of natural light, I’m reminded of the joy that comes with handcrafting a beautiful wooden spoon. The process of learning how to finish and oil a carved wooden spoon is often shrouded in mystery, with many believing it requires a multitude of chemicals and complicated techniques. But the truth is, it’s quite simple – all you need is a little patience, some quality oil, and a willingness to slow down and appreciate the beauty of the wood grain.
In this article, I’ll share with you my personal approach to finishing and oiling a carved wooden spoon, one that emphasizes the importance of natural materials and traditional techniques. You’ll learn how to bring out the unique character of your wooden spoon, and how to protect it for years to come. I’ll walk you through the process step-by-step, from preparing the wood to applying the perfect finish. By the end of this guide, you’ll be equipped with the knowledge and confidence to create a truly handmade masterpiece that tells a story of its own.
Table of Contents
- Guide Overview: What You'll Need
- Step-by-Step Instructions
- Soul in the Grain Finishing Your Spoon
- Finishing Touches: 5 Tips to Bring Out the Beauty in Your Hand-Carved Wooden Spoon
- Key Takeaways: Bringing Your Wooden Spoon to Life
- The Heart of the Craft
- Embracing the Beauty of Handcrafted Utensils
- Frequently Asked Questions
Guide Overview: What You'll Need
Total Time: 1 hour 15 minutes
Estimated Cost: $10 – $20
Difficulty Level: Easy
Tools Required
- Clean cloth (for applying oil)
- Sandpaper (various grits, up to 220-grit)
- Wood burner or sharp utility knife (for carving and smoothing out the spoon shape)
- Steel wool (for fine polishing)
- Soft brush (for removing dust and debris)
Supplies & Materials
- Food-safe wood oil (such as mineral oil or beeswax)
- Wood conditioner (optional, for enhancing the wood grain)
- Carved wooden spoon (made from a hardwood, such as maple or walnut, approximately 10 inches in length)
Step-by-Step Instructions
- 1. First, let’s start by preparing our workspace – a clean and well-ventilated area is essential for this process. I like to lay out all my tools and materials, including the carved wooden spoon, a soft cloth, and the finish and oil we’ll be using. It’s amazing how a little bit of _organization_ can make all the difference in the world.
- 2. Next, we need to ensure our wooden spoon is completely free of any debris or dust. I use a soft-bristled brush to gently sweep away any particles that might be clinging to the wood. This is a crucial step, as any imperfections can affect the finish. I find that taking my time and being _meticulous_ really pays off in the end.
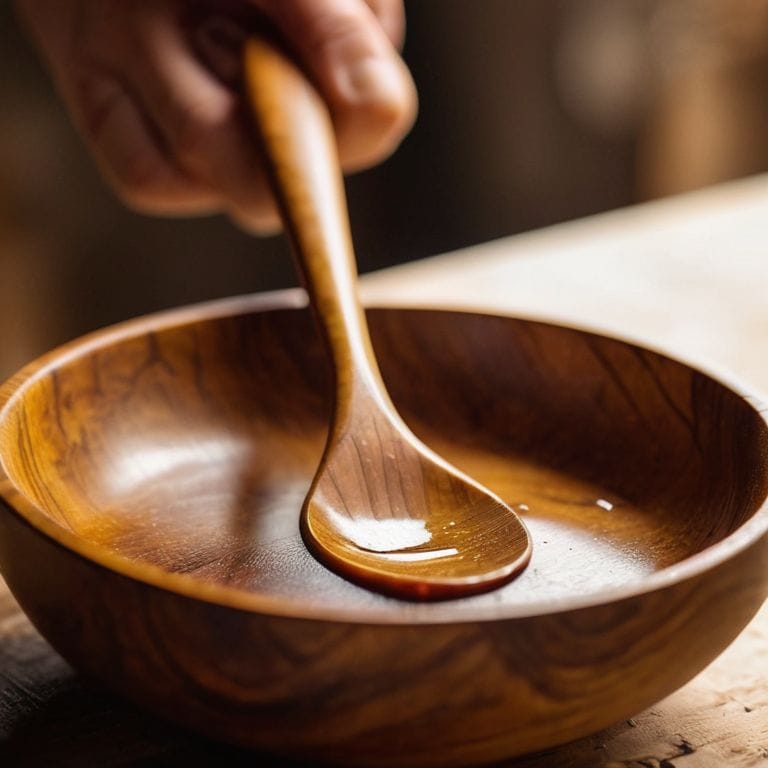
- 3. Now it’s time to apply the finish. I’m using a natural wax finish for this project, which I just love for its warm, golden glow. Apply a small amount to the cloth and rub it into the wood in circular motions, making sure to cover the entire surface. Don’t worry too much about getting it perfect – a little bit of _character_ is what makes handmade objects so special.
- 4. Once the finish is applied, let it dry completely according to the manufacturer’s instructions. This is usually the hardest part for me – waiting for it to dry! But trust me, it’s worth it. While we’re waiting, we can prepare our oil. I’m using a food-safe oil that will not only protect the wood but also make it safe for use with food. I always make sure to read the labels and choose products that are _sustainably sourced_.
- 5. With our finish dry, it’s time to apply the oil. This is the part where our wooden spoon really starts to come alive. Apply a small amount of oil to the cloth and rub it into the wood, just like we did with the finish. Make sure to get all surfaces, including the handle and any intricate details. I love watching the wood transform before my eyes as the oil brings out its natural beauty.
- 6. Now, let the oil soak in for a bit. This will help it penetrate deep into the wood, protecting it and giving it a beautiful sheen. While we’re waiting, take a moment to admire your handiwork – it’s amazing how much _love and care_ goes into creating something with our own hands.
- 7. Finally, use a clean, soft cloth to buff the wooden spoon and remove any excess oil. This will help create a beautiful, even finish that’s perfect for everyday use. And that’s it! Our hand-carved wooden spoon is now complete, ready to be used and enjoyed for years to come. I always feel a sense of _pride and accomplishment_ when I finish a project like this.
Soul in the Grain Finishing Your Spoon

As I work on finishing my wooden spoons, I’m always reminded of the importance of natural wood finishing techniques. There’s something special about bringing out the inherent beauty of the wood, rather than covering it up with harsh chemicals. When it comes to wooden utensil care and maintenance, I believe that a little bit of love and attention can go a long way. A simple coat of oil or wax can make all the difference in protecting the wood and keeping it looking its best.
I’ve found that hand sanding wooden surfaces is an essential step in preparing my spoons for finishing. It helps to smooth out any rough edges and creates a beautiful, tactile surface that’s a joy to hold. When choosing the best wood for carving spoons, I always look for woods that are not only beautiful, but also durable and resistant to wear and tear. And when it comes to applying a finish, I prefer to use food safe wood finish options that will keep my spoons safe and functional.
One of my favorite techniques for adding an extra layer of protection and beauty to my spoons is applying beeswax to wood. It’s a simple process that can make a big difference in the overall look and feel of the spoon. By taking the time to carefully finish and maintain my wooden spoons, I’m able to create pieces that are not only functional, but also truly special and unique.
Applying Beeswax for a Food Safe Finish
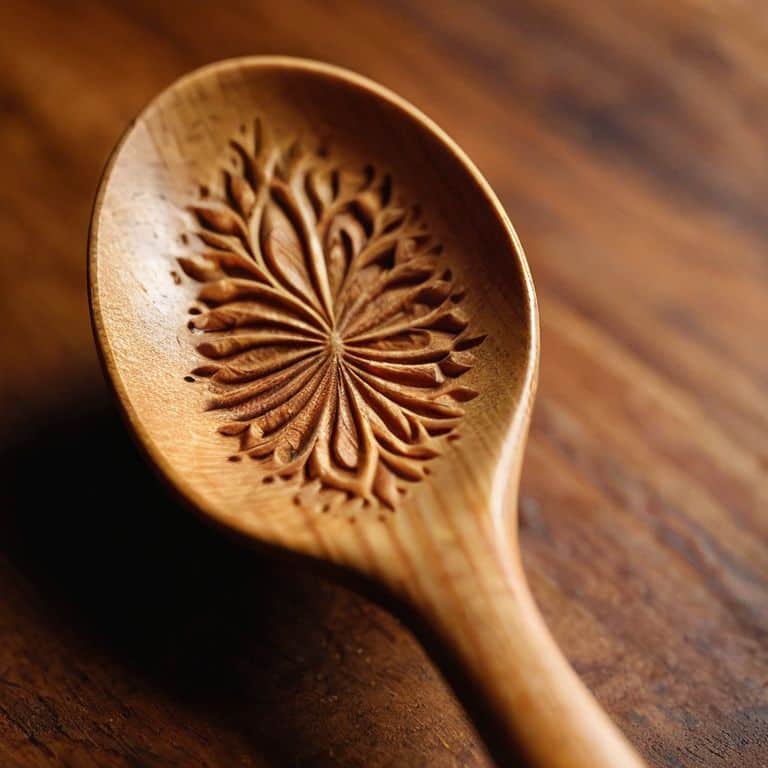
To add an extra layer of protection and a subtle sheen, I apply a thin coat of beeswax to my finished spoons. This natural finish is not only food-safe, but it also enhances the wood’s texture and aroma. I gently melt the wax in my hands, feeling its warmth spread as I work it into the wood. The process is almost meditative, as I carefully buff the spoon to a soft glow.
As the wax is absorbed, the wood seems to come alive, its grain and imperfections telling a story of their own. I find that beeswax brings a sense of authenticity to my handmade spoons, a reminder that they’re crafted from natural materials, meant to be used and loved. With this final touch, my spoon is ready to be passed down, its character and beauty evolving over time.
Natural Wood Finishing Techniques for Utensils
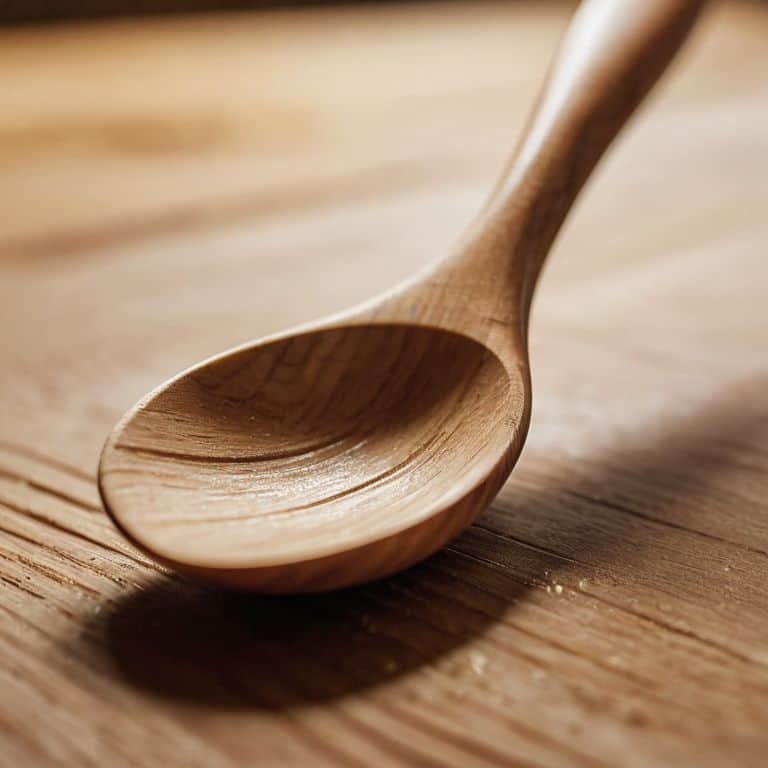
When it comes to finishing your hand-carved wooden spoon, I’m a firm believer in embracing the natural beauty of the wood. A simple oil finish can bring out the unique grain patterns and textures, giving your spoon a warm, organic feel. I like to use a food-safe oil, such as coconut or walnut oil, to protect the wood while still allowing it to breathe. This approach not only enhances the spoon’s aesthetic but also ensures it remains safe for use with food.
By keeping the finish natural, you’re able to appreciate the imperfections and character of the wood, which, to me, is where the true soul of the spoon lies. Whether you’re using a rich, dark wood like walnut or a lighter, more rustic wood like birch, the key is to let the natural beauty of the material shine through.
Finishing Touches: 5 Tips to Bring Out the Beauty in Your Hand-Carved Wooden Spoon
- Let the wood speak for itself: use a finish that enhances the natural grain and texture of your spoon, rather than covering it up
- Start with a gentle touch: apply a small amount of oil or wax to a discreet area of the spoon to test the finish and ensure it doesn’t affect the color or texture
- Build it up in thin layers: apply multiple thin coats of finish, allowing each layer to dry completely before adding the next, for a deep and even finish
- Pay attention to the edges: where the wood meets the air, the finish can sometimes pool or become uneven – use a soft cloth to gently buff these areas and create a seamless finish
- Be patient and let it cure: once you’ve applied your finish, let it sit for a day or two to allow the oils to fully penetrate and the wax to harden, before putting your spoon to use
Key Takeaways: Bringing Your Wooden Spoon to Life
Remember, the finish you choose for your wooden spoon is what sets its character, so don’t be afraid to experiment with different natural oils and waxes to find the one that resonates with you
Always apply a finish in a well-ventilated area, and consider the intended use of your spoon when selecting a food-safe finish – it’s all about creating something that’s both beautiful and functional
Ultimately, the imperfections in your handmade wooden spoon are what make it truly unique, so don’t strive for perfection – instead, celebrate the small quirks that tell the story of your craft
The Heart of the Craft
As I smooth the oil into the wood, I’m reminded that the true beauty of a handmade spoon lies not in its perfection, but in the gentle imperfections that tell the story of its creation – the whispers of the tree, the touch of my hands, and the patience of the process.
Finn Rivera
Embracing the Beauty of Handcrafted Utensils
As we conclude this journey of finishing and oiling your carved wooden spoon, remember that the process is just as important as the end result. We’ve explored natural wood finishing techniques, discussed the benefits of applying beeswax for a food-safe finish, and delved into the world of bringing soul to the grain. These steps not only protect your spoon but also enhance its beauty, making it a truly unique and personal item. By embracing these techniques, you’re not just creating a utensil, you’re crafting a story that will be told through the imperfections and character that only a handmade object can possess.
As you hold your finished spoon, feel the weight of it in your hand, and admire the way the light dances across its surface, remember that the true beauty lies in the process. It’s about slowing down, connecting with the material, and pouring your heart into something that will be used and cherished. So, don’t be afraid to experiment, to try new things, and to make mistakes. For it’s in these moments of creative freedom that we truly find the joy of making something with our own hands, and that’s a story worth telling.
Frequently Asked Questions
What type of oil is best to use on a carved wooden spoon to ensure it's food safe and durable?
For a food-safe and durable finish, I swear by mineral oil or walnut oil – they’re gentle on the wood and non-toxic. I also love using coconut oil for its warmth and character. Always apply a thin coat and let it soak in, then buff with a soft cloth for a beautiful sheen.
How often should I reapply oil or wax to my handmade wooden spoon to maintain its finish and prevent cracking?
For me, it’s all about tuning in to the wood’s needs. I reapply a thin coat of oil or wax to my handmade spoons every 1-3 months, depending on usage. If you notice the finish starting to dull or the wood feeling dry, it’s time for a refresh – just like giving your spoon a little hydration boost to keep it happy and healthy.
Can I use a polyurethane finish on my wooden spoon, or are there better alternatives for a utensil that will come into contact with food?
While polyurethane is durable, I’d advise against it for a spoon that’ll touch food. Instead, consider a natural oil like coconut or walnut oil, or a beeswax finish – they’re non-toxic and gentle on the wood, allowing the grain to breathe and the spoon to develop a beautiful patina over time.


