A Guide to What Is the “sunny 16” Rule in Photography
I still remember the first time I stumbled upon the what is the sunny 16 rule. I was on a photo walk, trying to capture the perfect shot, and a fellow photographer mentioned this “secret” to getting the right exposure. At first, I was skeptical – it sounded like just another complicated formula to memorize. But as I started experimenting with it, I realized that the Sunny 16 rule was actually a game-changer. It’s not just about numbers and settings; it’s about understanding how to work with natural light to tell your story.
As someone who’s passionate about street photography and documentary photography, I’ve learned that mastering the Sunny 16 rule is essential to capturing life’s fleeting moments. In this article, I’ll share my personal experience and no-nonsense advice on how to use the Sunny 16 rule to improve your photography. I’ll cut through the hype and technical jargon, and provide you with practical tips on how to apply this rule in real-world situations. My goal is to help you develop your own unique visual style and approach to photography, so you can start capturing stunning images that truly tell a story.
Table of Contents
Unlocking the Sunny 16 Rule
As I delve into the world of natural light photography, I’ve come to realize that understanding exposure compensation is key to capturing those perfect, sun-kissed moments. The Sunny 16 rule has been a game-changer for me, allowing me to shoot in manual mode with confidence, even in ever-changing lighting conditions. By grasping this fundamental concept, I’ve been able to take my landscape photography to the next level, often opting for manual mode to have complete control over my camera settings.
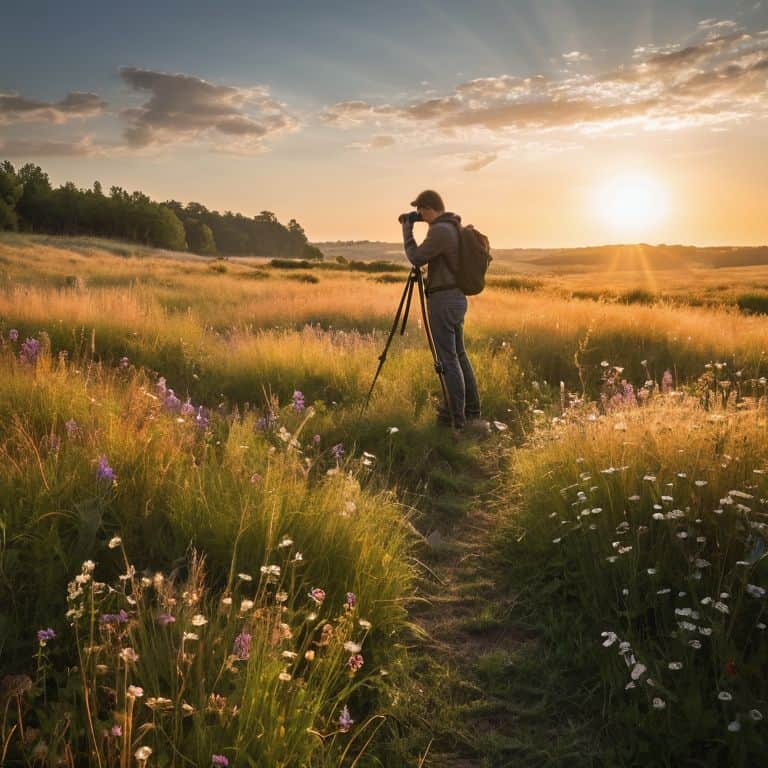
When it comes to natural light photography tips, I always emphasize the importance of being mindful of the time of day. The golden hour, with its soft, warm light, is ideal for capturing portraits and landscapes that exude a sense of serenity. To make the most of this fleeting time, I recommend using the Sunny 16 rule as a starting point and then adjusting your settings accordingly. This approach has allowed me to develop a keen eye for aperture priority mode, which I often use in conjunction with manual mode to achieve the desired effect.
For beginners, the Sunny 16 rule can seem daunting, but trust me, it’s worth mastering. By learning to shoot without a light meter, you’ll develop a deeper understanding of how light interacts with your subject. As you practice, you’ll begin to see the world in a different light, and your photographs will start to tell a story that’s uniquely yours. Whether you’re shooting in sunny 16 rule for beginners or more advanced modes, the key is to experiment and find what works best for you, and that’s where the real magic happens.
Chasing Golden Hours With Natural Light
As I venture out to capture life’s fleeting stories, I’m always on the lookout for that perfect golden hour light. There’s something magical about the way the soft, warm tones dance across my subject’s face, inviting the viewer to step into the narrative. I recall a particular shoot where the golden hour transformed a mundane street scene into a captivating visual tale, with the gentle light wrapping around the characters like a warm embrace.
In these moments, I find myself completely absorbed in the art of natural storytelling, where the light becomes the primary protagonist. The way it falls, the way it wraps, and the way it whispers secrets to the camera – it’s a truly enchanting experience. As I click the shutter, I feel like I’m not just capturing an image, but a slice of life that will be treasured forever.
Understanding Exposure Compensation Made Easy
When I’m out shooting during the golden hour, I always think about exposure compensation. It’s the key to capturing those perfect, sun-kissed moments without losing any details in the shadows or highlights. I’ve found that understanding how to adjust my exposure compensation can make all the difference in telling the story I want to tell with my photographs.
I like to think of exposure compensation as a way to fine-tune my camera’s settings to match my own unique vision. By making small adjustments to the exposure, I can add depth and emotion to my images, drawing the viewer’s eye to the parts of the scene that really matter.
What Is the Sunny 16 Rule
As I reflect on my journey as a photographer, I realize that understanding exposure compensation has been a crucial aspect of capturing stunning images. The Sunny 16 rule, in particular, has been a game-changer for me, allowing me to shoot in manual mode with confidence. This rule is essentially a guideline for determining the correct exposure settings when shooting in sunny conditions, and it’s been a valuable tool in my natural light photography endeavors.
When I’m out shooting, I love using the Sunny 16 rule to inform my decisions about aperture and shutter speed. It’s amazing how much of a difference it can make in the quality of the image. By using manual mode for landscape photography, I can take full control of the exposure and capture the exact mood and atmosphere I’m looking for. And the best part is, it’s incredibly simple to learn and apply, making it a great technique for sunny 16 rule for beginners.
One of the things I appreciate most about the Sunny 16 rule is that it allows me to shoot photography without a light meter, relying instead on my understanding of the relationship between aperture, shutter speed, and ISO. It’s a very intuitive way of working, and it’s helped me develop a keen eye for aperture priority mode explained in a way that feels very organic and creative.
Mastering Manual Mode for Landscape Photography
When I’m out shooting landscapes, I always switch to manual mode to have full control over my camera’s settings. This allows me to capture the scene exactly as I envision it, taking into account the unique lighting conditions and composition. By adjusting the aperture, shutter speed, and ISO, I can achieve a depth of field that draws the viewer’s eye to the subject, whether it’s a majestic mountain range or a serene lake.
In manual mode, I can also experiment with different techniques, such as intentionally overexposing or underexposing certain areas of the image to add depth and interest. This is where the magic happens, and I get to see my vision come to life. For example, during the golden hour, I might use a slower shutter speed to create a sense of movement in the clouds, adding a dynamic element to the photo.
Sunny 16 for Beginners Photography Without a Meter
When I first started out in photography, I remember being intimidated by the lack of a light meter. But as I delved deeper into the world of film, I discovered that the Sunny 16 rule could be a powerful tool for beginners. It’s all about understanding how to work with natural light to capture stunning images, even without any fancy equipment.
I recall my early days of shooting in manual mode, trying to grasp the concept of exposure compensation. The key to it all was learning to trust my instincts and observe the interplay of light and shadow. By doing so, I was able to develop a keen eye for photography, and the Sunny 16 rule became an essential part of my workflow.
5 Essential Tips to Unlock the Power of the Sunny 16 Rule
- Start by understanding that the Sunny 16 rule is a guideline, not a hard and fast rule – it’s all about adapting to the situation and using your camera to tell a story
- Always shoot in manual mode to truly master the Sunny 16 rule, as it allows you to take control of your exposure settings and make intentional decisions about your photography
- Pay attention to the quality of light, especially during the golden hour, as this is when the Sunny 16 rule really comes into its own and can help you capture truly breathtaking images
- Experiment with different aperture settings to find what works best for your scene, as the Sunny 16 rule is just a starting point – the key is to find the right balance between aperture, shutter speed, and ISO
- Remember that the Sunny 16 rule is just a tool to help you capture better photos, not a replacement for your own creative vision – don’t be afraid to break the rules and try new things to develop your unique photographic style
Key Takeaways for Mastering the Sunny 16 Rule
Embracing the Sunny 16 rule allows you to capture stunning outdoor photographs by leveraging natural light, especially during the golden hour, to tell compelling stories
Mastering manual mode and understanding exposure compensation are crucial for applying the Sunny 16 rule effectively, enabling you to freeze life’s fleeting moments with precision and creativity
By incorporating the Sunny 16 rule into your photography practice, you’ll develop a keen eye for light and composition, ultimately unlocking your unique visual voice and approach to documentary and portrait photography
Capturing Life's Essence
The Sunny 16 rule is more than just a guideline – it’s a key to unlocking the symphony of natural light, allowing us to capture life’s fleeting stories in all their beauty and complexity.
Julian Kade
Embracing the Sunny 16 Rule: A Path to Photographic Enlightenment
As we’ve explored the Sunny 16 rule and its applications, it’s clear that mastering this technique is about more than just numbers and settings – it’s about understanding the dance between light and shadow that elevates a photograph from mere snapshot to timeless story. By grasping the fundamentals of manual mode, exposure compensation, and the unique qualities of natural light, especially during the golden hour, photographers can unlock a world of creative possibilities. Whether you’re a seasoned pro or just starting out, the Sunny 16 rule offers a foundation for growth and experimentation, allowing you to refine your eye and capture the world in a way that’s distinctly yours.
So, as you venture out with your camera, remember that the true power of the Sunny 16 rule lies not in its technical specifics, but in the freedom it gives you to see the world anew. It’s an invitation to slow down, observe the light, and let the stories of the everyday unfold before your lens. With practice, patience, and a willingness to embrace the unknown, you’ll find that the Sunny 16 rule becomes not just a tool, but a way of seeing – one that will forever change the way you approach the art of photography.
Frequently Asked Questions
How does the Sunny 16 rule apply to portrait photography?
When it comes to portrait photography, I love using the Sunny 16 rule to capture candid, natural-light shots. By setting my aperture to f/16 and shutter speed to the reciprocal of my ISO, I can achieve beautifully exposed portraits, even without a light meter. It’s all about embracing the simplicity of natural light to reveal my subjects’ authentic selves.
Can the Sunny 16 rule be used in cloudy or overcast conditions?
While the Sunny 16 rule is tailored for sunny conditions, I’ve found that overcast days can be just as captivating. In cloudy or overcast conditions, I adjust my settings to let more light in, often using a lower f-stop or slower shutter speed to compensate for the soft, diffused light.
What are some common mistakes to avoid when using the Sunny 16 rule for the first time?
When using the Sunny 16 rule for the first time, I’ve seen many beginners underestimate the impact of cloud cover or overcompensate for shadows, leading to poorly exposed shots. My advice? Start by practicing in open fields or beaches with minimal obstructions, and don’t be afraid to bracket your shots to find that perfect balance of light and composition.